
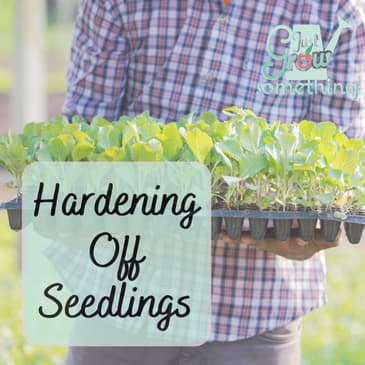
Hardening off is a process that helps plants adjust to the outdoor environment, preventing shock and ensuring they thrive once planted in the garden. Gradual exposure helps the plants acclimate to the conditions they will experience out in the garden or in their containers on your porch before you put them out there.
Today on Just Grow Something we’ll go over the exact steps we need to take to harden off our plants prior to putting them out into the garden. This includes whether you’re growing them yourselves or if you’ve just brought them home from the nursery, garden center, or farmers market. Following these steps and displaying some patience will prevent the heartache of putting those plants out and having them fail. We’ll also talk about how to recover if your plants begin display signs of stress after they are already in their permanent home. Let’s dig in.
Question of the Month:
: “What is your biggest pest in the garden and how do you manage it (if at all)?” Leave a voice message from the link in the show notes, respond to the question in Spotify if that’s where you’re listening, send me an email, drop it in the Facebook group or in a DM to me on Instagram, Facebook or TikTok. We’ve already had some good discussions around this in the Facebook group and I will read all the answers on next week’s episode. You have until March 31st to get me your answer.
References and Resources:
Save 10% and get Free Shipping with code JUSTGROW10 at Planter Box Direct
Just Grow Something Merch Shop
Just Grow Something Gardening Friends Facebook Group
Check out how you can become a patron on Patreon
Hosted by Simplecast, an AdsWizz company. See pcm.adswizz.com for information about our collection and use of personal data for advertising.
00:00:00
If you follow me on Instagram or TikTok, you may have recently
00:00:04
seen a video where I talked about my brassicas and sun
00:00:08
scald. I was attempting to harden off
00:00:11
my plants and get them out into the garden and I rushed the
00:00:14
process and therefore ended up with some damaged cabbage and
00:00:18
broccoli and cauliflower plants. That was due to my lack of
00:00:23
patience as a gardener. So I had to put those plants
00:00:27
back into some shade and allow them to recover and then
00:00:31
continue on with the hardening process, which of course
00:00:35
defeated the purpose. I was trying to speed up that
00:00:38
process and I ended up getting myself behind anyway.
00:00:42
Why is it so important for us to harden off our ceilings properly
00:00:46
before transplant? The process helps our plants
00:00:50
adjust to the outdoor environment, preventing shock
00:00:54
and ensuring that they thrive once they get planted out into
00:00:58
the garden. Gradual exposure helps the
00:01:01
plants acclimate to the conditions that they're going to
00:01:04
experience out in the garden or in their containers on your
00:01:07
porch before you put them out there.
00:01:10
Today on Just Grow Something, we will go over the exact steps
00:01:13
that we need to take to harden off our plants prior to putting
00:01:17
them out into the garden. This includes whether you're
00:01:20
growing them yourselves or if you've just brought them home
00:01:23
from the nursery, the garden center or the farmers market.
00:01:26
Following these steps and displaying some patients will
00:01:30
prevent the heartache of putting those plants out and having them
00:01:34
fail. We'll also talk about how to
00:01:36
recover if your plants begin to display signs of stress after
00:01:41
they are already in their permanent home.
00:01:43
Let's dig in. Hey, I'm Karen.
00:01:46
I started gardening in a small corner of my suburban backyard
00:01:49
and now 18 years later, I've got a degree in horticulture and
00:01:52
operate a 40 acre market farm. I believe there is power in food
00:01:56
and that everyone should know how to grow at least a little
00:01:58
bit of their own. On this podcast I share evidence
00:02:01
based techniques to help you plant, grow, harvest, and store
00:02:05
all your family's favorites. Consider me your friend in the
00:02:08
garden. So grab your garden journal and
00:02:10
a cup of coffee and get ready to just grow something.
00:02:21
OK, so this is your last chance for the question of the month.
00:02:24
What is your biggest pest in the garden and how do you manage it,
00:02:29
if at all? Leave me a voice message from
00:02:31
the link in the show notes. Respond to the question in
00:02:34
Spotify. If that's where you're
00:02:35
listening. Send me an e-mail.
00:02:37
Drop it in the Facebook group or in Adm to me on Instagram or
00:02:40
Facebook or TikTok or wherever you can find me.
00:02:43
We have already had some good discussions around this in the
00:02:46
Facebook group and I will read all the answers on next week's
00:02:50
episode. You have until March 31st to get
00:02:53
me your answer. OK?
00:02:56
I am hardening off hundreds of plants right now to go out into
00:03:00
the gardens, and there is a whole lineup of plants waiting
00:03:04
just behind those for their chance at being hardened off and
00:03:08
prepared for going out into the garden.
00:03:10
What is hardening off when we say to harden off a plant, what
00:03:14
is that? This is the process of gradually
00:03:18
exposing our young plants to the specific elements in our garden
00:03:23
before they are being planted into their permanent home
00:03:26
outside. So this is especially important
00:03:30
for greenhouse grown plants or plants that we have grown
00:03:34
indoors, whether they're from seed or from cuttings, because
00:03:38
the conditions inside our house or a greenhouse are vastly
00:03:43
different than those that are outside.
00:03:46
So too much sun and wind too quickly can actually stunt the
00:03:51
growth of the plants. It can cause transplant shock,
00:03:54
it can cause damage to the plant leaves, which is going to reduce
00:03:58
photosynthesis, which is going to stunt the growth, and it can
00:04:01
even cause those little plants to just die off.
00:04:04
Let's put it this way. If you have spent the entire
00:04:06
winter indoors with very little exposure to outdoor conditions,
00:04:10
and then you head to a beautiful, sunny, tropical
00:04:13
location and you spend all day on the beach, the first day,
00:04:17
you're going to get burned. I don't care how much sunscreen
00:04:20
you put on. The same thing goes if you live
00:04:22
in a very warm climate and you decide to go on a trip to
00:04:25
Antarctica. You can bundle up all you want,
00:04:27
but you're not going to be used to those conditions and it's
00:04:30
going to get ugly. The same thing goes for our
00:04:33
plants. And you do still need to be sure
00:04:36
that you are taking some of these steps with plants that you
00:04:38
bring home from elsewhere too. There is no guarantee that those
00:04:42
plants have been conditioned to take full sun and wind and rain
00:04:46
and whatever else the garden environment throws at them.
00:04:49
And it's really lousy to spend a bunch of money on plants, put
00:04:53
them outside, and then watch them succumb to the elements in
00:04:56
less than a week. So even if you're not starting
00:04:59
your transplants yourself, you should still be acclimating
00:05:02
those purchased ones to your garden conditions before they go
00:05:06
into the garden. Now.
00:05:08
Doing this properly is going to thicken the cuticle on the
00:05:11
leaves, so they're going to lose less water when exposed out to
00:05:15
the elements. It's going to strengthen the
00:05:18
stems against wind damage. It's going to cause the plants
00:05:21
to be more temperature Hardy, which is really important in the
00:05:24
early spring when you have such wide temperature fluctuations.
00:05:28
And it's going to help to prevent transplant shock, which
00:05:31
can cause plant growth to basically completely stall out
00:05:34
or even cause plants to die from the sudden change in temperature
00:05:38
and sun exposure. So some tips for this.
00:05:43
We want to begin the hardening off process about 7 to 10 days
00:05:49
before the intended transplant date.
00:05:52
This timing allows the plants to gradually acclimate to the
00:05:57
outdoor conditions. This is where I messed up.
00:05:59
I tried to force this process. I tried to move it along a
00:06:03
little bit more quickly and I exposed those plants to full sun
00:06:07
sooner than what they were ready and that 'cause them to get sun
00:06:11
scald. It's better to select a period
00:06:15
of mild weather for hardening off, avoiding days where you've
00:06:18
got extreme heat or extreme cold or really, really strong winds.
00:06:22
Now I know sometimes this can be difficult, especially when we're
00:06:25
hardening off plants that go in during the early spring, because
00:06:29
that weather can be very unpredictable in some areas, at
00:06:32
least in mine for sure. So just do the best that you can
00:06:36
with some protected areas near your house or near a shed or
00:06:41
underneath the tables or chairs or near a porch, whatever you
00:06:44
can do to help sort of protect those plants for those first few
00:06:48
days. The other thing we want to do is
00:06:50
start really slowly, just a few hours in a shaded area the first
00:06:55
few days and then slowly increasing that exposure is what
00:07:00
we're going for. Just because these plants may
00:07:03
have been under grow lights for 12 to 15 hours a day since they
00:07:06
sprouted does not mean that they are ready for exposure to full
00:07:10
sun right away. Very different light spectrums.
00:07:13
Plus we're adding in wind and maybe rain, so go slow.
00:07:16
Again. Exhibit your gardener's
00:07:18
patience, which is what I didn't do.
00:07:21
And then each day you're going to gradually increase the amount
00:07:24
of time the ceilings spend outdoors by about one or two
00:07:28
hours, maybe three. Aim to expose them to gradual
00:07:33
increases in amounts of direct sunlight.
00:07:35
Gradual, gradual, gradual. I can't say that enough.
00:07:39
Now you're going to want to monitor the weather conditions.
00:07:42
Be mindful of your weather forecast.
00:07:44
If there's a prediction of frost or storm conditions while you're
00:07:48
in this process, then just bring your seedlings back indoors.
00:07:51
Now, if it's toward the end of the hardening off process, you
00:07:54
might go ahead and leave them out there, but you might want to
00:07:57
provide them with some sort of protection like grow covers or
00:08:00
something, depending on how severe the weather situation is
00:08:03
going to be. But also keep in mind those
00:08:07
outdoor conditions are likely to dry out the soil in your
00:08:11
seedlings more quickly, and this is OK.
00:08:13
Check the soil moisture daily and water as needed.
00:08:17
But we don't want to keep them waterlogged because they're not
00:08:20
going to be consistently moist after they go into the garden.
00:08:23
Or at least they shouldn't be. So a reduction in watering is
00:08:27
part of the hardening off process.
00:08:30
I actually recommend that you start by gradually reducing the
00:08:33
amount of water that the plant gets a few days before you even
00:08:38
start the hardening off process. Let them dry out between
00:08:41
watering to sort of simulate the conditions that they're going to
00:08:44
face outdoors. No, we don't want them wilting,
00:08:47
but we do need to get them used to not having water all the
00:08:51
time. Now along with this, we do not
00:08:54
want to feed them no fertilizer or plant food during this
00:08:58
process. Seedlings in the hardening off
00:09:01
phase are not in active growth mode.
00:09:05
They kind of go into a survival mode.
00:09:07
They're they're getting ready to go out into the garden.
00:09:10
Fertilizer is really most beneficial when plants are
00:09:13
actively growing and they can utilize those nutrients
00:09:16
efficiently. So if we apply plant food during
00:09:20
this sort of transition period, this is likely not going to
00:09:24
result in any kind of significant growth benefits and
00:09:26
it actually could lead to more plant stress.
00:09:29
Plus, we want the plants focusing on developing strong,
00:09:33
healthy roots that can anchor them into the garden soil when
00:09:36
they go out. Too much plant food is actually
00:09:39
going to more encourage that top growth growth on the leaves and
00:09:43
the stems, and that's at the expense of root development.
00:09:47
So save the plant food or amendments for after the plants
00:09:51
are established in their new home.
00:09:53
Now, depending on where you put your seedlings out to harden
00:09:56
them off, you may need to keep them under some insect netting
00:10:00
to let the light in. But to keep the bugs out, if you
00:10:02
have slugs or snails, you may need to elevate the plants up
00:10:06
onto a table. If you have cats or dogs, you
00:10:08
may need to harden them off somewhere where your furry
00:10:11
companions aren't likely to get into them.
00:10:13
I have made the mistake of starting to harden my plants off
00:10:16
on the table on my back deck only to find a squirrel smack
00:10:20
dab in the middle of the table digging into one of the
00:10:22
containers to hide an acorn. So consider your particular
00:10:26
version of pest and protect your seedlings accordingly.
00:10:31
So, step by step, how do we harden off our seedlings?
00:10:36
Start this process when the daytime temperatures are
00:10:40
generally staying above 45°F, or 7.2 Celsius for your cool
00:10:46
weather crops, and at least 50 Fahrenheit or 10 Celsius for the
00:10:50
warmer weather plants. Keep your long range forecast in
00:10:55
mind too. Just because I have a warm spell
00:10:59
in the beginning of February where it's 60° outside, it
00:11:02
doesn't mean the temperatures aren't going to plummet down to
00:11:04
10° in the overnights in the next week.
00:11:07
And that's not going to be good for my lettuce if I moved into
00:11:09
the garden too early. So plan according to the
00:11:13
preferred growing conditions for whatever you're planting, and
00:11:16
then start the process about 10 days before you want to put them
00:11:20
out into the garden. Now if you have put a garden
00:11:23
plan together that includes a calendar based on what your
00:11:27
usual conditions are for that time of year, this is going to
00:11:30
be a little bit easier and you may actually decide to add that
00:11:34
as a date. But learn to be flexible with
00:11:37
this. So when we start this process on
00:11:40
the first day, we want to put the plants outside in a
00:11:44
protected area in the shade or in dappled shade somewhere
00:11:49
outside of direct sunlight for just a few hours.
00:11:53
Now the next day you want to add a couple of hours to that, and
00:11:56
the third day we're going to add a few more hours to that.
00:11:59
We don't want to expose them to too much sun too quickly, we're
00:12:02
just allowing them to get outside.
00:12:05
We also don't want too much wind right away, which is why I say a
00:12:09
protected area at first. A very gentle breeze is fine,
00:12:13
but avoid putting them out into any gusting winds.
00:12:18
Now conversely to this, if there isn't enough air movement on the
00:12:21
days that your plants are outside, then you can go ahead
00:12:23
and just run your hands across the plants several times a day,
00:12:25
and that's also going to do the trick.
00:12:27
If you started these plants yourself, hopefully you have had
00:12:31
a fan on them for at least a few hours a day, simulating a light
00:12:35
breeze, and this has helped to strengthen them up beforehand,
00:12:38
so this might not be as necessary.
00:12:41
Now, after a few days of increasing time outside in the
00:12:45
shade, you can place them in direct morning sun for just a
00:12:50
couple of hours and then move them back into the shade in
00:12:53
their protected area for the afternoons, and then gradually
00:12:57
expose them to more direct sun each morning.
00:13:01
This is not only exposing them to increased amounts of
00:13:04
sunlight, but it's also adding more wind and the other elements
00:13:08
as you move them out of that protected area in the morning.
00:13:12
You also want to gradually reduce the amount of water they
00:13:17
get each day as you do this. Again, we don't want to bring
00:13:20
them to the wilting point, but we want to prepare them for the
00:13:23
fact that they won't be constantly wet in the garden.
00:13:27
And then if we water them really well on the day we transplant
00:13:31
and we make sure they're watered in very well, when they go in
00:13:34
the ground, they'll be less prone to transplant shock
00:13:38
because they won't have to focus on getting water.
00:13:40
They can focus on stretching their roots out into the soil.
00:13:43
We want those roots to search downward for moisture once they
00:13:47
go out into the garden. So when you do water them during
00:13:51
this hardening off period, try to water them from the bottom.
00:13:54
Just place them in a tray with some water and let them soak it
00:13:57
up from underneath. Now following these steps,
00:14:01
within about 7 to 10 days your plants should be used to the
00:14:05
outdoor temperatures and the elements and the sun exposure.
00:14:08
Their final Test is to place them still in their containers,
00:14:13
out into the place where they will reside permanently and
00:14:17
leave them there for at least 24 hours. 48 hours if you can
00:14:20
manage it, watering them as usual but providing no other
00:14:24
protection other than to protect from critters.
00:14:27
If they still look good, well then go forth and transplant my
00:14:30
friend. But if they show any signs of
00:14:33
stress or shock at that point or anywhere along the way with this
00:14:37
process, slow down, back up and introduce them more gradually.
00:14:42
What are those signs of plant stress?
00:14:47
Very wilted plants or sagging leaves that don't seem to perk?
00:14:51
Back up spots on the leaves or leaf edges that look like burn
00:14:55
marks, discoloured leaves, leaves turning purple or
00:14:58
blanching, leaves dropping off the plant.
00:15:02
Plants that lean over and don't seem to stand back up very
00:15:05
readily, especially after being watered or when facing heavy
00:15:08
wind gusts. These are all signs your plants
00:15:11
need to be acclimated a little more slowly.
00:15:14
You are much better off delaying your planting than to continue
00:15:18
to move forward with transplanting and shocking your
00:15:21
plants even further. This could set back your harvest
00:15:24
by a full month or more because it will stunt the plant growth.
00:15:28
Or worse, you may not get a harvest at all because the
00:15:32
plants die after being transplanted, or they don't
00:15:35
bounce back quickly enough to reach maturity before their
00:15:38
season ends. If your plants do show these
00:15:42
signs of stress, just reduce the amount of exposure that they're
00:15:45
getting for a few days and then start to increase again a little
00:15:49
bit more slowly. Some plants are much more prone
00:15:53
to sun scald like my brassicas, and it may take them a while to
00:15:57
bounce back, so give it some time.
00:15:59
Most of the ones that I scalded bounced back in a matter of just
00:16:02
a few days and I was able to finish the hardening off process
00:16:05
and get them transplanted. However, I have an entire tray
00:16:09
of cauliflower that got so scalded the older leaves didn't
00:16:14
bounce back at all, and I'm waiting on the new green growth
00:16:18
to mature before I start the process all over again.
00:16:22
It's very possible that I won't get a harvest from those
00:16:25
depending on our weather, but it's a very fast maturing
00:16:27
variety so I'm not giving up hope.
00:16:30
If I was relying on those to produce for me though, and they
00:16:33
are something that maybe took longer than 60 days to mature,
00:16:37
then I would likely replace them with plants from the nursery.
00:16:40
You have to decide what's best for your specific growing
00:16:43
situation and the specific plants you are growing.
00:16:50
Planter Box Direct has some exciting news to share.
00:16:53
They've got a new shape and a new look.
00:16:55
Now not only can you get my favorite planters in square,
00:16:58
rectangular, tiered and stand versions, you've got a hexagonal
00:17:02
option too. And on top of the 21 color
00:17:05
choices they already offered, they've added rough cedar Gray
00:17:08
as a wood grain option on all shapes of their USA made steel
00:17:12
planters. Get your own long lasting
00:17:15
beautiful planter boxes by going to planterboxdirect.com and
00:17:19
using code Just grow 10 at checkout to save 10% and get
00:17:24
free shipping. They're the planters I use in my
00:17:26
own gardens and now you can have them in yours in whatever color
00:17:30
and shape combo you like. Use code.
00:17:33
Just grow 10 for 10% off and free shipping at Planter Box
00:17:37
direct.com now. Just because you buy plants from
00:17:41
the store or the market instead of starting them yourself
00:17:44
doesn't mean you're off the hook and you get to skip this
00:17:47
hardening off process. Purchased plants might be
00:17:50
hardened off to the best of the growers ability before being
00:17:53
sold to you, and they might not be hardened off at all.
00:17:57
So whether or not there has been an attempt to harden those
00:18:01
plants off, the conditions at the greenhouse or the farm or
00:18:04
the retail center that those plants came from are not the
00:18:07
same as the ones in your garden. If they've been hardened off at
00:18:12
all to some extent, those plants have likely been hardened off as
00:18:16
a large group, not individual plants facing the outdoor
00:18:20
conditions alone. This makes a difference.
00:18:23
So if the nursery has dozens of trays of 18 to 24 plants sitting
00:18:30
outside together facing the wind, those plants have each
00:18:33
other for support and a little bit of protection just by the
00:18:36
sheer volume of plants and their proximity to each other.
00:18:39
That is very different from a single plant whose nearest
00:18:43
neighbor is 18 to 36 inches away, like they will be after
00:18:47
they're transplanted. So you don't necessarily have to
00:18:51
take the entire 7 to 10 days to harden nursery plants off,
00:18:55
especially if you bought them from a garden center where
00:18:57
they've been sitting outside somewhat.
00:18:59
But you should give them at least five days to acclimate to
00:19:04
your unique gardening situation and just watch how they react.
00:19:08
Put the plants out into the sun for a few morning hours the
00:19:12
first day you bring them home, and then back into the shade
00:19:15
again in the afternoon. Just increase those hours over
00:19:18
the next three days and then give them that 24 hour test on
00:19:22
day 5. You should also be letting them
00:19:25
dry out between waterings each day too, to acclimate them to
00:19:29
those less than ideal conditions.
00:19:31
Keep an eye out for those stress indicators I talked about
00:19:34
earlier and adjust your schedule accordingly based on how the
00:19:39
plant reacts. So what happens if you get
00:19:43
through the hardening off process and you think everything
00:19:45
is good to go and you transplant everything outside into their
00:19:48
new homes only to see your plants start to show signs of
00:19:52
stress once they're out in the garden.
00:19:55
Signs of stress or shock are going to include wilting,
00:19:58
yellowing leaves, stunted growth, or drooping that doesn't
00:20:02
recover after being watered or after the sun goes down.
00:20:05
So here are some steps to assist your plant in recovering from
00:20:08
transplant shock. Ensure the soil around the
00:20:12
transplanted seedlings is very moist when you transplant.
00:20:16
If the plant starts to show signs of stress over the next
00:20:19
few days, then continue to water deeply and evenly, providing
00:20:23
enough moisture for the plant to establish its roots.
00:20:26
If you've backed off the watering a bit during the
00:20:29
hardening off process, this extra water is going to take
00:20:32
some stress off the plant and allow it to focus on tissue
00:20:35
repair. If the plants are wilting
00:20:38
excessively or show signs of sun scald, provide temporary shade
00:20:42
using garden fabric, a shade cloth, or even a simple
00:20:45
makeshift cover like a cardboard box with holes for circulation.
00:20:49
This helps reduce stress from overexposure to intense
00:20:52
sunlight. Then gradually reintroduce
00:20:56
sunlight to the plants. Over the next several days,
00:21:00
apply a layer of organic mulch around the base of the
00:21:03
seedlings. Mulch helps retain soil
00:21:06
moisture, regulates soil temperature, and reduces stress
00:21:10
on the plants. If the plant has lost a
00:21:13
significant portion of its foliage, consider pruning back
00:21:17
the damaged leaves and stems. This reduces the load on the
00:21:20
plant and allows it to focus on recovery.
00:21:24
Hold off on applying fertilizer immediately after transplanting
00:21:27
and during the recovery period. Fertilizer can stress already
00:21:31
weakened plants. Allow the plant to recover fully
00:21:34
before introducing nutrients, and if the plant is tall or top
00:21:39
heavy, consider providing A stake to provide support until
00:21:43
it establishes stronger roots and can stand on its own.
00:21:47
And sometimes the best remedy is just time and patience.
00:21:51
Most plants are pretty resilient and they will recover given the
00:21:54
right care. So avoid overreacting and making
00:21:58
too many drastic changes at once.
00:22:00
I know it's hard not to panic when it looks like all our hard
00:22:04
work or money is just shriveling up out in the garden.
00:22:07
So just continuously monitor the plants progress and if it shows
00:22:11
signs of improvement then continue with what you're doing.
00:22:14
If conditions worsen or they just don't improve at all, well
00:22:17
then maybe re evaluate and sort of adjust your approach
00:22:20
accordingly. And sometimes transplant shock
00:22:25
is going to happen. No matter how well we harden the
00:22:29
seedlings off beforehand, we are changing their environment and
00:22:32
some plants are just less resilient to this change than
00:22:35
others. So some tips for preventing
00:22:37
transplant shock include transplant during cooler, milder
00:22:42
weather. Cloudy days are great days for
00:22:44
transplanting. Handle the seedlings gently
00:22:47
during transplanting to minimize the root damage.
00:22:50
Ensure that your planting hole is large enough for the root
00:22:53
ball without cramping the roots, and that you've loosened up the
00:22:56
soil around the hole enough for those roots to start to spread.
00:23:01
And then be sure to water thoroughly before and after
00:23:04
transplanting to help settle the soil around the roots and to
00:23:07
reduce the stress on the plant. By following the steps from this
00:23:11
episode, we can ensure that our seedlings are properly
00:23:13
acclimated to outdoor conditions and we are able to help them
00:23:17
recover from any transplant shock and thrive in their new
00:23:20
garden environment. It just takes patience.
00:23:25
Until next time, my gardening friends, Keep on cultivating
00:23:27
that dream garden and we'll talk again soon.
00:23:30
Thanks for listening to another episode of the Just Grow
00:23:32
Something Podcast. For more information about
00:23:34
today's topic and to find all the ways you can get in touch
00:23:37
with me or support the show, go to justgrowsomethingpodcast.com.
00:23:41
Until next time, my gardening friends keep learning and keep
00:23:44
growing.