
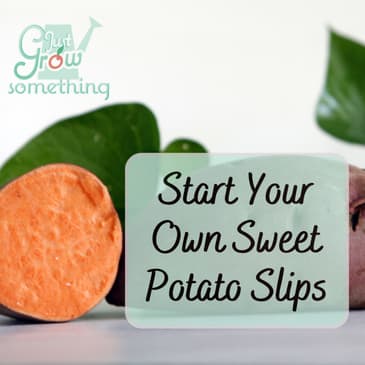
Many home gardeners and market growers alike rely on seed companies and other suppliers for not just our seeds, but also our started plants, roots, or bulbs. Things like garlic, onions, and seed potatoes are often purchased rather than saved from the previous harvest or started at home and sweet potatoes also fall into this category. For years I purchased started sweet potato slips to grow and I often still do, just because of the quantity I need.
Today on Just Grow Something we’re going to go over three ways we can easily get our own slips started either from our own harvested sweet potatoes or from store-bought ones. It’s easier than you think and even if you need a lot of slips, it takes up less room than you might think. Let’s dig in!
Episode Resources and References:
Ep. 94 - Growing Sweet Potatoes
Growing Sweet Potatoes in Missouri | MU Extension
Sweet Potato Starts and Plantings (k-state.edu)
Just Grow Something Gardening Friends Facebook Group
Check out how you can become a patron on Patreon
Hosted by Simplecast, an AdsWizz company. See pcm.adswizz.com for information about our collection and use of personal data for advertising.
00:00:01
This is positively farming media.
00:00:04
Many home gardeners and market growers alike rely on seed
00:00:08
companies and other suppliers for not just our seeds, but also
00:00:11
our started plants, our roots or our bulbs.
00:00:14
So things like garlic, onions, seed potatoes, these are often
00:00:18
purchased rather than saved from our previous year's harvest or
00:00:22
started at home. And sweet potatoes also fall
00:00:25
into this category. For years I purchased started
00:00:29
Sweet Potato slips to grow, and I often still do, just because
00:00:33
of the quantity that I need. Today on Just Grow Something,
00:00:35
we're going to go over three ways that we can easily get our
00:00:39
own slips started, either from our own harvested sweet potatoes
00:00:43
or from store bought ones. It's easier than you think, and
00:00:46
even if you need a lot of slips, it takes up less room than you
00:00:50
might think. Let's dig in.
00:00:53
Hey, I'm Karen and I started gardening 18 years ago in a
00:00:56
small corner of my suburban backyard when we moved to A5
00:00:59
acre Homestead. I expanded that garden to half
00:01:01
an acre and I found such joy and purpose in feeding my family and
00:01:05
friends. This newfound love for digging
00:01:07
in the dirt and providing for others prompted my husband and I
00:01:10
to grow our small homestead into a 40 acre market farm.
00:01:13
When I went back to school to get my degree in horticulture, I
00:01:15
discovered there is so much power in food and I want to
00:01:19
share everything I've learned with as many people as possible.
00:01:22
On this podcast, we explore. Crop information, Soil health,
00:01:25
pests and diseases, plant. Nutrition, our own nutrition,
00:01:28
and so much more in the world of food and gardening.
00:01:31
So grab your garden journal and a cup of coffee and get ready to
00:01:35
just grow. Something a little note about
00:01:39
the recording of this episode. I'm actually recording from
00:01:42
inside Lulu, our tiny camper, because we are in Florida
00:01:46
celebrating my father in So just keep that in mind as you
00:02:01
listen to this episode. If you have not grown sweet
00:02:05
potatoes before, you may not know that growing them is
00:02:09
different from growing a regular Irish potato.
00:02:12
Irish potatoes are grown from a piece of a potato with sprouting
00:02:17
points that we call eyes, and that's just placed in the ground
00:02:20
and then covered with soil. So the eyes sprout the shoots
00:02:24
that grow above the ground, and that sends energy back down into
00:02:28
the tuber below ground, which then sends out the roots with
00:02:32
the new tubers on them, and that becomes the new potatoes that we
00:02:35
harvest. Sweet potatoes, on the other
00:02:38
hand, are grown from what we call slips.
00:02:41
Essentially, these are shoots that have sprouted from a mature
00:02:46
sweet potato that are then removed and allowed to root and
00:02:50
then planted in a mound of soil. It's about 8 inches high or so.
00:02:54
It can take a few weeks for your slips to get established once
00:02:59
you plant them, but then after that the shoots will take off.
00:03:02
They'll continue to grow and sprawl and then in the same
00:03:05
manner as the Irish potatoes, they will send energy down into
00:03:09
the roots which then produce the new tubers.
00:03:12
Sweet potatoes are in the Morning Glory family, so you'll
00:03:16
see these shoots very quickly turn into vines and those vines
00:03:21
will take off and ultimately cover the exposed garden soil.
00:03:25
And then they're they're just going to choke out anything else
00:03:27
that attempts to grow there. They also put out those
00:03:29
distinctive funnel shaped flowers indicative of most of
00:03:33
the plants in the Convolvo ACA family.
00:03:35
Here's the thing about sweet potatoes in an in ground
00:03:39
situation. Because it's a vine, wherever
00:03:42
the leaf nodes touch the ground, the plant sends out new roots
00:03:47
and those roots can eventually yield more sweet potatoes.
00:03:51
So if you have a really long growing season and a nice big
00:03:54
garden bed that you can dedicate to sweet potatoes, you can get a
00:03:57
ton of sweet potatoes from just a few slips.
00:04:01
In fact, gardeners in warmer areas may need to spend some
00:04:04
time redirecting those sweet potato vines out of the garden
00:04:07
pads and back into the garden bed where they belong, because
00:04:10
they can grow very aggressively and you can also grow them in
00:04:15
pots and they just are beautiful.
00:04:18
Those lovely vines just spill up and over the edge of the
00:04:22
container, and so they put on a really pretty show and then you
00:04:25
get an edible treat at the end of the growing period.
00:04:28
I did a full episode on growing sweet potatoes back in episode
00:04:33
94. I will link to that in the show
00:04:35
notes, as well as the episode on growing those regular potatoes,
00:04:38
which is episode 135 S How do we get these sweet potato slips to
00:04:43
begin with? There are three main ways that
00:04:46
you can start slips from sweet potatoes that you have on hand,
00:04:49
whether they were from last season's harvest or from a
00:04:52
neighbor or the farmers market or even from the grocery store.
00:04:55
There's the water method, a container soil method, and the
00:04:59
in ground method. There are pros and cons to each,
00:05:03
and which one that you choose will depend on how much space
00:05:06
you have, how long you're growing season is, and whether
00:05:10
or not you have things like lights or heat mats indoors.
00:05:13
To help facilitate some of this, let's start with the simplest
00:05:16
method, the water method. All you need to start sweet
00:05:24
potato slips in water is a Mason jar, toothpicks, water, and your
00:05:29
sweet potato. You need to determine the
00:05:31
rooting end of your sweet potato.
00:05:34
Now, generally speaking, the rooting end is the skinnier or
00:05:37
more slender end of the sweet potato.
00:05:40
And if you wash it well and look really closely, you may already
00:05:43
see tiny little roots emerging from a sweet potato that's been
00:05:47
stored at room temperature. The opposite end is the
00:05:50
sprouting end, the side that will produce our slips for us.
00:05:55
Put your sweet potato about halfway into your Mason jar with
00:05:58
the rooting end down, and then push toothpicks into the sides
00:06:02
of the potato so they extend out over the lip of the jar to
00:06:05
suspend the potato in place. Then add fresh water to the jar
00:06:10
so that the bottom half of the sweet potato is submerged and
00:06:13
the sprouting end is above the jar.
00:06:16
You can now put the jar either in a sunny window where it gets
00:06:19
some warmth and some light, or another warm spot like the top
00:06:22
of the refrigerator, or on a seedling heat mat if you have
00:06:25
one. If it's not in a window, you'll
00:06:28
need to supply some artificial light, but it doesn't need to be
00:06:31
fancy, just enough light to encourage growth.
00:06:34
Once the shoots start to sprout, refresh the water when needed to
00:06:37
keep the water level up, replacing it completely once a
00:06:40
week to be sure the water doesn't get funky and cause the
00:06:43
bottom of the potato to rot before forming roots.
00:06:46
After a few weeks, you'll start to see the potatoes start to
00:06:49
pull roots at the bottom, and then the sprouts will start to
00:06:52
form at the top. These sprouts are your slips.
00:06:56
Let them get about 6 inches tall and then we'll talk about what
00:06:59
to do with them here in a minute.
00:07:03
This water method is pretty simple and straightforward, but
00:07:05
if you need a lot of slips, it may take up more room than what
00:07:09
you have. You might not want a bunch of
00:07:11
Mason jars with sweet potatoes sticking out of them, sitting
00:07:13
all over your house for weeks on end.
00:07:15
This is also the slowest method for sprouting them, generally
00:07:19
taking at least a minimum of six weeks, sometimes as long as ten
00:07:22
weeks depending on how warm you keep your jars.
00:07:26
So the next method we can use is the container soil method.
00:07:30
This is an indoor method. It's much faster and you can get
00:07:34
a lot of slips from a pretty small space.
00:07:38
But you're going to need some artificial lighting for this,
00:07:40
and ideally A seedling heat mat, plus a place that you don't mind
00:07:44
having a tub full of soil and potatoes sitting for about 6 to
00:07:47
8 weeks. For this method, you'll need a
00:07:50
shallow container, potting soil or seed starting mix, a seedling
00:07:54
heat mat, and some artificial lighting for sprouting just a
00:07:58
few sweet potatoes. The container you use can be
00:08:01
something like a foil baking pan or a deep seedling tray if you
00:08:06
want to sprout a larger amount of sweet potatoes.
00:08:08
I've found. Those black plastic tubs that
00:08:11
you can find at the hardware store that are used for like
00:08:14
mixing concrete are perfect for this.
00:08:17
They're shallow enough for the amount of potting soil that we
00:08:19
want to use and easy to drill drainage holes into.
00:08:23
Really any shallow container that can have some drainage
00:08:26
holes but that also can have something placed beneath it to
00:08:29
catch water will work. The size is really up to you and
00:08:33
how many sweet potatoes you want to sprout and how much room you
00:08:36
have to do it. All you're going to do is create
00:08:38
drainage holes in the bottom of your container and put a layer
00:08:41
of potting soil or seed starting mix in the container a few
00:08:44
inches deep. Nestle your sweet potatoes into
00:08:47
the soil, laying them flat, and then fill in with more soil
00:08:52
around the potatoes until they're covered at least halfway
00:08:55
up. The reason we do it this way
00:08:56
instead of completely burying them is to prevent the potatoes
00:09:00
from rotting before they get a chance to root and sprout.
00:09:04
Put your container on top of something to catch the water, so
00:09:06
like the lid to the baking sheet if that's what you're using, or
00:09:09
another large container if you're using something else, and
00:09:12
then water the soil thoroughly. We don't want it stopping wet,
00:09:16
but you'll want to keep the soil moist as the roots begin to
00:09:19
form. Put the container on top of the
00:09:21
heat mat if you have one, which I highly recommend because it's
00:09:25
definitely going to make this process go faster.
00:09:28
The sooner you can get the sweet potato to form roots, the lower
00:09:31
the chances that you'll have any of the tubers begin to rot with
00:09:35
heat. It should take about a week for
00:09:38
the roots to start forming, and then about another week or so
00:09:41
after that to start seeing sprouts much faster than the
00:09:44
water method. At this point, be sure to give
00:09:48
the sprouts some light, similar to like growing seedlings
00:09:51
indoors. Let them get to be about 6
00:09:54
inches tall and then we'll talk about how to remove the slip for
00:09:57
planting. Our final method for sprouting
00:10:04
sweet potato slips is similar to the container soil method, and
00:10:08
that's the in ground method. We'll be doing this out in our
00:10:11
garden area, so the effectiveness of this method is
00:10:15
going to depend on how warm your soil can get in the spring.
00:10:22
For sprouting sweet potatoes outdoors, we want the soil
00:10:25
temperature to be at least 65 Fahrenheit, or 18 Celsius.
00:10:30
If your soil isn't warm enough on its own or waiting for it to
00:10:34
warm up naturally won't give you enough time to get the slips
00:10:37
sprouted before it's actually time to plant.
00:10:40
You can use mini greenhouses, milk jugs, hoops with greenhouse
00:10:44
plastic or black plastic mulch, or even tarps to warm the soil
00:10:47
more quickly. You'll need to maintain the soil
00:10:50
temperature to successfully sprout and grow your slips, so
00:10:54
be sure it's something that can be maintained while also
00:10:57
allowing for sunlight on the sprouts.
00:11:00
Make sure your soil is loosened and well watered prior to
00:11:03
planting your tubers. You can either bury just the
00:11:06
rooting end of the sweet potato in the soil and leave the top
00:11:09
sprouting half outside the soil, similarly to how we did it with
00:11:13
the water method, or you can lay them flat like we did with the
00:11:17
indoor method and cover them lightly with soil.
00:11:20
Once again, we're going to keep the soil moist while we wait for
00:11:23
the roots to form and the sprouts to pop up.
00:11:25
So the warmer the soil is to start with and the warmer we
00:11:29
keep it, the less likely we are to have any of the potatoes rot
00:11:32
before they sprout. And just like with the indoor
00:11:36
container method, how long it takes for the roots to start
00:11:39
forming will be based on the level of moisture and warmth.
00:11:43
This could be as quickly as a week, or it could take a couple
00:11:46
of weeks if your soil is cool or if you allow it to dry out too
00:11:49
frequently after the roots start to form, it should only be
00:11:53
another week or two before you start to see these shoots
00:11:56
popping up. Now, because these are outside
00:11:59
and you'll have natural sunlight on them, the shoots will likely
00:12:02
grow quickly to get to that 6 inch height that we want for our
00:12:05
slips. Whichever method you choose may
00:12:09
also be partially determined by how long you have before it's
00:12:14
the ideal time to plant your slips.
00:12:16
You want to wait at least a month after your last frost in
00:12:20
the spring when the soil temperature is at least 65
00:12:23
Fahrenheit or 18 Celsius, and when the nighttime air
00:12:26
temperatures are consistently above 60 Fahrenheit, or 15.5
00:12:31
Celsius. I actually wait until the soil
00:12:34
temperatures are even warmer than that, around 70 Fahrenheit
00:12:37
or 21 Celsius, which for me is usually around the first week in
00:12:41
June. The slips just tend to root in
00:12:45
and take off more quickly than if I plant them earlier, and our
00:12:48
temperatures can fluctuate pretty wildly prior to that, So
00:12:51
that's just what works best for me, which means I need to time
00:12:55
the starting of my slips accordingly.
00:12:59
I actually do a combination of the indoor container method and
00:13:03
the in ground method. My soil temperatures outside
00:13:06
aren't quite warm enough in the six to eight weeks before my
00:13:10
intended planting date to sprout them in ground very quickly, and
00:13:14
my seedling room is so full of plants at that point that I
00:13:17
can't possibly squeeze in large containers of sweet potatoes
00:13:20
too. So I use those black tubs that I
00:13:23
mentioned in the same manner as the indoor container method, but
00:13:28
I put them in my greenhouse so I'm sure to put them out there a
00:13:32
few days before I put the tubers in so that the soil is nice and
00:13:36
warm. I can water them as needed when
00:13:38
I'm working in the greenhouse and then when they sprout they
00:13:41
automatically get the light coming into the greenhouse for
00:13:44
their growth. This has been the most effective
00:13:47
way to sprout slips that I have come up with.
00:13:50
If you don't have a greenhouse but you have some bed space in
00:13:53
your garden, you can use the little pop up greenhouse covers
00:13:57
that I've mentioned to warm the soil and allow you to use the in
00:14:01
ground method. But if the bed that you plan to
00:14:04
use for your sweet potatoes is taken up by something else, say
00:14:07
early greens in the six or eight weeks before you plan to plant,
00:14:11
then use a container. Put it outside and pop one of
00:14:14
those little greenhouses over top of the container.
00:14:17
You can technically even just use a bucket, Insulate around
00:14:21
the bucket if your air temperatures are still cool, and
00:14:23
then like pop a plastic milk jug or some other container on top
00:14:27
to keep them warm. Get creative if you need to
00:14:29
experiment and find out what works for you.
00:14:32
Try all three methods at the same time, even and decide from
00:14:35
there. No matter which method you
00:14:38
choose, once your sprouts get around 6 inches tall, it's time
00:14:42
to remove them from the sweet potato and use them as slips.
00:14:50
To remove the slips from the potato, carefully twist or cut
00:14:53
them from the tuber. If little roots have formed
00:14:57
where the sprout meets the tuber, try to keep those intact.
00:15:00
Remove the lower leaves from the sprouts and at this point you
00:15:04
have two options. The 1st is to put the bottoms of
00:15:07
the slips in a jar of water for a few days to pull visible roots
00:15:12
before planting. If you're new to growing sweet
00:15:15
potatoes or you have soil that isn't very loose or loamy, this
00:15:19
method ensures your new slips take root more quickly because
00:15:22
of the actively growing roots. But if you were an experienced
00:15:26
sweet potato grower and your soil is conducive to this, you
00:15:29
can just plant those newly harvested slips right into the
00:15:33
prepared bed. Bury the slips all the way up to
00:15:36
the top leaves and keep them evenly moist to promote those
00:15:40
roots to grow in the soil. No matter which way you choose,
00:15:44
your slips should be planted about 12 inches apart from each
00:15:47
other and the stem should be about four inches down into your
00:15:51
8 inch deep mount. If you really want to promote
00:15:55
fast root growth in your newly transplanted slips, water them
00:15:58
in with a solution that contains A phosphorus amendment to
00:16:01
encourage that fast root development.
00:16:05
So how many sweet potatoes do you need to be sprouting for the
00:16:08
number of slips that you want to plant?
00:16:11
You can usually count on a minimum of 10 slips per sweet
00:16:15
potato initially, and if you leave the tuber in the soil or
00:16:19
the water longer, you can often get many more than these,
00:16:22
sometimes up to 30 slips per potato.
00:16:25
It just depends on how much time you have.
00:16:27
I generally count on getting 10 to 15 per tuber harvested all at
00:16:33
the same time, so I start my tubers accordingly.
00:16:36
I can fit around 20 sweet potatoes in each of my black
00:16:41
bins, and I have six of those bins, so I can get anywhere from
00:16:45
1200 to 1500 slips from my setup, and these just all fit
00:16:50
under one bench in my greenhouse until they sprout and then I
00:16:53
pull them out into the sunlight. So it's not a major process to
00:16:57
start your own sweet potato slips, and it can be done in a
00:17:00
very little space. This is especially helpful if
00:17:03
you've found a specialty variety that you really like, but
00:17:07
they're hard to find or sometimes in short supply, like
00:17:11
some of the purple or the white varieties.
00:17:13
Or if you've had a really stellar year for growing your
00:17:17
sweet potatoes and you want to preserve those genetics for the
00:17:20
next season. The key is curing and storing
00:17:24
some of that harvest properly in the fall so that they're still
00:17:28
intact and able to be used to sprout those slips come
00:17:31
springtime, Or saving some from your favorite farmers market
00:17:35
vendor and growing some of your own next season.
00:17:38
And if all else fails, grab an organic sweet potato from the
00:17:41
grocery store and give it a shot.
00:17:44
And here's one last trick I learned from my colleague Zach
00:17:49
Hoppenstadt when he was doing his sweet potato trials with
00:17:52
Kansas State University. When sprouting slips from tubers
00:17:56
harvested in the previous year, raise the temperature in your
00:18:00
storage area to between 70 and 85 degrees Fahrenheit, or 21 to
00:18:05
29 degrees Celsius to induce pre sprouting.
00:18:10
This is going to help rooting and sprouting move much more
00:18:13
quickly. Until next time, my gardening
00:18:16
friends, keep on cultivating that dream garden and we'll talk
00:18:18
again soon. You.
00:18:19
Just finished another episode of the Just Grow Something podcast.
00:18:23
For more information about today's topic, go to just.
00:18:25
Growsomethingpodcast.com where you can find all the episodes,
00:18:29
show notes, articles, courses, newsletter, sign up and more.
00:18:32
I'd also love for you to head to Facebook and join our gardening
00:18:35
community in the Just Grow Something Gardening Friends
00:18:38
Facebook group. Until next time, my gardening
00:18:40
friends keep learning and keep growing.