
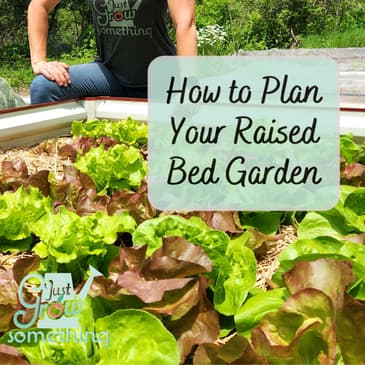
For this final episode in our Raised Bed series, we’re talking about how to plan your raised bed garden. If you’ve never grown in a raised bed, there are some nuances to the planning and planting aspect, no matter what material you built the bed from. And if you’re already gardening in raised beds, but it turned into a jungle by July and a desert by August, this episode is also for you!
So, today on Just Grow Something we’re mapping out a season-long plan. Learn how to plan a high-yield raised-bed vegetable garden - choose smart spacing for airflow and disease prevention, interplant and succession-plant for nonstop harvests, use mulch to save water and block weeds, and more!So, grab a pencil, a piece of graph paper and a coffee, my gardening friend, we are building a raised-bed garden plan. Let’s dig in!
Don't forget you can save 20% and get FREE shipping on your new raised bed from PlanterBoxDirect.com when you use code JUSTGROW20 now through October 15th!
Resources:
Ep. 265: How Big Should a Raised Bed Be?
Square-foot Chart free download: https://preview.mailerlite.io/forms/757286/166825529232590223/share
For full show notes and transcript, visit https://justgrowsomething.com/episode/how-to-plan-a-raised-bed-garden-ep-269
Hosted by Simplecast, an AdsWizz company. See pcm.adswizz.com for information about our collection and use of personal data for advertising.
00:00:00
This whole month we've walked through designing a raised bed
00:00:04
garden, from what sizes to choose, what materials to use to
00:00:07
build them, how to properly fill them, and of course, my
00:00:10
interview with Gardner Scott last week.
00:00:12
For this final episode in the series, we're talking about how
00:00:16
to grow in raised beds. You know, if you've never grown
00:00:20
in a raised bed, there are some nuances to the planning and the
00:00:23
planting aspect since you are technically gardening in a box
00:00:27
essentially no matter what material you built the bed from.
00:00:30
And if you've already gardened in a raised bed, but it turned
00:00:34
into a jungle by July and then a desert by August, this episode
00:00:39
is also for you. So today on Just Grow Something,
00:00:43
we're mapping out a season long plan, what goes where, who
00:00:48
shares space, how to keep diseases down and using mulch to
00:00:52
hold in moisture, block weeds and moderate the soil
00:00:55
temperature. So grab a pencil, a piece of
00:00:58
graph paper and I want a coffee. My gardening friend, we are
00:01:02
building a raised bed garden plant.
00:01:04
Let's dig in. Hey, I'm Karen and what started
00:01:07
as a small backyard garden 20 years ago turned into a lifelong
00:01:11
passion for growing food. Now as a market farmer and
00:01:14
horticulturist, I want to help you do the same.
00:01:16
On this podcast, I am your friend in the garden teaching
00:01:20
evidence based techniques to help you grow your favorites and
00:01:22
build confidence in your own garden space.
00:01:25
So grab your garden journal and a cup of coffee and get ready to
00:01:28
just grow something. Big thanks to those of you who
00:01:34
have reached out and said that you like the idea of doing a
00:01:38
whole deep dive series like the one that we've done on raised
00:01:41
beds this month. If you have an idea for
00:01:44
something that you would like to hear about in depth over
00:01:47
multiple episodes, please reach out and let me know.
00:01:51
There is lots of really good information that I can share
00:01:55
about a lot of topics that I can be really in depth about that
00:02:01
don't really or can't really be covered in just one episode.
00:02:05
So this, if this is a format that you like, drop me a comment
00:02:09
in Spotify or on YouTube or send me an e-mail or DM me or
00:02:12
whatever. I would love to hear from you.
00:02:15
And if you don't like this format, well that's OK, you can
00:02:18
tell me that too. I can take it.
00:02:22
So let's just assume that you have already decided on the
00:02:27
dimensions of your bed or you have some existing beds in
00:02:31
place. Now, if you're not there yet, go
00:02:32
back. Listen to episode 265 about
00:02:35
choosing the right size raised bed.
00:02:37
I will link to that in the show notes.
00:02:39
Essentially, you're going to want to choose something that is
00:02:43
comfortable for you and your planning is going to revolve
00:02:47
around that size. I have beds in all different
00:02:50
kinds of of dimensions, and so I lay them out on graph paper with
00:02:55
the dimensions to scale so I know exactly what I can fit into
00:03:00
each of those beds as I'm planning.
00:03:03
Is it easier to start with all of your beds the same size?
00:03:06
Yeah, probably. Do you have to?
00:03:08
No, you just have to be familiar with each bed's size when you
00:03:13
plant because this is going to dictate how many of each type of
00:03:18
plant that you can fit into that bed.
00:03:21
So graph paper is a fantastic tool for this.
00:03:25
You can also use a spreadsheet just by, you know, kind of
00:03:28
marking a border along a specific number of cells that
00:03:32
correspond to the dimensions of your bed.
00:03:34
If you want to do this electronically, SO1 cell would
00:03:37
equal like 1 square foot. Are there online tools that you
00:03:41
can use? Yes, absolutely, and you can.
00:03:44
Some of them are free, some of them are paid, but they let you
00:03:47
input like the dimensions of your bed and then we'll break it
00:03:51
into a bed space for you so that you can place your plants.
00:03:56
You can do this with your in ground garden planning too.
00:03:59
But you know, specifically for raised bed gardening, it's very,
00:04:03
very accurate. But no matter what you use, it
00:04:06
is important to be accurate. So know the dimensions of your
00:04:10
bed. For the purposes of today's
00:04:14
discussion, we're just going to assume that we're planting in a
00:04:18
four foot wide by 8 foot long raised bed, 4 feet wide so that
00:04:24
you can reach from both sides without any foot traffic in the
00:04:28
bed. We'll also assume that it's in
00:04:31
full sun with easy access to water.
00:04:33
And we're going to assume that the bed is running east to West
00:04:37
so that when we place the taller plants in the bed, they can run
00:04:41
along that N edge so they don't cast shade over everybody else.
00:04:45
Now, obviously, if you are one of my gardening friends in the
00:04:47
Southern Hemisphere, this is going to be the opposite for
00:04:50
you. We're not taking into
00:04:51
consideration whether or not you are going to intentionally try
00:04:54
to shade any plants or if you've got shorter beds or if you've
00:04:58
really got parts and or whatever.
00:04:59
This is what we're working with today.
00:05:02
And just know that everything would need to be adjusted based
00:05:05
on your individual conditions. The key here is that we're going
00:05:08
to work in blocks instead of long rows, so every square inch
00:05:16
of the bed is going to be growing food and there is no
00:05:19
bare soil. The spaces between our
00:05:22
containers, between our beds, whatever they are, are for
00:05:25
walking in. We don't need that extra space
00:05:27
in the bed, which means we can utilize the entirety of that
00:05:31
bed. The caveat here is that we don't
00:05:35
want to overcrowd the plants, especially if we are gardening
00:05:40
in high humidity. Hello, West Central Missouri.
00:05:43
OK, so as we plan, we need to keep in mind two things, the
00:05:48
mature size of the plant and how long the plant remains in place.
00:05:54
This is not just key for airflow and disease prevention, but it's
00:05:59
also a component in our interplanting, which we'll cover
00:06:02
as we move on. Let's start by thinking about
00:06:05
our spacing, not just for production purposes, but also
00:06:08
for airflow and disease prevention.
00:06:11
Airflow is absolutely critical in raised beds because we are
00:06:15
gardening below the level of the bed material we don't usually
00:06:20
have. The soil level in our raised
00:06:22
beds reach all the way up to the top right.
00:06:25
Just like in a pot or a container, the soil usually sits
00:06:29
several inches below the lip, so having good airflow means those
00:06:35
leaves dry faster because wet foliage always equals a higher
00:06:39
risk for bacterial or fungal diseases.
00:06:43
So we need to space our plants appropriately and support those
00:06:47
vining crops up off of the soil so that we can increase that air
00:06:53
movement when the leaves dry quickly, especially after rain
00:06:57
or maybe overhead irrigation. A lot of these diseases can
00:07:00
never get a foothold if those leaves are nice and dry.
00:07:03
This means giving those plants some elbow room and helping them
00:07:08
to grow up and not out. So trellising is a really great
00:07:11
way to create that airflow for those plants that climb.
00:07:15
So this means trellising or caging our tomatoes and our
00:07:20
cucumbers, right? So if we can set those tomatoes
00:07:24
about 18 inches to two feet apart, either in cages or a long
00:07:28
trellis, and then clip those lower leaves so that nothing is
00:07:33
touching the soil, that is going to be beneficial for airflow.
00:07:37
Same idea for cucumbers, train them up a trellis.
00:07:40
I found a really significant difference this year between my
00:07:44
different beds in how well my cucumbers performed with a
00:07:48
trellis versus without. The cucumbers that were growing
00:07:53
up, the trellis definitely produced better.
00:07:56
The fruits were just better, right?
00:07:58
They had fewer fungal diseases and the fruits were up off the
00:08:03
soil, so they were less open to predation by the pill bugs,
00:08:07
which I had a really big problem with this year.
00:08:10
I was also able to grow more plants in that same space
00:08:15
because they weren't crawling across the soil.
00:08:17
They were growing up, which meant I was able to space the
00:08:21
cucumbers only about 6 inches apart across each of those
00:08:26
trellises. Where the beds?
00:08:28
Where they just sprawled across the bed.
00:08:31
Those plants had to be spaced at least a foot apart, if not more,
00:08:35
to prevent them from overcrowding.
00:08:36
That is twice as many cucumber plants.
00:08:39
Plus that gave me room to plant things at the base of that
00:08:43
trellis to fill the rest of the bed.
00:08:46
Pull beans, same thing. Give them something to good to
00:08:49
climb up for airflow and then you can plant something else in
00:08:52
the remainder of that bed. Some other spacing would be
00:08:57
using Bush beans, doing Bush beans at about four inches
00:08:59
apart, Peppers can be just about 8 to 12 inches apart if you're
00:09:04
staking them. Peppers like to hold hands a
00:09:07
little bit and staking them keeps them upright when they
00:09:10
start to get really heavy with the fruit so they're not falling
00:09:13
all over each other. And it also gives you some more
00:09:15
room to sort of plant in and around those plants.
00:09:19
Things like kale where you know, if you're planning on growing
00:09:23
them across the entire season instead of just as a spring
00:09:26
crop, you're likely going to be harvesting them the outer leaves
00:09:29
first, right? Which means they're going to
00:09:31
create this stock and then you're going to be harvesting
00:09:33
from the bottom. As the plant grows up, they're
00:09:37
going to kind of create their own airflow naturally at that
00:09:40
point. So it's okay to space them where
00:09:44
the leaves might be touching each other.
00:09:46
So 6 to 8 inches apart is going to be fine because again,
00:09:48
they're sort of naturally going to be lifting themselves up off
00:09:51
the ground. Broccoli, on the other hand,
00:09:54
gets really big and really leafy and it definitely needs that air
00:10:00
flow. So it really is best to space
00:10:03
broccoli plants about 18 inches apart all the way around.
00:10:08
Now that is going to seem like a huge amount of space between
00:10:13
those plants when they're little and we first transplant them,
00:10:17
but we'll minimize that wasted space.
00:10:19
When we talk about interplanting, just keep in mind
00:10:21
when we're planting our spacing, we're thinking about the mature
00:10:25
size of the plant prior to harvest and the the broccoli
00:10:29
plants get really big and then they're also in the bed for an
00:10:33
extended period of time. If you look on the seed packet
00:10:38
and the spacing just doesn't seem to make sense to you
00:10:42
because it's either hard to visualize what the mature plants
00:10:45
will look like or just doesn't seem right to you in your
00:10:47
garden. You're not alone.
00:10:49
OK. A lot of the spacing
00:10:51
recommendations that are put onto seed packets are actually
00:10:54
based on best performances on a commercial scale.
00:10:59
So this means, you know, working in beds that are generally 36 to
00:11:03
48 inches wide with like an 18 inch spacing in between the
00:11:06
rows, because that's the size of a tractor tire, right?
00:11:10
And the spacing is designed for harvesting equipment or
00:11:13
irrigation systems or whatever. It's not generally spaced
00:11:18
specifically for home gardening, honestly, just because there
00:11:23
aren't a lot of studies going on to see what works best in the
00:11:27
home garden. So, you know, plant breeders are
00:11:30
more interested in what's going on in terms of the commercial
00:11:33
guys. And then we have to learn by
00:11:36
doing and practicing and trial and error and by just asking
00:11:40
people who have done it before us.
00:11:42
So if you want a really good guide to start with when you're
00:11:46
learning how to sort of grow in this block mentality within your
00:11:49
raised beds, then you can start by following the square foot
00:11:54
gardening method, the one that was made famous by Mel
00:11:59
Bartholomew. Sorry.
00:12:01
You know, Gardner Scott and I talked about this last week
00:12:04
about Mel's mix. We talked about it, you know,
00:12:06
during the episode on filling the raised beds.
00:12:09
But essentially he sort of spearheaded this idea of the
00:12:12
number of plants that you can fit into a 12 by 12 space and
00:12:16
then working through your garden in that type of a grit.
00:12:18
So it's going to give you a really good idea of what will
00:12:22
fit into a 12 inch by 12 inch section of your bed, or two of
00:12:27
those sections if you're growing something that needs a lot of
00:12:29
leaf space, like that broccoli, right?
00:12:32
This is a really good starting point.
00:12:34
I put together a download for you that has a chart of over 50
00:12:40
different plants and the recommended number of those
00:12:44
plants that you can put into 112 by 12 square section of your
00:12:48
bed. It is very, very helpful when
00:12:51
you're sitting down and trying to layout your garden.
00:12:53
So I will link to that in the show notes for you.
00:12:56
This is what I mean by planting in a grid and not in rows.
00:13:00
Whether you use that chart or just you plant based on the
00:13:03
recommended spacing on the packet, whatever it is, think in
00:13:06
terms of space around the plant, not space in a row.
00:13:15
So like, instead of placing your Bush beans 4 inches apart in
00:13:20
rows that are 12 inches apart, we're just going to group them 4
00:13:25
inches apart from each other in a solid block in one part of the
00:13:30
bed or the entire bed, whatever you need.
00:13:33
Then we can fill in the rest of the bed with other crops, or we
00:13:39
can plant them in alternating blocks throughout the bed so
00:13:42
that we're not creating a little mini monoculture in the bed that
00:13:45
attracts the insects that want to eat those plants, right?
00:13:48
This is a form of interplanting, alternating the plants that
00:13:51
you're growing, making sure to choose plants from different
00:13:55
plant families. So it's confusing the insects.
00:14:00
Now, if we're looking at things that don't trellis and that do
00:14:04
tend to take up a lot of space in the bed for an extended
00:14:08
period of time, how do we fit more plants in without causing
00:14:13
airflow and fungal issues? That's where we look at
00:14:16
combining interplanting and succession planting.
00:14:20
That's next. I wanted to give one more really
00:14:24
big thank you to Planter Box Direct for sponsoring this
00:14:27
month's series on raised bed gardening.
00:14:30
It's the support of companies like them that eases a little
00:14:34
bit of the financial burden on creating this show and I love
00:14:38
shouting out companies whose product I use in my day-to-day
00:14:41
life. Planter Box Direct's planters
00:14:43
have become my go to when replacing old beds or adding new
00:14:48
garden space to our farm and I happily share that with just
00:14:51
just about every gardener I meet who is looking for high quality
00:14:55
materials that last a lifetime but also look good in the
00:14:59
garden. If you've not gone to check out
00:15:01
all their color and configuration options, I highly
00:15:04
encourage you to take a look at planterboxdirect.com once you've
00:15:08
decided on your new raised planter because you are going to
00:15:11
love the way they look. Use the special code Just Grow
00:15:14
20 Now through October 15th to save 20% and also get free
00:15:19
shipping during this special series.
00:15:22
Find my favorite raised planters at Planter Box direct.com and
00:15:27
use code Just Grow 20 for significant savings now through
00:15:30
October 15th. The link is in the show notes.
00:15:35
OK, now let's make our one raised bed do multiple jobs
00:15:39
using interplanting and succession planting.
00:15:41
First off, what's the difference between the two?
00:15:43
Interplanting is otherwise known as intercropping in commercial
00:15:47
farming. Basically just pairs crops with
00:15:51
different maturities and different sizes or different
00:15:54
root depths in order to make the most efficient use of the
00:15:58
available light and the space, right?
00:16:00
So think about using things like radishes and leaf lettuces that
00:16:04
are pretty fast maturing crops in between things that are
00:16:07
slower to mature, like Peppers or tomatoes, right?
00:16:10
Succession planting gives us the ability to continue harvesting
00:16:14
across the entire season so that we don't have gaps in our
00:16:18
harvest. And we're doing this by planting
00:16:20
the same crop multiple times at specific intervals.
00:16:25
So the great thing about combining these techniques in
00:16:28
raised planters is that by using blocking or square foot layout
00:16:33
in the bed, it makes it easier to design our inter planting and
00:16:39
schedule our succession plantings.
00:16:41
Because we have equal spacing in all directions, we're not
00:16:44
worried about row spaces interrupting the pattern.
00:16:48
So not only are we fitting more into the same space, but we have
00:16:52
more control over it because it's more confined.
00:16:56
This also means that we're preventing a little mini
00:16:58
monoculture from happening. So not only is it more
00:17:02
efficient, a more efficient use of space, but it also confuses
00:17:06
the pest, specifically if we are interplanting different plant
00:17:09
families. So let's take our broccoli as
00:17:12
the example, OK? Broccoli takes up a lot of space
00:17:15
at its mature size, and it generally stays in the bed for
00:17:19
upwards of 60 days if you're transplanting from seedling, 90
00:17:24
days if you're sowing it directly in the bed from seed.
00:17:27
That's a long time for one crop to take up that much space,
00:17:32
depending on the number of heads of broccoli that you want to
00:17:34
harvest, right? If you have a standard variety
00:17:38
that produces a head that's between like 4 and 8 inches
00:17:41
across, then that leaf span is going to be anywhere from 12 to
00:17:45
24 inches across and about 18 to 24 inches tall.
00:17:48
That's a big plant, but like we mentioned before, those plants
00:17:52
are pretty small when they first start out, and they take about a
00:17:55
month or so to really start that large leaf spread.
00:17:59
So we can interplant something else between those broccoli
00:18:05
plants to take advantage of that open space while it's available.
00:18:09
So if our broccoli are spaced 18 inches apart in our grid, we can
00:18:15
look at what might fit in between those spaces
00:18:17
temporarily, something that can be to maturity and harvested in
00:18:24
about 30 to 45 days before the broccoli crowds it out, right.
00:18:29
So if we go and look at our chart and we see, OK, what can
00:18:33
be planted in those 12 by 12 spaces, and we find we have room
00:18:37
for that will mature quickly. Why does this work?
00:18:41
Because if we have two broccoli plants that are spaced 18 inches
00:18:45
apart, that's 36 inches, that's three of our 12 by 12 squares.
00:18:50
So in the beginning stages, if our broccoli is centered in one
00:18:54
square each and they're really small and there's one square
00:18:57
between them, we have that one square where we can put
00:19:00
something temporarily until the broccoli takes over.
00:19:03
So what matures in 30 to 45 days that grows in the same weather
00:19:08
conditions, those cooler days that broccoli does that is not
00:19:12
in the same plant family. Radishes, leaf lettuce, baby
00:19:16
spinach, these are all things that can fit into that space
00:19:19
between the broccoli get to maturity before the broccoli
00:19:22
takes over and they are in different plant families.
00:19:26
So we get to confuse those pests.
00:19:28
So if we have a four foot by 8 foot bed and we only use half of
00:19:34
that bed for our broccoli and we use the spaces between the
00:19:37
broccoli for those other quick growing crops, we can fit 8
00:19:41
heads of broccoli. Plus, if we look at that chart,
00:19:45
16 leaf lettuces per square foot, 9 spinach plants that we
00:19:49
can harvest as baby leaf, or we can broadcast seed the spinach
00:19:53
and cover the entire square foot and then 16 radishes per square
00:19:57
foot. So in the other air, 8 square
00:20:00
feet that are initially not taken up by the broccoli.
00:20:03
We can grow 48 radishes, 32 leaf lettuce plants and 27 spinach
00:20:07
plants or whatever other combination you want and still
00:20:10
have 16 square foot of space in that same bed to grow something
00:20:15
else. So you're going to have some
00:20:18
killer lettuce and spinach and radish salads in the weeks
00:20:22
leading up to your broccoli harvest.
00:20:25
Those plants are going to be out of the way for the final couple
00:20:27
of weeks that it takes the broccoli to get to maturity.
00:20:29
And then as you start harvesting that broccoli, you can pull
00:20:33
those plants, amend the soil, and plant another crop.
00:20:38
Now, what if you don't want all of that lettuce and spinach and
00:20:42
radishes to come to maturity all at the same time?
00:20:46
That's a lot of salad to eat all at once, and then you've got
00:20:49
nothing for the couple of weeks while you wait for your
00:20:51
broccoli. That is where the succession
00:20:55
planting comes in, right? Some of the plants that we grow
00:20:59
give us a pretty continual harvest up until the 1st fall
00:21:03
frost. So things like your
00:21:05
indeterminate tomatoes and Peppers and eggplant and pole
00:21:08
beans, these all continue to produce basically until they
00:21:11
can't. But most of our other crops are
00:21:14
either one and done, like broccoli or cabbage or head
00:21:17
lettuces or our carrots and beets.
00:21:20
Or maybe they only produce for a few weeks before they've just
00:21:23
given their all and then they're done.
00:21:25
So like our Bush beans or our sugar snap peas.
00:21:27
Or if you're doing come again crops like lettuce or spinach
00:21:30
that eventually can't handle the heat, right.
00:21:33
So if we want salads the whole spring into the early summer,
00:21:39
then we have to plant those crops in succession so we don't
00:21:42
get them all at once. This means one of two things.
00:21:46
We either plant the same crop in a different spot every two to
00:21:50
three weeks and that staggers the harvest, or we plant
00:21:54
different varieties of that crop that have differing maturity
00:21:59
dates all at the same time to stagger the harvest.
00:22:03
So if we have a whole other 16 square feet in that garden bed
00:22:08
that's not being taken up by our broccoli, then we can use that
00:22:12
for succession plantings of things that we want to eat over
00:22:15
a longer period of time. And then we can inter plant
00:22:19
those crops to transition from one season to another.
00:22:23
OK. And again, because we are
00:22:25
planting in our raised beds in a grid, this is super easy to plan
00:22:32
by laying it out on graph paper and just marking some dates so
00:22:35
that we know how long each thing is in place.
00:22:39
Can we do all of this in a raised bed or in an in ground
00:22:42
bed instead of a raised bed? Yeah, absolutely.
00:22:45
But it tends to need some more adjustment because we have to
00:22:50
consider the edges of those beds and where the plants may spill
00:22:53
over into our walkways. So it's doable.
00:22:56
It's absolutely how I plan my beds, and it's how I teach my
00:22:59
students in my plan, like a pro course, but it takes some
00:23:02
practice. I find doing this in a raised
00:23:06
bed is almost foolproof from the start.
00:23:11
If we're always considering the mature size of the plant and how
00:23:15
long the plant remains in place, then we're usually going to be
00:23:20
OK. And we're pairing that high,
00:23:23
low, fast, slow, right? And remember I said that after
00:23:28
we pull that broccoli, we're going to amend and then we're
00:23:31
going to plant something new, right?
00:23:32
This is another type of a succession planting that we
00:23:35
refer to as relay planting. SO1 crop follows another follows
00:23:39
another based on the season. So if you plan this all out on a
00:23:44
grid ahead of time, there will be no gaps in your harvest and
00:23:48
there will be no gaps in your bed where the soil is exposed
00:23:52
and not being productive. Now, Speaking of soil exposure,
00:23:57
coming up, we're going to talk about one of my favorite
00:23:59
subjects, mulch, and how it helps us control weeds and
00:24:03
disease in the raised bed, but also how it can help us to
00:24:07
manage the moisture level and the soil temperature in our
00:24:11
raised beds. That's next.
00:24:14
Mulch is your bed's security blanket.
00:24:19
A2 to three inch layer of clean straw or shredded leaves or
00:24:24
dried grass clippings. Unsprayed grass clippings,
00:24:28
please and thank you, is going to block the new weeds from
00:24:31
blowing in and taking hold. It's going to stop any muddy
00:24:35
rain splash that spreads diseases from the soil up onto
00:24:39
the plant leaves. So this is going to further
00:24:41
protect us against the fungal and bacterial diseases, right?
00:24:44
But mulch is also going to help us conserve that soil moisture.
00:24:49
You know, sometimes despite our best efforts, the composition of
00:24:53
our soil in our raised bed might drain a little too quickly for
00:24:57
our liking. If this is happening, you likely
00:25:00
need to add some more organic material to the bed in the
00:25:03
offseason. But in the meantime, a heavy
00:25:05
layer of mulch is going to slow the rate at which the water
00:25:08
soaks into the bed. And it's going to protect the
00:25:11
soil surface from the drying effect of the sun's rays, which
00:25:14
will help you retain whatever moisture doesn't drain from the
00:25:17
soil. It's also going to help you with
00:25:19
temperature control of the soil because there is a smaller
00:25:24
volume of soil in a raised bed than in the ground.
00:25:26
Obviously the bed is going to tend to heat up sooner in the
00:25:31
spring, and we like that. But that also means that the
00:25:34
soil temperature can fluctuate dramatically if your
00:25:37
temperatures swing widely in the spring like they tend to here.
00:25:41
So if you can add a good layer of mulch after the soil has
00:25:45
initially warmed in the spring, then it's going to help to
00:25:48
mitigate some of those swings as it remains in place.
00:25:52
It's going to actually have the opposite effect in the summer
00:25:55
months. So if it's a light colored mulch
00:25:57
like straw, it's going to absorb fewer of the sun's rays and that
00:26:02
means keeping the root zone of the crops cooler as the
00:26:06
temperatures heat up. This is going to prevent those
00:26:09
late spring crops that get harvested in the early summer,
00:26:12
like beets or carrots from bolting prematurely because the
00:26:16
temperatures got super hot before they were ready to
00:26:18
harvest. And then bonus organic mulches
00:26:23
slowly add organic matter as they breakdown.
00:26:25
So by the end of the season, you can just add a good layer of
00:26:29
compost and some source of nitrogen right on top of your
00:26:32
mulch and then put some more mulch on top.
00:26:35
And it's going to incorporate that under layer as organic
00:26:39
matter over the winter time. And it's going to be ready to
00:26:42
plant into into the spring. And it's also going to increase
00:26:44
your biomass. It is a win, win, win all the
00:26:47
way around. Just keep the mulch pulled back
00:26:49
a little bit from the base of the plants by an inch or two and
00:26:52
you are golden. OK, so let's bring this whole
00:26:57
plan together, right? Picture this with me.
00:27:00
Along the north edge of our 4 by 8 bed, we put a sturdy trellis
00:27:05
that will eventually hold 4 tomato plants about 18 inches
00:27:08
apart. In the spring we use that tomato
00:27:11
space twice by sowing a quick crop of radishes in blocks in
00:27:17
between head lettuces to start with, and then we're going to
00:27:20
plant those tomatoes in between the lettuces.
00:27:22
When the soil temperature and the day temperatures are right
00:27:25
for planting tomatoes, the radishes and the lettuce will be
00:27:28
out of the way before the tomatoes need the elbow room.
00:27:32
At that point you could plant whole beans along that trellis
00:27:37
to fill in the space between the tomatoes.
00:27:40
Now to the east side of the bed we can do another short little
00:27:43
trellis for some sugar snap peas in the spring, and these can
00:27:47
give way to Bush beans in two week waves for most of the rest
00:27:52
of the season. The center of the bed basically
00:27:55
starts as salad central. We'll start with several blocks
00:27:58
of carrots and beets and greens sewn about two weeks apart.
00:28:04
These can give way to summer squashes in the center of the
00:28:08
bed. As the season warms.
00:28:10
Those squashes can produce all summer but then be pulled in the
00:28:14
late summer or early fall to give way for more salad greens
00:28:19
and carrots and beets for the fall while the tomatoes stay in
00:28:23
place as we plant more lettuces under them, protected from the
00:28:27
heat of the lay summer giving way to a fall crop.
00:28:31
Now the front edge of that bed can be planted to onions in the
00:28:35
early spring that are harvested in the early summer with a relay
00:28:39
crop of basil and parsley replacing them.
00:28:42
And that takes us all the way through until the 1st frost.
00:28:45
We can even squeeze some extra goodies into the corners and the
00:28:49
edges like zinnias, calendula, dills, cilantro, thyme, all
00:28:53
things that complement what we're growing.
00:28:55
These are going to feed pollinators and the tiny little
00:28:57
beneficials that eat the aphids and the caterpillars while also
00:29:01
contributing to our harvests is keep the taller flowers to the
00:29:04
bed corners or the north edge so you don't shade the other plants
00:29:07
and you're good to go. Add a 2 to 3 inch blanket of
00:29:10
mulch everywhere in the bed to hold in moisture, regulate the
00:29:14
soil temperature and keep those plant leaves clean and you are
00:29:17
all set. This is a tremendous amount of
00:29:23
food from one single 4 by 8 bed. Let's add it up across the
00:29:28
entire season. In the spring, we're looking at
00:29:31
64 radishes, 16 heads of lettuce, 20 lbs.
00:29:34
Of leaf lettuce, 5 lbs. Of spinach, 3 lbs of arugula, 2
00:29:38
large bok choy or 8 little baby bok choy, 64 carats, 27 beets,
00:29:44
and 6 lbs of sugar snap peas. As we transition into the
00:29:48
summer, those relay plantings can yield up to 80 lbs of
00:29:51
tomatoes, 35 lbs of pole beans, 20 lbs.
00:29:54
Of Bush beans, 40 lbs. Of zucchini or yellow squash or
00:29:58
specialty summer squashes, 63 onions, plus a bounty of basil
00:30:03
and parsley through the summer. Which leads us into our fall
00:30:07
harvest of another 16 heads of lettuce, 30 lbs.
00:30:10
Of leaf lettuce, 32 carats, 18 beads, plus all the other herbs
00:30:14
and flowers you could be harvesting along the edges.
00:30:17
And we didn't even talk about the the succession planting that
00:30:21
you could do for things like kale and spinach and carrots
00:30:25
that can get to maturity before the 1st frost and be harvested
00:30:29
through the winter in a lot of areas for additional harvests.
00:30:34
I'm going to say it again, that is a tremendous amount of food
00:30:39
from 1/4 by 8 foot bed. Now of course this depends on
00:30:44
your climate, how long your growing season is, and the
00:30:47
fertility of your soil. But I actually underestimated
00:30:50
some of the yield on these things.
00:30:52
So even if you only harvested half of what I mentioned, you
00:30:57
would have gotten over 200 lbs of produce from that bed.
00:31:03
And if that sounds ridiculous, I can confirm that my 4x4 beds
00:31:09
this year have averaged about 150 lbs of produce from each bed
00:31:14
due to inter plantings and succession plantings.
00:31:17
And that's without amending them part way through the season as I
00:31:20
change crops. So yes, that number tracks.
00:31:27
OK, so tips for planning your raised bed?
00:31:31
Plan the box to be 3 to 4 foot wide, however long you want it
00:31:35
to be. Put your trellises on the north
00:31:37
and maybe temporarily on the east, and plan your garden space
00:31:42
out on a grid. Make sure that you're spacing
00:31:45
your plants for airflow. So trellis, those vining crops
00:31:47
don't handle any wet foliage, please.
00:31:50
And use the grid to plan how many plants per section so
00:31:54
they're not interfering with each other.
00:31:56
We're concerned about size at maturity and the amount of time
00:31:59
that they spend in the bed. Use your interplanting high,
00:32:03
low, fast, slow, right, tall plants with short ones, fast
00:32:06
maturing crops with the slow ones.
00:32:08
Stack the timing and the height of your plants and then do your
00:32:12
six sessions, small sowings everyone to two weeks.
00:32:15
Relay those new crops in as the other ones finish.
00:32:18
Mulch everything with a 2 to 3 inch depth of straw or leaves or
00:32:22
clippings. This is going to save your
00:32:23
water. It's going to block weeds.
00:32:25
It's going to reduce that disease.
00:32:26
Splash and modify those temperatures and then add in
00:32:30
your flowers and your herbs at the edges for season long blooms
00:32:33
and even more support for beneficial insects.
00:32:36
Just mind your height and your airflow.
00:32:39
I will leave that link to that chart to download that tells you
00:32:43
how many plants you can put in each 12 by 12 space in your
00:32:47
raised bed. I really hope that this series
00:32:51
has convinced you how effective growing in raised beds can be.
00:32:56
If you have fantastic soil where you garden and the in ground
00:33:00
beds allow you to grow what you need in the space that you have
00:33:03
them, no harm, no foul. Keep doing what you're doing,
00:33:07
but if you struggle at all with soil fertility or perennial
00:33:11
weeds, the space needed to grow what it is that you want to
00:33:15
grow, water retention, whatever, I absolutely encourage you to
00:33:19
try just one raised bed for next season.
00:33:23
Get it set up now. Get it filled in, let it mellow
00:33:27
over the winter while you grab your grid paper or your
00:33:30
spreadsheet and you lay out the garden in the most efficient
00:33:33
manner that you can. You will be blown away by the
00:33:38
results. Until next time, my gardening
00:33:40
friends, keep on cultivating that dream garden, and we'll
00:33:42
talk again soon.