
If you like to start your own seeds for your garden but often struggle with the amount of space it takes up, you’re definitely not alone. Or maybe you’ve wanted to start your own plants but are put off by all the indoor growing requirements? Having the space, the lighting, fans for strengthening the seedlings, keeping a watering schedule, getting them hardened off … starting transplants from seed indoors can feel intimidating or overwhelming. Even for me, someone who has an entire room dedicated to seedlings, with shelves and lights and fans and water systems, I run out of room every single year and need to adhere to a strict schedule to get plants rotated out to the greenhouse to make way for more plants in the basement.
Which is why the concept of winter sowing intrigues me. I always wondered why we couldn’t just plant the seeds we wanted to grow out in the garden in the winter and let them naturally come up on their own? Apparently, about 30 years ago someone else had that same question and she came up with a modified way to approach it with great success. Her name is Trudi Davidoff. Trudi refined the winter sowing process, worked with the USDA to coin the terminology and the method and then created a non-profit and spent more than 20 years teaching the Wintersowing Method to anyone and everyone who wanted to learn. I joined the Winter Sowers group on Facebook and watched YouTube videos and read posts from Trudi herself and I am ready to start winter sowing as a way to germinate some of my own seedlings this year.
This episode, we’re going to go over the technique of winter sowing, the do’s and don’ts, the basic list of supplies you’ll need and how to get started. It’s meant to be inexpensive and easy. There is really nothing technical about this and I think we can all do this with both vegetables and flowers for our gardens. Let’s dig in!
RESOURCES:
Links for this episode:
Get 10% off with code JUSTGROW at Truly Garden
Just Grow Something Gardening Friends Facebook Group
Check out how you can become a patron on Patreon
Merchandise | Just Grow Something
Positively Farming Media Podcast Playlist on Spotify
--- Send in a voice message: https://anchor.fm/justgrowsomething/message
Karin Velez [00:00:00]:
Hello, my gardening friends, and welcome back to another episode of the just grow something podcast. So if you like to start your own seeds for your garden but you often struggle with the amount of space it takes up, you're definitely not alone. Or maybe you've wanted to start your own plants, but you're put off by all the indoor growing requirements. Having the space, the light, the fans for strengthening the seedlings, Keeping a watering schedule, getting them hardened off. Starting transplants from seed indoors can often feel intimidating or be overwhelming. Even for me, someone who has an entire room dedicated to seedlings with shelves and lights and fans and water systems, I run out of room every single year, and I need to adhere to a strict schedule to get plants rotated out to the greenhouse to make way for more plants in the basement, which is why the concept of winter sowing intrigues me. I always wondered why we just couldn't plant the seeds that we wanted to grow out in the garden in the winter and let them naturally come up on their own.
Karin Velez [00:01:10]:
Now apparently, about 30 years ago, someone else had that same question, and she came up with a modified way to approach it with great success. Her name is Trudy Davydoff, and Trudy refined the winter sewing process. She worked with the USDA to coin the terminology and the method and then created a nonprofit and spent more than 20 years teaching the winter sewing method to anyone and everyone who wanted to learn. I joined the winter sewers group on Facebook and watched YouTube videos and read posts from Trudy herself, And I am ready to start winter sowing as a way to germinate some of my own seedlings this year. So this episode, We're gonna go over the technique of winter sewing, the do's and the don'ts, the basic list of supplies that you'll need, and how to get started. It's meant to be inexpensive and easy. There is really nothing technical about this, and I think we can all do this with both vegetables and flowers for our gardens. Let's dig in.
Karin Velez [00:02:56]:
So what is winter sowing? The USDA definition And now that was developed with the help of Trudy is winter sowing is a propagation method used during the winter where temperate climate seeds are sewn into protective vented containers and placed outdoors to foster a naturally timed high percentage germination of climate tolerant seedlings. Okay. So in plain English, basically, you're Sowing your seeds that you would normally plant outside in the spring earlier than what you normally would, and you're planting them out in an area that is protected so that they can come up on their own when they think that it is the best time for them to come up. Obviously, the seeds know best. Right? So winter sowing doesn't get you early plants. It gives you the hardiest plants that you can get. It's a it's essentially just a method of starting seeds outdoors. You place the seeds outdoors in protected and vented containers, either Milk jugs or foil trays with plastic lids, large, like, 32 ounce yogurt containers, anything Anything that you can recycle that's gonna hold enough soil, and we'll get into those details here in a minute. But this method basically fosters A naturally timed vernalization and germination process, but it's in a protected space.
Karin Velez [00:04:26]:
So think of this like a cheaper, inexpensive, more readily available version of a cold frame. A very high rate of germination is common with this Sewing method. It's really good for perennials, hardy animals, and half hardy animals. You can't really do this with Tropicals because, obviously, they just can't stand that type of cold. But you can do this for both flowers and vegetables. What's a hearty annual? Anything that is very cold tolerant even as a young seedling, half party annuals are those that can be, like, directly sown into your garden after the last frost. Again, you do not wanna do this with any annual seeds that do not tolerate any kind of extended cold. Those you could do with, Spring sowing, and we'll talk about that at the very end.
Karin Velez [00:05:12]:
It's great for perennial native plants and florals if you're adding those to your gardens. And if you are in a temperate climate, a 4 season climate, you can really sow just about any, seed can be winter sown. So, your your climates are a little bit different. For the rest of us, we have to be careful about what it is that we're planting. But why would you want to do this? Well, Like I mentioned, sowing seeds indoors can be tricky sometimes. You need to have lights. You have to have the right amount of heat. You have to have airflow and the space to do it.
Karin Velez [00:05:45]:
If you're doing that in the winter sewing containers, you don't need any of that stuff. You don't have to worry about damping off or fungus gnats. You don't have to worry about watering as frequently. And the biggest thing to me is that there's not gonna be any hardening off that is needed. These plants are already gonna be coming up and ready to go, so they are gonna be more hardy and very, very sturdy. Again, I wanna emphasize here that the intent behind this is not to plant, or to get earlier plants. We just want better Plants. We want plants that have been getting gotten off to a better start.
Karin Velez [00:06:21]:
Right? I also mentioned already the the germination rate on on this type of a planting is supposed to be phenomenal. I will preface this by saying I have not started to do this yet. This is my 1st time, so this is all research that I am passing on to you that I am using to do this winter sowing for my 1st try this year. But what I'm excited about is that you can start these seeds in batches without delaying their germination or their growth, which is one thing that I often struggle with when I am trying to plant hundreds of seedlings, in my basement. I'm trying to start all of these seeds all at once that all need to be planted out all at the same time. If I start with winter sowing, I can do these seeds in batches, and I'm not worried about when they're coming up because they're gonna come up when they're ready. So I'm not taking up space with all of these different trays down in my seedling room and I can use that space for all my warm weather stuff that really needs A much longer time to germinate and and to to get ready to go out on the ground. So, this also means that Transplanting is gonna be a lot faster because these little cold hardy plants are gonna be able to be transplanted at a much smaller size Then we're used to seeing with the ones that we start indoors.
Karin Velez [00:07:40]:
So there's not gonna be any need to really pot them up before they go out into the gardens, which to me is fantastic. That's that's a huge time saver. Not to mention, it's a a huge saver as far as expense when you're looking at Potting soil and containers and that sort of thing. So these are all just great benefits as far as I'm concerned. So, a lot of people who do winter sewing start to gather their Plies really early, like in the summer. Again, start holding on to all of those containers that you might wanna use as your winter sowing vessels, And then you start planting. Usually, the the guidance is to wait until after, the winter solstice. So we're beyond that point now, and you can keep going all the way through until April.
Karin Velez [00:08:27]:
There there really isn't a real rigid Timeline, there are just guidelines to this, so this is gonna vary by region. The overnight temperatures are really what matters, especially if you need something, you have something that needs to be called stratified. You want it below 50 Fahrenheit for at least 8 weeks, but, if it's not something that needs that Cool stratification that you you can basically do it at any time. You can plant in stages all the way through when those overnight low temperatures Start to get above 50 Fahrenheit. These are the plants that you're looking at transplanting out in the the Spring or even the very late spring, early summer. So it probably is going to require some experimentation, on our parts with depending on our regions. So what I am going to attempt to do is plant half early and then plant Half a little bit later on and see how they go because I don't know about you, but our region, our weather in the springtime can be very Volatile. It can be very dramatic as far as the swings are concerned in temperatures.
Karin Velez [00:09:34]:
And so that's another challenge that I usually face when it comes to starting my seeds indoors, timing it to where I can get them transplanted the proper time. So, hopefully, with this method, I won't have to worry about it as much. Some general guidelines for when to start certain Plants, January February. And, again, this is in sort of most areas, not your super coldest, not your super warmest. So anything I would say zones, maybe 4 through 8. These are probably your best bet, maybe 4 through 7. The beginning of the year, January February, starting after the winter solstice, your earliest veggies vegetables. So spinach, kale, Brussel sprouts, snow peas, broccoli, cabbage, chard, all of those types of things.
Karin Velez [00:10:24]:
Your herbs, specifically, your perennial herbs, thyme, oregano, Sage, parsley can probably be done at this time too. Once you move into March, things like bok choy, snow peas, cabbage, lettuce. And then in April, if you are in a long season area, you could probably do tomatoes. I don't have any intention of doing that. I will probably try basil and cilantro, but for me, our season our warm growing season is short enough to where I really think I do want to get an earlier jump on tomatoes and peppers for sure, just due to their long season heat requirements. But if you're in an area where your season is very long, by all means, give it a shot. Try doing, tomato plants in winter sowing conditions and see if you can get them transplanted out and get a and get a harvest out of them. I wouldn't hedge all of my bets on that, but, you know, why not give it a try and see? And the reason for that is because the supplies that you're using are basically just items from around your house.
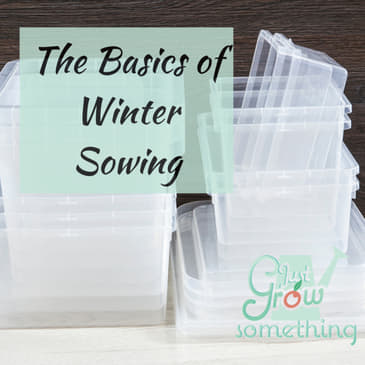
Karin Velez [00:11:27]:
This is nothing that you should be spending a ton of money on Other than the potting soil, most of what is required for winter sewing, you can gather, from around the house and from things that you purchase from the store anyway, which is why I said, you know, start early in the year collecting your containers. You don't wanna wait till last minute and try Bramble trying to find containers to plant in. What type of containers are we talking about? Any clear or opaque container that holds 3 to 4 inches of soil and that has headroom for the ceilings to grow about 2 inches or so. You will see if you look up winter sowing, a lot of people gathering milk jugs. And this is probably the most Common thing now just because it's something that's readily available to a lot of people. It's also something that is easy to sort of stack up and store until you're ready to use them, But milk jugs are not a requirement. We actually don't have milk jugs at my house. I go to our dairy to get our milk directly, and I use glass containers.
Karin Velez [00:12:30]:
So I don't have milk jugs that I can use, but I do collect, anything else that we see, that comes into the house. We don't use a lot of plastic. So I just sort of hang on to anything that is a plastic container, whether it's a large yogurt container or something that for cottage cheese. Vinegar, I do use a lot of white vinegar. And so those containers, I will save those and use those. Large cat litter containers. Takeout containers that have sort of solid bottoms but clear tops on them. Those are fine too.
Karin Velez [00:13:03]:
Anything that you can use That, again, is gonna hold enough soil. You want 3 to 4 inches of soil, and you want the lid or whatever you're cutting to to create the lid to give you at least 2 inches of space. K? You're also gonna want a way to label these containers, And you want it to be something that's UV resistant because, remember, these things are gonna go out right now. They're gonna sit outside all the way through until the spring. And so it's gonna be subjected to the elements. Permanent marker is not actually recommended because that marker may fade. So I've seen grease pens or grease pencils recommended, paint pens, those sorts of things. So Any any way to label the containers and the plant labels that is UV resistant? You do want plant labels.
Karin Velez [00:13:53]:
You want knife or a pair of scissors, Some duct tape or packing tape and then potting soil. We're not talking topsoil here. We don't want black garden soil. You definitely want a Potting soil and preferably one that doesn't have high levels of added nutrients in it. So don't go grab the miracle grow Stuff off the counter off the the shelf that's got really high levels of nitrogen that's actually a really wasted resource when it comes to seed starting anyway. And speaking of seed starting, you don't actually Probably don't wanna use seed starter mix either. It's too light. It likely will not retain enough moisture.
Karin Velez [00:14:27]:
So this is a little bit different than what you're gonna do inside. You also don't want to use previously used potting soil because the one problem that I have seen some people have with this planting method or the seed starting method Is algae growth? If these things are sitting outside and you have a high moisture content and then you have the sun warming it up just a little bit, If there are any algae spores in there, they are going to rapidly develop in that container and previously used potting soil is more than likely gonna have those spores already. So start with new Potting soil, if you can. It just needs to be able to drain well and you don't want There to be a lot of compression when the soil is wet. So that's the reason why we don't wanna use a top soil or a garden soil. So potting soil, for sure and something that doesn't have a whole lot of nutrients already in it. You also want probably a rubber band, or at least a ruler. I'll explain the rubber band here in a minute, and then of course your seeds, whatever it is that you wanna plant.
Karin Velez [00:15:27]:
So step by step, what do we do with winter sowing? Start with clean containers, first of all. Right? If you if it's had food in it, make sure that you've ridged up with bleach a little bit. Let it dry a day or so before you, get ready to use it. You do want a fairly sterile environment to start with just like any other seed starting method. We don't want to encourage anything in there to grow other than our plants. Right? So take your containers and then make drainage holes in the bottom of the containers. Four Larger holes in the bottom of, say, a 1 gallon milk jug would be fine. Eight smaller ones is fine too.
Karin Velez [00:16:03]:
Whatever works best for you. One way, you know, to make this a little bit easier, like, if you've ever tried to poke a hole in something that is like a flexible plastic, you know, sometimes it can cause That container to collapse. So if you can put them upside down into a container to help hold them steady while you're poking the holes, You can also freeze a little bit of water in the bottom, so that when you flip it over, it's it's solid, so it doesn't help them or it doesn't cause them to collapse. But whatever means necessary, go ahead and get some. Make sure you have, plenty of drainage holes cut into the bottom of the containers. The next thing you're gonna do is measure and cut. So depending on the container that you have, you're going to measure up 4 inches From the bottom of the container, because remember, 3 to 4 inches is the proper soil depth that we want. We also want the top of the container to have at least 2 inches for seedling growth.
Karin Velez [00:16:59]:
So let's use a milk jug or a vinegar jug. As an example, measure 4 inches up In, you know, 2 different places on either side of that jug, and then you can use a large rubber band. Remember that rubber band I mentioned? Use a large rubber band and wrap it around the container right at the 4 inch mark, and you can use this as a guide that you can cut a straight line. So, essentially, we're almost cutting this jug in half, but you're gonna leave one part. Generally, it's the easiest to do. It is right where the handle is. Leave 1 part uncut, and this is gonna act sort of as a hinge. This is gonna make it easier to get sort of in and out of this jug without causing it to collapse in on itself.
Karin Velez [00:17:47]:
If you're using containers that have removable lids, like takeout containers or foil trays or or, you know, that have clear lids to them or whatever, this obviously is not gonna be necessary. Another method for this also is to cut just a window in the side of the container. Again, measure up the 4 inches and then just Kinda cut a 3 sided window that can flip down, flip open, and then the rest of the container stays intact. It's gonna be slightly trickier to get the soil and the seeds and stuff inside and to work with them, but if you don't have a whole lot in the way of your packing tape or Your duct tape, which we'll talk about in a minute. Then this is a way to save on some of the tape. But generally speaking, you do you know, the best method that I've seen is to is To cut it almost completely through and have it hinged as an open. Once you've got it hinged open, all of your your, drainage holes r in the bottom and you're all set there. Then fill the container with 3 to 4 inches of potting soil, and then you want to water it thoroughly.
Karin Velez [00:18:46]:
This is to make sure that all of that airspace is sort of filled. And so if the the potting soil compresses down to, like, less than 3 inches, you're gonna want To add a little bit more potting soil and then moisten it again, we wanna make sure that there is enough soil in there for these little plants to do their thing. And then while you've got it open, add plant markers inside the container. So there's a couple of reasons for this. Number 1, If you have a marking on the outside of the container, and that's the only marking that you have. If it's exposed to the elements and it eventually fades and you can't read it, you no longer know what it is that you planted in the inside. We are also going to mark the outside of the containers, but eventually, these lids are gonna come completely off. And they're gonna be off for just a little bit before You end up transplanting these seeds.
Karin Velez [00:19:39]:
So if you go through and you take the lids off of all of these and you don't keep track of what was with which container, which lid went to each container. Then now you also don't know what it was that you planted in each of these containers. So add a plant marker inside the container. This is gonna protect the writing from the elements, and it's also gonna be referenced for later, after the tops are removed. You can use anything as a plant marker that is water resistant, Plastic knives or spoons, plastic plant markers. I don't recommend using, like, Popsicle sticks or anything like that because these are going to be sitting in the soil. They're gonna be pulling up moisture and speaking from experience. If you use anything that's wooden, it does wick that moisture up, and eventually, it will rot, Or it will also sort of erase whatever you have written on it.
Karin Velez [00:20:25]:
I made that mistake, 1 year with all of my plantings, and that was not fun. So, use something that is water resistant. The next step is to actually plant your seeds. Right? So the Spacing of this planting is going to depend on your goal. What I'm used to when I'm starting seeds indoors is either planting multiple seeds In a flat tray and then sort of thinning them and transplanting them and potting them up into bigger containers individually later on or starting larger seeds in their own individual little, cells and allowing them to come up that way. So based on your goal and how you plan on transplanting these once they go out into the garden is going to determine How you space these seeds within this container. So if you're planning to transplant them individually, then you want to Space those seeds to be able to separate them easily, so maybe an inch apart or so. Visualize what those seedlings are going to look like and that sort of chunk of soil that you're going to break off to go ahead and plant.
Karin Velez [00:21:30]:
Now speaking of chunks, you can also plant in chunks. If you're gonna do it that way, then closer together is fine. So long as there's enough Soil within there to sustain those plants, until they get transplanted. So you can seed fairly heavily So long as there's enough space for those plants to to grow and and not choke each other out, then later on when you're transplanting, you can quite literally just break them apart Into 3 or 4 chunks of these little seedlings and then plant them in the ground. And then if you need to, you can send them out later. This is a really easy way to just go ahead and get these plants transplanted, and I think this is the method that I likely will choose for most of my smaller plants. Larger seeds, I definitely think you're better off spacing them farther apart, but most of my larger seeds are are warm weather plants anyway, so I'm not sure if I'll be using this method for that or not, but, again, your your spacing is gonna depend on your goal. Just remember larger seeds means larger seedlings, so don't overcrowd them in the container.
Karin Velez [00:22:33]:
The best way to do this with the smaller seeds, especially just sprinkle the seeds on top of the soil and then Pat it down. You can cover it lightly with a a fine layer layer of the soil. And again, if you've got larger seeds, then go ahead and place them into the soil, in the spacing that you require and then go ahead and cover them up. As you're doing this, try to avoid the temptation of planting multiple types of seed in 1 container because they're gonna have competing growth habits in most instances. So just for the benefit of the seedlings, to avoid competition between between them and also for your sanity, I'm trying to keep track of what is planted where. I would just recommend One type of seed per container just to avoid the problems.
Karin Velez [00:24:35]:
Okay. Once we have all of our seeds planted into our jug or our container. We are going to tape the jug closed or we're gonna put the lid on. So this depends, again, on what types of containers you are using. So if you are using a milk jug or a a vinegar jug or any other container that has a small lid to the top of it, you wanna remove it, and and discard that that lid. If you're using a container that has a solid lid, like maybe you're using a takeout container, a Yogurt container, a cat litter, bucket. Then make sure that you are poking holes in the top of the lid.
Karin Velez [00:25:14]:
This opening, in the milk jug or or the the holes that you poke are going to serve to both allow water in, But then, also, vent hot air out when necessary. You know, think about a greenhouse. You you Can't keep a greenhouse completely closed up all the time, or you will literally cook the plants inside. There needs to be some venting. Same thing with these little guys. Even though we're not Really creating a greenhouse, you can definitely create a greenhouse effect if there isn't any way for that that hot air to vent out. This is also going to allow your natural cycle of things to hopefully, give these plants some moisture, as they're trying to trying to sprout. So if you've got rain or snow, that's great.
Karin Velez [00:26:02]:
It's gonna water it for you. But it's also going to allow you to be able to water yourself if you need to later on if you see that they're starting to dry out. So the next thing you wanna do is label the container. So you've already labeled the plant inside with some sort of a plant marker. Now we've completely closed our container up and we need to label the outside side of it. Doing this on top is gonna make it really easy to read while the container is closed, but whatever location you prefer is fine. I would suggest to write what the plant is, what the variety is, and probably the planting date 2, at least for me, you know, in me keeping my records, I wanna know how long it took for something to germinate, by comparison, especially if I'm doing a side by side with, you know plants that I'm doing indoors versus plants that I'm doing outdoors. I just think it would be good future reference if you have the planting date on there, and you may not necessarily want that.
Karin Velez [00:26:58]:
That's fine. Make sure again that you're using a u v resistant marker of some sort of paint marker a grease pen a plant marker or something that's not going to fade you can either write it directly on your surface or if your surface isn't real conducive to writing or even being able to see it, you know, like those clear lids for takeout containers, or the the foil, casserole, you know, trays or whatever. Those plastic tops these aren't really great I don't think for reading so you can just use a piece of duct tape, on the top of there and then write directly on the duct tape and and mark it that way. And then you're gonna put them outside. Find a spot where obviously they're not gonna get you know, the lids aren't gonna get blown away or blown around or whatever, but Find a way to be able to easily move them if you need to because, again, as our seasons change, you might have it in an area that gets good morning And it's, you know, not too hot in the afternoon, but as the seasons change, it very well may end up being too hot. You may have too too much sun, so you can put them in crates so that you could easily move them around if they, you know, need to be moved or if they get in your way. You know, it's fine when it's Snow on the ground and you're not going out there and walking around, but you have them on your back deck and you wanna, like, start using your back deck, you may wanna move them. So Just put them someplace where they're sort of out of the way, but they do get some sunlight and leave them be.
Karin Velez [00:28:21]:
Snow cover is fine. Ice is fine. You want the moisture, just let them sit there. You are gonna wanna monitor them, and we'll get to that here in a second. But That essentially is all you need to do. Just follow those steps that I talked about and then leave them alone. So start with your clean containers, Make your drainage holes, measure and cut your container if you need to. Fill it with the potting soil, plant your seeds, tape it closed, or put the lid on label the container and throw it outside.
Karin Velez [00:28:49]:
I cannot stress enough that Trudy, the creator of this method, is constantly saying this is not supposed to be hard. This is not supposed to be fancy. This is supposed to be easy. It's supposed to be not labor intensive, so don't overcomplicate it is basically what it boils down to. Now Are there some tips for success? Absolutely. Some handy tips that I have come across while researching this. 1 is to place a coffee filter or some other type of sturdy paper or cloth in the bottom of your containers if you live in an area where slugs are a problem. Because if you got those drainage holes, especially if you're using larger Drainer Holes where you have a a heavy slug issue, the slugs can get in through those drainage holes.
Karin Velez [00:29:34]:
Plus, if you're using larger drainer holes, this is also going to help keep the soil in too. So keeps the slugs out, keeps the soil in. The other thing is that you wanna monitor these, fairly frequently. I mean, you don't wanna set them and forget them. You because they they do need water. And if your conditions start to dry out, if you are in an area in the wintertime where you don't get a lot of moisture, you may need to give them some water. These containers are naturally going to condense. So you're gonna get the condensation on the inside of the container, and the rain and the snow is gonna help keep them watered.
Karin Velez [00:30:08]:
But If you see the soil drying out, you absolutely need to water. These seeds need moisture, especially if they're cold stratifying, but they also need to be able to stay alive. And if it gets too warm inside those containers on sunny days, they are going to need that moisture. So if the sides of the jug, you know, you're looking at the at the soil and it seems like it is dry or if your containers feel really light, If they are visibly dry, give them a drink. If the temperatures are above, like, 35 Fahrenheit or it's really sunny out, this is Probably gonna make them dry out faster. This is why you wanna use these larger containers and not very small ones because you want that moisture retention. Stir the seeds. You don't wanna disturb the seedlings.
Karin Velez [00:31:01]:
So using a small watering can that will allow you to sort of Drip the water slowly into the container is good. I saw somebody use a water bottle, and they poked Multiple tiny holes in the top of the cap of their water bottle, and then the cap, fit into the holes in the tops of their jugs, and so they filled their little water bottle And put the cap on it with its tiny little holes, turn it upside down, and essentially, it sort of just rained water into their containers. It was kinda cute. So, I imagine that a spray bottle would also work just fine. Anything that you can get into the size of the jug opening that will allow you to water the seeds, and the seedlings gently and not disturb them. So what should you expect to happen After you get these all planted and you've checked the the water and you're making sure that they're they're kept moist enough. Well, the germination rates are gonna be different for every single plant. So your most cold hardy ones are gonna be the ones that germinate first.
Karin Velez [00:32:08]:
Remember, with any plant, the germination is Is a lot of the time triggered by the increasing day length and then the warming days, but still having cold nights. Sometimes they're at still below freezing and that's okay. Again, these plants are gonna come up when they know it's good for them to come up. So, many of them are just gonna germinate Right around the time that winter starts to transition into spring, I'm thinking about my brassicas. So when you see that they are starting to sprout, When the temperatures sort of start to settle in the spring and it's safe to expose the seedlings to overnight air temperatures Then you can go ahead and open your containers or open your jugs. Again, this is gonna depend on the plant type. So the temperatures at which you would normally start to set your plants out Side to harden off if they were being grown indoors. This is probably about the time that you're gonna wanna open those containers up and let them Continue to grow with the lid off.
Karin Velez [00:33:13]:
If the overnight air temperatures look like they're going to drop dramatically, then you can always just close those lids back Up without having to move anything, which again is just one of the benefits of this this whole winter sowing thing, I don't have to worry about bringing plants up from the basement out onto the back porch during the day and then lifting them and taking them all the way back inside again downstairs just to harden them off and doing this over and over again until it's time to move them out into the greenhouse and then into art. So this to me is just one of the biggest time savers of all and and savers of effort. So and then the only other thing I can think to say is that you're not I need fertilizer during the actual sewing process itself. This is why I said, you know, choose a potting soil or potting mix that doesn't have a A whole lot of nutrients in them. You know, we've talked about this before. All the nutrients that a seedling needs are in the Actual seed itself. Remember, it's a baby plant in a little package with a boxed lunch. That is what a seed is, and it doesn't need any outside nutrients in order to be able to Sprout do its thing.
Karin Velez [00:34:15]:
Once the seeds have germinated and you've got 2 to 3 sets of true leaves, Then you can begin to give it a little bit of feed if there isn't anything already in your potting mix or it's a very low nutrient mix. The thing is this is likely right around the time that you're gonna be transplanting. So you may not need to do this in the container. You may just wanna wait until you are actually transplanting And give it some nutrients then. If you do wanna do it within the container, maybe you've been delayed in transplanting. A slow release pellet is a really good idea. Any organic amendments because they're usually like low levels of nutrients, that's fine. If you're gonna use a chemical fertilizer or a chemical plant food, please make sure that you dilute it by at least half because you very well may burn those plants If that mixture is too strong, if it were me, I would just wait until I actually transplanted them and then give them a little bit of a boost as I was planting them into the ground.
Karin Velez [00:35:14]:
So let's talk about transplanting. Here is where we talk about that hunk of seedlings method. There it was. I knew I knew I could remember the name. Hunk of seedlings. Right? You're literally just taking the entire mass of the plants out of that jug, Separating the soil and the and the the root systems into 3 or 4 hunks of seedlings, and you're planting them. K. If they're very densely populated, you can worry about sending them out later on once they've sort of gotten established, and you can just take the Scissors and thin them out the way that you normally would.
Karin Velez [00:35:47]:
If you seated your your plants in the containers with the proper spacing, Like, how you would plant them out if they were, in, you know, individual cells, that's fine too. You're just gonna separate them in the soil with 1 plant per section and transplant them. Again, this is probably gonna be with your larger seedlings is the way that you would have done that, but I I mean, I like the hunk of seedlings method. It really just takes the effort out of it. So just make sure that the soil is moist Before you separate them and transplant them, it's definitely easier on the roots when you move them around. This goes the same with anything that we're transplanting, but specifically with this method. And then where you plant them is entirely up to you. You can put them into pots.
Karin Velez [00:36:28]:
You can put them into raised containers. You can plant them in in ground beds, whatever it is. The timing on your transplanting again, once your seeds or your seedlings, I should say, have gotten 2 to 3 sets of true leaves, this Is when you're going to go ahead and transplant them. In general, they're gonna be ready because they have germinated at the proper time And, and the weather should be ready for them. So unless you see something really extreme coming that would preclude you from transplanting them at that point, Just go ahead and transplant when they look like they're right. So I mentioned earlier spring sowing. So everything that we talked about really does work best for plants that you would be transplanting in the spring when the temperatures are still cool or cold. But if you are interested in doing this with more tender annuals the plants that, would be transplanted much later late spring early summer.
Karin Velez [00:37:22]:
You can use the same method. You just start them later. So rather than starting your jugs or your containers, You know, right around or shortly after the winter solstice, you're gonna put them out when the daytime temperatures are starting to warm up, But the overnights are still cool or cold. You just want to make sure that it's not going to be dipping below Freezing because we're talking tender annuals here, so even in their seed stage, they could be damaged, and certainly once they've already sprouted. So If you're gonna do this, just make sure that you are putting more ventilation into your containers because your daytime temperatures are gonna start to get much warmer much more quickly, and it can get too hot In those little containers and literally cook your seeds or your seedlings. So you're, you know, that greenhouse effect is gonna be way stronger. So make sure that you have a way to, to ventilate those containers. You know, again, this is kind of akin to cold frames, only smaller and cheaper.
Karin Velez [00:38:21]:
So I think it's a good way to not only save space and equipment inside, but it's also a really good way to get these seedlings started while you're Protecting them from wildlife, like things like squirrels and voles. If you usually, you know, plant, seeds into containers outside and wait for them come up but you find that the squirrels are digging them up and carrying them away. This is another really good way to sort of sort of get them to a size where it won't be as easy for the squirrels to, to decimate them. So, what things would we not want to winter sow? Like I said, we don't we don't wanna do tropicals. They're not conducive to this unless you are in a more tropical area, you know, zone 9, 10, where we're warmer where you guys are are growing year round, then you could use this method. That's fine, but you likely don't really have A very long, winter per se. So, you can plant just about anything. You also don't wanna do anything that is a bulb.
Karin Velez [00:39:17]:
No, acorns. Nothing that grows from a rhizome and nothing that you would want to root from a cane. These types of things are gonna be more prone to rotting inside one of these containers because there's just too much moisture In them, and anything that's kind of soft sided like a bulb or a rhizome or something is just going to rot so that you don't want to do, with winter sowing. Again, your best candidates are those cool season crops and anything that requires cold stratification, particularly, flowers or perennial native plants that require a long cold period in order to be able to germinate. I am super excited to try this method specifically for my spring brassicas. I Actually, had almost come to the decision that I was not gonna grow any broccoli or cauliflower this spring because It is just such a delicate dance of the timing between figuring out when to start them indoors And then getting them hardened off and then timing the planting to where it's not so cold that they're gonna freeze and die, But it's also doesn't suddenly get warm, so fast that they just decide to bolt. 95% of the time, my broccoli will bolt, And I end up just getting side shoots, which is fine, but they take up a lot of bed space in the spring for me to just be getting A handful of of florets off of each of them, so it just didn't seem like it was worth it. And then the cauliflower again is completely hit or miss.
Karin Velez [00:40:56]:
Sometimes I will get Great cauliflower, and sometimes I don't get anything because they bolt. So I think that this method It may make it easier for me to know, number 1, when the best time to transplant these out is going to be. If I can winter sow these In protected containers now and put them outside and then watch them. When they sprout and they get to where they have their 1st couple true leaves And they've been, you know, growing without their covers on for a little bit. I'm going to think that, yeah, they're ready to go in the ground even if They're smaller than what I would normally transplant them out. So I'm gonna kinda put my faith in this method and and see what happens, which means, of course, Me being me, I'm gonna have to do a side by side comparison. So, I will start some of the cauliflower and the broccoli indoors And do them with my regular method of sewing and growing them inside and hardening them off and transplanting them, And I'm gonna have to play it by ear. I don't know whether I will actually transplant them at the same time or if I will I will wait and do it like when I would normally do it and see which method is better.
Karin Velez [00:42:08]:
I don't know. We'll see. I will keep you updated because I this is definitely something that I I plan on tweaking and working with to see if it how successful I could be with it. So, if you want more information about this, like I said, the winter sewers group on Facebook. If you're a Facebook person, I will leave a link to that in the show notes so you can request to join that group. Tons of great information in there, people who have been doing this for years years years. The admins are all very familiar with Trudy and and how she developed this method, and they're in contact with her too. And so, you know, you're basically getting all the all the straight scoop from the horse's mouth, and it's it's fantastic.
Karin Velez [00:42:53]:
There's a lot to read in that group to give you information. You can also search, winter sewing and find resources like on YouTube and that sort of thing, but really that winter sewers group is Is a fantastic resource. Let me know if you're gonna try this because I would love to have somebody else sort of trialing this, and I would love to have a few people doing this alongside me in different growing zones because I would like to see how this works. If you're if you're in zone 8 in California or you're in zone, you know, 7, just South of me in Arkansas or something, try this and let me know how it works for you. Let's keep some notes and make some comparisons and see if we can't continue to do this and Make it, an even better method for getting, you know, our our seedlings off to a really, really good start for this gardening season. So, until next time, my gardening friends. Keep on cultivating that dream garden and sowing those winter seeds, and I will talk to you again soon.