
One of my goals this year for the garden is to focus a little bit more on the aesthetics of the garden, rather than just the functionality of it. I really feel like I can get more enjoyment from the gardens if I enjoy how they look and enjoy spending time in them not for just planting and weeding and harvesting, but just for the sheer joy of it.
One of the ways I think I can do this is by adding flowers. I am pretty adept and growing annuals from seed but this year I’m adding bulbs to the list. Spring is also a really good time to be adding perennials to the edible areas of the garden, vegetables and fruits.
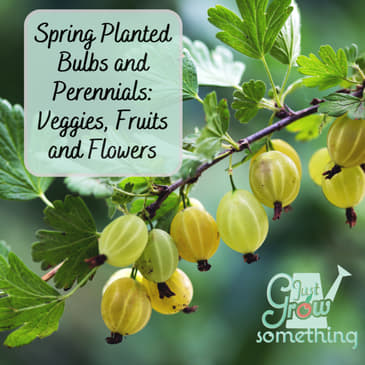
Today on Just Grow Something we’re talking about perennial fruit and vegetable plants best planted in spring and flowering bulbs planted in spring for summer blooms. We'll cover proper planting methods, timing, and first-year care to set you up for success. Let’s dig in!
References and Resources:
Save 20% on your Magic Mind subscription! https://magicmind.com/GROWSOMETHING20 with code GROWSOMETHING20
Seed to Sprout seed-starting course: https://www.justgrowsomething.com/indoor-seed-starting
Just Grow Something: https://justgrowsomething.com
Just Grow Something Merch and Downloads: https://justgrowsomething.com/shop
Just Grow Something Gardening Friends Facebook Group:https://www.facebook.com/groups/508637300354140/
Check out how you can become a patron on Patreon: https://www.patreon.com/JustGrowSomething
Bonus content for supporters of the Podcast: https://buymeacoffee.com/justgrowsomething
Amazon storefront: https://www.amazon.com/shop/justgrowsomething
[00:00:00] Spring is almost here. I don't know about you, but I am more than ready for warmer sunny days and digging in the dirt. One of my goals this year for the garden is to focus a little bit more on the aesthetics of the garden rather than just the functionality of it. This was already on my radar for this year, but even more so after my conversation with Bailey Van Tassel last week.
[00:00:21] I really feel like I can get even more enjoyment from the gardens if maybe I enjoy how they look and enjoy spending time in them not for just planting and weeding and harvesting, but just for the sheer joy and beauty of it. One of the ways that I think I can do this is by adding more flowers. Now I'm pretty adept at growing annuals from seed, but this year I'm adding bulbs to the list.
[00:00:47] Spring is also a really good time to be adding perennials to the edible areas of the garden, vegetables and fruits. So today on Just Grow Something, we're talking about perennial vegetable and fruit plants that are best planted in the spring and flowering bulbs that are planted in the spring for summer blooms. We'll cover proper planting methods, timing and first year care to set us all up for success. Let's dig in.
[00:01:13] Hey, I'm Karen and what started as a small backyard garden 20 years ago turned into a lifelong passion for growing food. Now as a market farmer and horticulturist, I want to help you do the same. On this podcast, I am your friend in the garden, teaching evidence-based techniques to help you grow your favorites and build confidence in your own garden space. So grab your garden journal and a cup of coffee and get ready to just grow something.
[00:01:41] So before we talk spring planting, I have to share a story with you. Something that just happened with my husband here recently and it's a good thing he doesn't listen to this podcast. So if you know him, I'm looking at you, my local gardening friends, do not tell him I told this story, okay? So I had to be out of town for almost three weeks taking care of my mom after she had open heart surgery. I was literally out of state.
[00:02:08] And of course on the farm, this is the time of year just like for everybody else for all of our indoor seed starting. Now, I, as you know, am a planner and all of my seed starting dates were all out on the calendar already. So, um, it, I was confident in going ahead and leaving town and allowing my husband to go ahead and take over those duties. All he had to do was look at the calendar and he would know what day, what needed to be started.
[00:02:35] And I even had in parentheses there, how many of those seeds needed to be started. So if you've not done a seed starting or transplanting calendar or your garden calendar in general, this is your call to do so because this literally saved my hide and made it a no brainer for him. So he kept up on the schedule and I came home and was checking on all the seeds and stuff down in our seed starting area. And I realized that our germination rate wasn't what I'm normally used to.
[00:03:05] Like normally we're getting about 90% or higher germination rates on all of our different sprouts. This year it's more like 75%. And I noticed part of it was we have been having problems with mice. Now we live in the country. Our seed starting area is down in the basement. And yes, mice get in and we do our best to set traps and make sure things are covered. But I did notice that in some of the cells it was obvious that they had been dug up.
[00:03:33] And so the seed had actually been eaten. And then also as some of the baby sprouts were coming up, you could see where they were getting pinched off of the top. So something was very obviously in there eating. And, you know, my husband didn't really recognize that for what it was. Because normally in previous years or at least in recent years, seed starting has been my jam. Like this is what I do. He's not used to having to look out for these signs and symptoms. He would have recognized it. So I chalked it up to, well, the mouse.
[00:04:02] And I'm going to have to figure out a way to maybe plant some more seeds and make up the difference. So we were working in the seedling room side by side. I was working on some stuff and he was sitting at the table behind me and he was starting more seeds for me. And like I said, it's been a long time since he's been involved in this portion of the spring farm chores. And when he did used to help me a lot with the seed starting, normally we would be side by side when this was happening.
[00:04:29] He's never really been in charge of like doing the seed starting on his own. So I'm working with some of the seedlings and plants and he's behind me seed starting. And I happened to kind of just kind of look over my shoulder to see, you know, his process and what he was doing. And I immediately noticed a couple of things right off the bat. Number one, he was planting the seeds way too deep.
[00:04:53] Like I even have a little chart at the front of our seed starting area that shows exactly how deep you're supposed to plant certain seeds of certain plant families. Quarter inch, half inch, eighth of an inch, just barely cover. All of those things are noted, right? And at the time, I think he was planting maybe the last of the pepper seeds. And I swear to you, I think these were in like an inch in the soil, which is twice as deep as they need to be, if not more.
[00:05:20] So I casually mentioned that to him, you know, hey, maybe you want to do that this way in an effort, you know, to not hurt his feelings, but also explain the alternative method to this and how it would be more effective. I also noticed that the seed starting mix was way too dry, like really dry. So I mentioned that, you know, we might want to soak those first before doing it. And also like, you know, the trays weren't being covered when they were put under the lights or onto mats.
[00:05:49] And so they were drying out really, really quickly. And so there was all these different things. And it was just, oh, it was, I was having such a hard time, like not coaching him and say, no, we probably ought to do it this way or no. I was trying to be very gentle. And finally, I just looked at him really jokingly and said, babe, I think you need to take my seed starting course.
[00:06:12] But that, this man has been doing this with me for 18 years. And for me to tell him that he needed to take seed to sprout after all this time, yeah, he was not happy. I think he gave me the silent treatment for like the next three hours. But in his defense, he has not done this in a really long time.
[00:06:35] So I promise you, if you take my seed to sprout course, you are going to apparently be more equipped than my husband to get a better germination on your seedlings. So that's my little story for this week. I'm hoping that he doesn't hear this. But it was all in fun. And, you know, I know he knows what he's doing. He just forgot a little bit of it. That's all. Anyway, speaking of promises, I promise you that seed to sprout is going to work for you.
[00:07:03] Our partners at Magic Mind promise to only use the world's best suppliers to require rigorous testing of every ingredient sent to them for every production run. And they will readily provide certificates of analysis for their ingredients to anyone who requests them. They also promise to inspect every bottle of Magic Mind by hand and to test every batch of Magic Mind that they produce in their lab.
[00:07:29] Their goal is to make the best mental performance beverage on the planet. And they promise to do it the right way for everyone involved, even if it means going above and beyond industry standards. Of course, these promises are reflected in their money back guarantee. They refund 100%, no questions asked, without asking for the bottles back. So if you are ever not satisfied with the product, it's easy peasy, lemon squeezy.
[00:07:57] Plenty of reasons to give it a try with zero risk. Get your Magic Mind subscription started and get my happy little green productivity shot delivered to your door by going to magicmind.com slash grow something 20 and using code grow something 20 at checkout to save an additional 20% off off the already discounted subscription price. Magic Mind. Magic Mind.com slash grow something 20 with code grow something 20.
[00:08:25] The link, as always, is in the show notes. So spring is a prime time for planting a lot of our perennials. The soil is warming up. Water is usually pretty plentiful depending on where you are in the spring. And plants have basically a full growing season to really get themselves established. So the first one we're going to talk about is asparagus.
[00:08:53] Generally speaking, asparagus, you are going to get dormant crowns in the early spring. And those benefit from the cool soil to be able to allow them to establish a strong root system before the summer heat sort of kicks in. With asparagus, you want a very sunny, very well draining location. You need to dig a trench about 8 to 12 inches deep and then amend it really well with compost. Once you put those crowns in there, you want to spread the roots out.
[00:09:21] Just fan them out inside the trench. And then you want to cover it with a few inches of soil. So as those shoots grow, you're going to gradually sort of backfill that trench to allow them to be planted that deeply but still be able to reach out and do what they do. We don't ever harvest asparagus in the first year. Generally speaking, if you buy one-year crowns or first-year crowns, you're going to want to wait at least two more seasons before you actually harvest. So we don't want to be harvesting until the third season.
[00:09:50] So if you buy second-year roots, then you can go ahead and harvest lightly in that third year without a problem. And then the fourth year, that is when we really start to get a full harvest. For the first year, you want to make sure that you keep that soil consistently moist but not waterlogged. Again, you do not harvest them in the first year. You want those plants to focus on root development. We do, however, want to mulch.
[00:10:14] We really do want to keep the competition from weeds down when it comes to asparagus because they don't compete well, especially if you have like grasses or something that are growing in there. So you really want to mulch to suppress those weeds and also to retain the moisture. So the second one on my list is rhubarb. Rhubarb establishes really nice deep roots in the spring before the heat of the summer kicks in.
[00:10:38] You want to plant dormant crowns or divisions, however you're getting them, in a full sun space. You also want to space those plants about three to four feet apart because these plants will get big. You want to plant them just so the buds are just above the soil surface. And you do this in the early spring as soon as the ground is workable. Again, that first year care is going to involve keeping these plants well watered, especially during dry periods.
[00:11:07] Don't harvest the stalks the first year. You want to give them a chance to settle in same way as the asparagus. And then again, apply mulch to control the weeds and retain the moisture. The third one is Jerusalem artichoke. This is Helianthus tuberosus. The tuberous roots will benefit from an early spring planting to get them to maximize their growth before the summer heat. These tubers get planted about three to five inches deep and they're spaced about 12 inches apart.
[00:11:33] Once again, full sun here is ideal for this plant for best tuber production. Early to mid spring is fine for planting these. You do want to water the water consistently, but you do want to avoid overly wet soil. So make sure you're planting it someplace where it gets good drainage. These plants will tend to crowd. So you might want to thin them out if they start to get too crowded in that first year. And then you will be able to harvest after the first frost in the fall.
[00:12:04] Now Jerusalem artichoke is not a perennial in every area. And I should make that caveat. Not all of these are perennials in every location, but the majority of them are. Just make sure that you are looking up what is perennial in your zone. Some of them can just be grown as annuals. Number four would be horseradish. So you generally plant horseradish from root cuttings. And they grow best when they are planted in cool soil and have an entire season to get established.
[00:12:32] The thing that's kind of different about horseradish is you plant the root cuttings at about a 45 degree angle. And you drop them in at about four inches deep. And you want to leave at least 18 inches in between the plants. These again are being planted somewhere between early and mid spring. Moist soil, but not soggy. And then you only harvest in the late fall during that first year. Next up is Egyptian walking onions. These are planted in the early spring when the soil is workable.
[00:13:01] You can actually plant these a little bit later so long as you're able to get those transplants to sort of maintain their moisture while waiting to go in the ground. I was gifted some that I actually ended up planting in the very, very late spring, almost at the early part of summer. And they did just fine. You just want to make sure you have a well-drained location in full sun. Plant those little bulbs or the divisions, however you're getting them, about two inches deep and about six inches apart. Moist soil, not soggy.
[00:13:30] Mulching does help to suppress those weeds, especially depending on where you're planting them. Um, the top sets or the little bulblets that form on the stalks of Egyptian walking onions. These are the ones that you allow to mature and they drop for self-propagation. So that's kind of like they'll either, they'll either drop or the whole plant will bend over and then you'll have a new one come up. So this is why they say they're walking onions because they sort of spread in that manner.
[00:13:58] They walk along in the bed, which is why that if you don't want these to spread, you want to kind of put them in a contained bed. Otherwise they might tend to get a little bit out of control. So spring is also the ideal time to plant a lot of perennial small fruits and berries. Again, the cool weather is kind of helping those roots get established before the summer heat and the plants will get a full growing season to sort of settle in before it's time to go dormant for the winter.
[00:14:24] The first one and probably one of the most popular ones is strawberries. So when you're planting spring planted strawberries, they generally are going to be bare root again, dormant versions of this. So you, you know, can do June bearing varieties. You can do ever bearing or day neutral varieties. If you do, you know, plant in that first year, the common wisdom is that you should pinch off the blooms
[00:14:48] and not allow any fruit to bear in that first year in order to allow those fruits to really get their, or those plants to really get their roots established and come back even stronger the second year. I do see this being particularly important for like June bearing types because they do put on all their fruit pretty much all at once. But for the ever bearing or the day neutral ones, I don't see this to be as necessary.
[00:15:14] You can pinch off a lot of those early blooms to allow the plant to get more established. But then as you get towards the midsummer, if you go ahead and just let them do that, then you'll actually get a little harvest, you know, in the late summer and the early fall from those ever bearing or those day neutral varieties. The big thing is just to make sure you have a sunny location, well draining, fairly fertile soil.
[00:15:36] When you plant bare root crowns, you want the crown slightly above the soil level and you want to spread those roots out in the same way that we do with the asparagus. You just kind of fan them out before burying them. You want those plants about 12 to 18 inches apart in rows that are about two to three feet apart. Or you can do them like in a big mound and, you know, you could put like 50 of these plants just sort of spaced about a foot apart all around the mound.
[00:16:01] Of course, if you're doing them in, you know, raised planters or containers, then you can sort of do what we do out in the field, which is a matted row system. So we have raised beds where the strawberries are planted initially in those two to three foot rows apart from each other. And then they sort of fill in from there. We let the runners go ahead and do their thing. This especially works for ever bearing and day neutral types. And you just kind of let it all fill in and do its thing.
[00:16:28] When to plant strawberries in the spring really is just as soon as the soil is workable. So it's not super saturated, but it's not, you know, still frozen, obviously. You also don't want to wait until it's bone dry. And water regularly, keeping the soil evenly moist for that first year. Again, for the June bearing varieties, you definitely want to remove those flowers for the first year to encourage that root growth.
[00:16:52] On the ever bearing or the day neutral varieties, then I would say, yeah, do that up through about the midsummer and then go for it. Let yourself have a few strawberries because it's worth the work, right? You get a little reward there. Strawberries absolutely do appreciate mulch around the plants to suppress the weeds and retain the moisture.
[00:17:11] If you are allowing those runners to root in, this is when you might want to pull the mulch to the side or be very specific about where you allow those runners to land so that you can sort of fill in your strawberry bed for the next season. Next up is raspberries. If you have seen in like the garden centers or even in your hardware store, you have these dormant bare root plants that are in like a plastic bag with a little box around them. This is what they call a bare root.
[00:17:39] You can also buy potted raspberry plants and they all do very well when they're planted in the early spring. The key is to plant them before bud break. So if you have them in a pot or a container and you've gotten them from a nursery and they're already starting to break their buds, you might want to just keep them in the container for this season and allow them to fruit and do what they're going to do. And then you either plant them in the fall or put them in a protected place over the winter and put them back out again.
[00:18:08] Normally your dormant bare root varieties aren't or versions of this are not going to break bud that early, but it's just something to watch for. Raspberries like full sun, again, well draining soil. You've got a lot of different versions of raspberries now. You have red and yellow raspberries. Generally speaking, you want these to be about two feet apart, but you want, if you're doing them in rows, you want those rows to be about eight to 10 feet apart.
[00:18:34] If you're doing black or purple raspberries, these should be spaced about three feet apart, but their rows can be closer together about six to eight feet. If you're mixing them, then generally speaking, just do them three feet apart in whatever way you can and let them go from there. The big thing about this is when you're planting them, you want to dig a hole that is deep enough for those roots to spread out and plant them so that the crown is level with the soil surface.
[00:18:59] So generally speaking, wherever the soil level is in, then keep that soil level even with the ground when you put them in the soil. If it's a bare root plant, then just look for that crown and make sure that you keep it level with the soil surface. Early to mid spring, again, essentially when the soil is workable is good for these.
[00:19:24] For the first year, you want to water them, you know, our standard less frequently, more thoroughly. So once a week, watering really, really deeply to help those roots dig down into the soil is a really good idea. You might need to trellis or stake some varieties of raspberries, usually specifically the red or the yellow types, unless you want to have this sort of wild bramble look, which is perfectly fine. That's up to you.
[00:19:54] Once again, mulch is going to be your friend here. You want to control those weeds and retain the moisture, especially for that first year while they're getting established. When it comes to pruning with raspberries, you do not want to prune the first year canes. But after fruiting, you can prune the ones, like if you have a summer bearing type of raspberry, you can prune the spent flora canes. Those are the ones that actually did produce some fruit. Those can be clipped to the ground and cleared off.
[00:20:24] Very similar to raspberries is blackberries. Okay. These are a little bit more vigorous than raspberries usually, especially depending on the area that you are in. But again, they are best with a spring planting. Blackberries, in my experience, tend to be a little bit more forgiving in terms of when they get transplanted. So if you don't get them in right away or if you have a bunch of stuff that has to happen all at once in the spring and you need to wait on something, blackberries would be one that I would say, yeah, you can go ahead and wait on them.
[00:20:52] Again, they like a full sun site, well-draining soil. Generally with blackberries, you're going to want to space them about three to five feet apart and you want them in rows that are eight to ten feet apart. This is going to depend on the type of blackberry that you're growing. But in most instances, they're going to take up a lot of room or you're going to have to put up a trellis of some sort and train them to that trellis to make them, you know, kind of stay in their own area.
[00:21:19] Whatever you do when you're planting them, just make sure that you're setting the plant at the same depth as they are in the nursery container. Or if you're planting from bare root crowns, just make sure they are just above the soil level. The care for them in the first year is going to be about the same as raspberries. You want to water them deeply once a week. Again, we want those roots to search downward for the water. So we want really deep waterings. Add a trellis if you're going to need it.
[00:21:47] Mulch really heavily to suppress those weeds and conserve that moisture. With most fruits, again, especially the cane fruits, you may not want to allow those plants to bear fruit in the first year in order to be able to focus energy on root development. But if you are in an area where you know blackberries tend to be very vigorous, like here in west central Missouri, we have wild blackberries like everywhere. I know Oregon, same thing. So if that's the case, then you may be able to just go ahead and let them bear fruit.
[00:22:16] And it's not going to harm them at all. Just understand what works best for your area. Now, number four would be blueberries. And technically speaking, you can plant blueberries both in the spring and in the fall. But if you really want to give them a chance to get really good root establishment, then blueberries are going to prefer that cooler, moist conditions in the spring.
[00:22:38] This is one where, yes, you're going to choose a sunny spot, but you also are going to want to make sure that you are testing the soil pH because blueberries really do prefer that more acidic soil. We're talking a pH of between 4.5 and 5.5. If your pH is too high in the area where you are intending to plant those blueberries, then you want to amend that soil with some sulfur or with some peat moss to bring that soil pH down.
[00:23:05] Depending on the variety is going to depend on how far apart you space your plants. So 3 to 5 feet apart is the general consensus on most varieties. You can also do these in containers. I have had blueberries do very, very well in large pots and they come back with no problem. The one thing about blueberries is when you go to plant them, you want to dig a hole that is twice as wide as the root ball.
[00:23:30] So mix in some organic matter like some compost or something and then plant it at the same depth as it was in the nursery container. For the first year, water consistently, keeping the soil moist but not soggy. This is the difference with blueberries rather than like our cane berries. They really do like to have that consistent soil moisture. They don't like to be dried out in between. Mulch, especially if you have like pine needles or pine bark.
[00:23:55] If you can mulch with that, that is going to help to maintain that soil acidity a little bit, make it easier to manage. Once again, if you really want to encourage that root growth, you want to remove the blossoms the first year to prevent that fruiting. And if you are growing multiple plants, make sure that you are mixing cultivars so you get cross pollination and better fruiting. Number five on our list of perennial fruits would be gooseberries and currants. They are both in the same family. These are very cold hardy fruits.
[00:24:22] They establish really, really well when they are planted in the early spring. You want full sun to partial shade. So if you are somebody who wants to grow fruit and you don't really have a whole lot of full sun spaces, gooseberries and currants are actually a good option for you. You want the plants to be spaced about three to five feet apart in rows that are about six feet apart. So if you are doing a lot of these, make sure that you're giving them plenty of space. And you just want to plant them at about the same depth as they are in the nursery pot.
[00:24:51] This is another one that likes to be planted in the early spring before the buds break on the plant. This is your best timing. Make sure during that first year that you are watering consistently, especially in dry spells. Mulch, mulch, mulch. I'm going to keep saying it over and over again. You might want to lightly prune these guys after planting just to encourage that branching to happen. And then once again, better long-term fruiting if you go ahead and remove the flowers during the first year.
[00:25:20] Another one that's really popular and easy to grow here in West Central Missouri is elderberries. These can establish really nice deep roots if you plant them in the spring before the summer growth. They love full sun. They will do okay in some part shade as well. They won't be as big and they won't produce as much. So if you can put them in full sun, great. I tell you, I have some that are in full sun that reach the top of my barn.
[00:25:48] And I think that's like 10 foot tall to the roof line. So they will take up some space. So make sure that you're spacing them about 6 to 10 feet apart, depending on the variety. This is another one where you dig the hole twice as wide as the root ball. Or you can get cuttings from somebody else and just allow those little cuttings to start to root. And then you can go ahead and pop those in the ground. Elderberries aren't really, really fussy. So there's a lot of kind of leeway for you to kind of mess up when you're planting them.
[00:26:17] Early to mid spring is the best time to get these planted. But you can also plant these later in the season and they will get established just fine if you're in an area where elderberries thrive. So in my area, you can pretty much pop elderberries in the ground almost any time of the year. And they're going to go ahead and survive. They just do really well naturally here. That first year, water really deeply. Mulch to conserve moisture. Prune lightly in the first year if you want to shape it. But don't do any really, really heavy pruning.
[00:26:46] And for best fruiting, it's usually recommended to say that you need two different cultivars for cross-pollination of elderberries. I have not found this to be the case. And I don't know if it's because the elderberries that I grow are the ones like the birds naturally spread. And I had one that just, you know, showed up in my by my barn one day. And for the years, we actually cut it down because we thought it was a weed of some sort or an invasive of some sort. And then at one point I let it go.
[00:27:15] And I said, wait, wait, wait, don't cut that anymore. It's an elderberry. I want to keep that. And it was just one plant. There aren't any other plants anywhere nearby. The next one is like, I don't know, it's got to be at least 100 yards away, if not more. And it's going to be the same cultivar, right? Because they're all the wild ones. So I don't necessarily agree with like you have to have two different cultivars for cross-pollination. But if somebody knows better than me, let me know. Because like I said, I'm just kind of growing the wild ones.
[00:27:44] And then finally, hask cap berries. These are also known as honeyberries. They are another cold hardy plant that benefits from spring planting. Again, another one that likes full sun with well-draining soil. You want to plant these about three to five feet apart, keeping them at the same depth as the nursery pot. Another one that you want to plant in the early spring before the buds break. This is another one that likes really moist soil during the first year. You can prune it lightly after the first year.
[00:28:13] And another one where it's recommended to plant at least two cultivars for better pollination. Okay, so that's fruit and vegetables. Or vegetables first and then fruits. Whatever it is. It doesn't cover all of them. But those are some of the most popular. Now, what about bringing some more beauty and color into the garden with spring-planted flowering bulbs?
[00:28:35] So, unlike fall-planted bulbs like tulips and daffodils, a lot of the bulbs that we plant in the spring are actually summer flowering ones. So, it seems to me that the ones that you plant in the fall are the ones that sprout in the spring. And the ones that you would plant in the spring are the ones that flower in the summer. I think that's about right.
[00:28:59] If I have any more, you know, knowledgeable flower people out there when it comes to bulbs, let me know if I'm wrong. But this is my understanding. So, the summer flowering bulbs kind of need that warm soil in order to be able to thrive. So, the first one is dahlias. And again, a lot of these are not going to be perennials. Or they might be perennial in your area. But maybe not. I know a lot of them are not in my area. Which is why they're sort of, some of them are planted, you know, in the spring. They flower all summer.
[00:29:27] And then people will dig them up in the fall to store them away in their basements. And then plant them again in the spring. That seems like a whole lot of effort for me. So, I'm going to try to find some that are planted in the spring specifically that will be perennials. And then also, of course, I'm going to work on maybe doing some for the fall. So, for the spring planted ones, dahlias. Dahlia tubers are not frost hardy. And so, they need to be planted once the soil has already warmed.
[00:29:53] So, we want like after our first or our last frost date. So, dahlias need a full sun location. They like rich, really well draining soil. The tubers should be planted about four to six inches deep. You want the eye facing upward. And space them about to 12 to 18 inches apart. Again, we want to wait until after the last frost. And we actually a little bit longer than that. Because they want the soil consistently above 60 degrees Fahrenheit. So, make sure that you're using your soil thermometer to check on these.
[00:30:22] Once they're planted, you want to water them lightly until the shoots appear. And then you want to increase watering at that point. If you plant the really, really tall varieties of dahlias, you might need to provide a stake. And then, if you deadhead these, cut off the spent blooms. That is going to encourage continuous blooming. The second one would be gladiolas. So, gladiolas are planted by corms. And so, those corms, C-O-R-M-S, corms, need warm soil to sprout.
[00:30:48] These, you're going to plant about four inches deep, about four to six inches apart. Again, these ones like full sun. You want to do this after the last frost has passed. This is one that likes the soil to be moist, but not waterlogged. And this is also one where you might consider doing like a succession planting. So, we always talk about succession plantings in terms of like our veggies, like lettuces and radishes and that sort of thing. You can also do this with certain flowers. And gladiolas is one of them.
[00:31:17] If you plant the corms or you stagger those plantings about every two weeks or so, you'll have more of a continuous blooming period. The third one on this list is lilies. So, if you have some lily varieties like the Asiatic and Oriental lilies, absolutely do very well with the spring planting. The rule with these lily bulbs is that you want to plant them three times their height deep, if that makes sense.
[00:31:42] So, whatever size the bulb is, then three times that is how deep you want it planted. And you want them planted with the tips up, spaced about six to eight inches apart. Early to mid-spring is fine with these. Water them consistently and then mulch them to retain that moisture. And then, again, if there are really tall varieties, you might need to stake them. Number four is begonias. Begonia tubers require warm temperatures. They cannot take a frost.
[00:32:10] So, make sure that you are waiting until well after the last frost before you plant begonia tubers in the spring. You can start these tubers indoors about six to eight weeks before you plant them outside. You want to make sure that you are planting with the concave side up, just below the soil surface. Keep that soil moist, but well-drained. We don't want it waterlogged. And you can provide filtered light or part shade for begonias until they get going.
[00:32:38] And then you can put them out wherever. Begonias are infamous from planting everything from full sun to full shade and everything in between, which is why they're almost foolproof in a lot of gardens. So, they absolutely will take that partial shade and be very, very happy with it. Number five is calla lilies. And number six is canna lilies. So, calla lilies, they thrive in warm soil. They do not tolerate frost. You want to plant these rhizomes about three to four inches deep in well-drained soil. Water consistently.
[00:33:08] Avoid those soggy conditions. Basically, the same thing goes for the canna lilies. Oftentimes, you are going to have to provide staking for the cannas once they start to go, especially for those taller varieties. And then number seven is elephant ear. The thing about elephant ear is the soil needs to be warmed to a minimum of 65 degrees Fahrenheit in order for these guys to do very well.
[00:33:34] And you want to plant the tubers about two to four inches deep in a very rich, well-draining soil and space them about two to three feet apart. Water them frequently. If you are in a really, really hot climate, you are going to want to provide them with some shade. And then if you want these guys to keep going and you are in a colder region, you can actually lift those bulbs in the fall and store them over the wintertime if you want to plant them again the next year.
[00:34:01] So I am going to be playing around with these spring-planted bulbs this year and probably some fall-planted ones too. So I will attempt to take you along on the ride. I will do some videos on this and post them to Instagram Reels and also over to Facebook on Shorts so you can kind of see what's going on. I might do some longer videos too. Spring is the perfect time to set up not just your summer flowering bulb display, but also your perennial fruits and vegetables in your garden.
[00:34:28] So whether you're growing asparagus for years of harvest or you just want dahlias for a beautiful, stunning summer display, just make sure that you are planting them properly and you're waiting to the proper time to plant them and that is going to set you up for success. So check your local last frost dates. Check your soil temperatures. Check with your local extension service. They always have really good information about your area and what is going to do best for your garden.
[00:34:57] Until next time, my gardening friends, keep on cultivating that dream garden and we'll talk again soon. You want the plants about 12 to 18... Blah, blah, blah, blah, blah. Buy cotted rosberries. Rosberries? Not snozzberries. Rosberries. Probably do some videos and stuff on that that I'll paste to paste. Boy, I'm having all kinds of problems today. Well...