
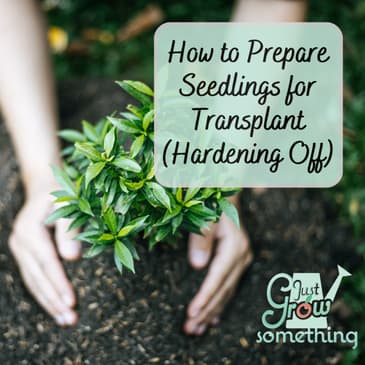
I will never forget the first time I successfully started my own transplants from seed indoors and they actually looked healthy and strong. I was so excited to get those tomato plants out into my garden and lovingly transferred them from their little pots out into the garden, got them all watered in, and was so excited about the money I had just saved by doing it myself instead of going to the garden center.
Three days later those plants were flopped over flat on the ground, looking like they had seen a hard frost over night even though I knew they hadn’t. Those plants took weeks to bounce back and started producing way later than they should have. That very next year I did it again, only this time it was cabbage and the plants got completely sun bleached and they never bounced back at all. They dropped most of their leaves and just didn’t grow.
In both cases, I had failed to give the plants adequate time to acclimate to their surroundings, moving them way too quickly from the indoor seed-starting setup with its perfect lighting, perfect temperatures, and protection from the elements right out into the full sun, gusting winds and wild temperature swings typical for our gardens here in the spring.That process of acclimating our plants to the outside world is called hardening off and nobody had every told me anything about this. It seems obvious if we think about it in terms of anything else in our world. If we live somewhere warm and travel someplace cold, our bodies need to time to acclimate to our new surroundings or need adequate protection to help with the transition. If we need it, our little plants need it, too.
So, today on Just Grow Something we’re walking step-by-step through how to transition your plants into the garden, whether you started them yourself or you bought them somewhere else. Will it always end in disaster if you don’t do this, no, not always. But the number of times it has ended in disaster for me has me checking myself every time I think I don’t have the patience to wait a week before putting my plant babies in the ground. Let’s dig in.
References and Resources:
Save 20% on your new own-root rose plant at HeirloomRoses.com with code JUSTGROW
Just Grow Something: https://justgrowsomething.com
Just Grow Something Merch andDownloads: https://justgrowsomething.com/shop
Just Grow Something Gardening Friends Facebook Group:https://www.facebook.com/share/g/18YgHveF5P/
Check out how you can become a patron on Patreon: https://www.patreon.com/JustGrowSomething
Bonus content for supporters of the Podcast: https://buymeacoffee.com/justgrowsomething
Amazon storefront: https://www.amazon.com/shop/justgrowsomething
Hosted by Simplecast, an AdsWizz company. See pcm.adswizz.com for information about our collection and use of personal data for advertising.
00:00:00
I will never forget the first time that I successfully started
00:00:04
my own transplants from seed indoors and they actually looked
00:00:08
healthy and strong. I was so excited to get those
00:00:12
tomato plants out into my garden and I lovingly transferred them
00:00:16
from their little pots out into the garden, got them all watered
00:00:20
in, and I was so excited about the money that I had just saved
00:00:22
by doing it all myself instead of going to the garden center.
00:00:26
Three days later those plants were flopped over flat on the
00:00:29
ground looking like they had seen a hard frost overnight.
00:00:32
Even though I knew they hadn't. Those plants took weeks to
00:00:36
bounce back and they started producing way later than they
00:00:39
should have. That very next year I did it
00:00:42
again, only this time it was cabbage and the plants got
00:00:45
completely sun bleached and they never bounced back at all.
00:00:49
They dropped most of their leaves and they just didn't
00:00:52
grow. In both cases, I had failed to
00:00:56
give the plants adequate time to acclimate to their surroundings.
00:01:00
I moved them way too quickly from their indoor seed starting
00:01:04
set up with it's perfect light and it's perfect temperatures
00:01:07
and protection from the elements right out into the full sun with
00:01:11
the gusting winds and the wild temperature swings that are very
00:01:13
typical for our gardens here in the spring.
00:01:16
That process of acclimating our plants to the outside world is
00:01:21
called hardening off. And nobody had ever told me
00:01:25
anything about this. It seems obvious if we think
00:01:30
about it in terms of anything else in our world.
00:01:33
I mean, if we live somewhere warm and travel someplace cold,
00:01:37
our bodies need time to acclimate to our new
00:01:40
surroundings or need adequate protection to help with that
00:01:44
transition. If we need it, our little plants
00:01:47
need it too. So today I'm Just grow
00:01:49
something. We're walking step by step
00:01:52
through how to transition your plants into the garden, whether
00:01:56
you've started them yourself or you bought them somewhere else.
00:01:59
Will it always end in disaster if you don't do this?
00:02:03
No, not always. But the number of times it has
00:02:07
ended in disaster for me has me checking myself every time that
00:02:11
I don't think that I have the patience to wait a week before
00:02:14
putting my plant babies in the ground.
00:02:16
Let's dig in. Hey, I'm Karen and what started
00:02:19
as a small backyard garden 20 years ago turned into a lifelong
00:02:23
passion for growing food. Now as a market farmer and
00:02:26
horticulturist, I want to help you do the same.
00:02:28
On this podcast, I am your friend in the garden, teaching
00:02:31
evidence based techniques to help you grow your favourites
00:02:34
and build confidence in your own garden space.
00:02:37
So grab your garden journal and a cup of coffee and get ready to
00:02:39
just grow something. OK?
00:02:45
I know we've talked about this before.
00:02:47
In fact, I'm pretty sure we talked about this at the same
00:02:50
time last season. And you know what?
00:02:52
That's OK. It's important because even very
00:02:55
experienced gardeners like myself tend to get overexcited
00:03:00
about putting our plants out into the garden on that
00:03:03
beautiful spring day when the weather is perfect and the soil
00:03:06
is perfect and the plants are ready and we're ready.
00:03:09
And so we just grab them and we go.
00:03:12
Except the feeling of walking out to the garden and seeing
00:03:15
those beautiful little seedlings just completely flopped over and
00:03:19
fighting for their life will fill you with such instant
00:03:24
regret. And at the same time you're
00:03:25
singing Britney Spears because oops, you did it again.
00:03:28
So let's not do that, OK? And if you're brand new to
00:03:32
gardening and you've not experienced that, then we're
00:03:34
just going to try to prevent it. So hardening off is the process
00:03:41
of gradually exposing our very young plants to the specific
00:03:46
elements that are in our garden before we get them planted into
00:03:51
their permanent homes. This is especially important for
00:03:54
plants that we have started indoors ourselves or that have
00:03:57
been grown previously in a greenhouse, whether that is from
00:04:00
seed or from cuttings. Because the conditions inside in
00:04:05
our house, in our little seed starting area, or the conditions
00:04:08
in a greenhouse are vastly different from those outside.
00:04:12
And too much sun and wind too quickly can cause the plants to
00:04:16
be stunted. It can cause transplant shock
00:04:19
and it can cause damage to their leaves, which is going to reduce
00:04:23
that photosynthesis or even cause the plants to die.
00:04:27
So if you as a gardener have never hardened your plants off
00:04:31
before and you think that you have never experienced any
00:04:35
problems for this, I invite you to think back.
00:04:38
It took me a while to figure out what was going on with my
00:04:43
plants. And even years later, when I had
00:04:46
only been hardening off some of my transplants and not all of
00:04:50
them, if I went back and I thought about it, I realized,
00:04:55
yeah, a lot of my plants were actually having this major
00:04:58
transplant shock from not being hardened off.
00:05:00
I just wasn't recognizing that that's what it was.
00:05:04
So if after planting your plants in the ground, you have ever
00:05:09
seen yellowing or even very bleached, almost white leaves on
00:05:14
your plants within a few days of transplants, with the leaves
00:05:18
maybe dropping completely off the plants.
00:05:20
Or if you've seen what we refer to as leaf scorch, which is
00:05:23
where the edges of the plant leaves turn brown and brittle,
00:05:28
the plants have ever looked extra dark or even purple, like
00:05:32
they were just subjected to a freeze.
00:05:34
And you know there wasn't a frost the night before.
00:05:37
If you've ever had seedlings that wilt over just completely
00:05:41
on their sides and they don't perk up even when they've had
00:05:44
enough water, or if you've just had overall stunted growth, or
00:05:49
seedlings that just kind of seemed to sit in the garden for
00:05:52
several weeks without growing at all, yeah, guess what?
00:05:56
All of those are signs of severe transplant shock, and that can
00:06:00
generally be avoided with proper hardening off and the proper
00:06:03
timing of wind to plant those seedlings.
00:06:06
Yes, sometimes transplant shock is going to happen no matter
00:06:10
what, but we can do our best to prevent it and give our little
00:06:14
plants the best chance. And the steps that I'm sharing
00:06:17
are just as important with plants that you bring home from
00:06:20
elsewhere as they are with the ones that you've grown yourself.
00:06:23
There is no guarantee that those plants that you've bought at the
00:06:26
nursery or at the farmers market have been conditioned to take
00:06:30
full sun and wind and rain and whatever else your garden is
00:06:34
going to throw at them. It's a really, really lousy
00:06:38
feeling to spend a bunch of money on some really nice plants
00:06:42
and then put them outside and then just watch them succumb to
00:06:45
the elements in less than a week.
00:06:47
So even if you're not starting your own transplants yourself,
00:06:52
you should still be acclimating those ones that you purchase to
00:06:55
your garden conditions before they go in the garden.
00:06:58
So what are we actually doing physically to the plants when we
00:07:03
harden them off? Number one, we're thickening the
00:07:06
cuticle on the leaves so they're going to lose less water when
00:07:10
they're exposed to the elements out in the garden, especially
00:07:13
like wind and the sun. Second, we're strengthening the
00:07:17
stems so they are better able to stand up to the wind.
00:07:21
Thirdly, we're helping the plant to be more temperature party, so
00:07:25
it's better prepared for the wild temperature swings that can
00:07:28
occur from the daytime into the overnights in a lot of areas,
00:07:31
especially in the spring. And then finally, we're working
00:07:34
to prevent that transplant shock, which you know, can cause
00:07:38
plant growth to completely stall out or even cause plants to die
00:07:41
from the sudden change in temperature and sun exposure.
00:07:45
Now before we go step by step into how to do this, I want to
00:07:49
mention that Heirloom Roses is back as a sponsor of the podcast
00:07:55
this season. I am super excited about this
00:07:57
because I have now seen first hand the quality of their
00:08:02
plants. I got a rose Bush from them
00:08:04
toward the end of the season last year specifically to plant
00:08:06
in a container. It bloomed beautifully within
00:08:10
about two weeks of being planted in the fall, and I was super
00:08:13
impressed with that. But I figured our harsh Missouri
00:08:16
winter was going to be the true test of how good their own root
00:08:20
roses are. So I pushed the pot up against
00:08:22
the side of my house once the plant went dormant, and I
00:08:25
mulched in and around the pot with straw, and I left it there
00:08:28
all winter. So since I'm in the process of
00:08:31
hardening off a lot of my seedlings to go into the garden
00:08:34
right now, I thought it would be a good time to pull that pot
00:08:37
away from the house and get it back out into the sun and kind
00:08:40
of allow that rose to come out of dormancy.
00:08:42
Well, wouldn't you know what? When I went to go move it out,
00:08:45
there were already leaves opening up on that Bush and it
00:08:48
hadn't even been out in the sun at all yet.
00:08:49
So I'm already thinking really good things about this rose, and
00:08:54
I'm expecting, you know, like really good things.
00:08:57
And I'm excited to see what happens as it starts to bloom
00:08:59
this season. If you want to experience the
00:09:02
charm of heirloom roses for yourself, head to
00:09:05
heirloomroses.com and use code Just Grow at checkout to save
00:09:09
20% on your own rose. Plant heirloomroses.com with
00:09:14
code Just Grow and the link will be in the shown UPS.
00:09:17
OK, step by step, how do we harden off our transplants?
00:09:22
You really want to do this and you want to kind of plan this
00:09:25
according to whatever the preferred growing conditions are
00:09:29
for whatever it is that you're transplanting.
00:09:31
So generally speaking, we're going to want daytime
00:09:33
temperatures that are staying above 45°F or 7.2 Celsius for
00:09:39
our cool weather crops and then at least 50 Fahrenheit or 10
00:09:43
Celsius for our warmer weather plants.
00:09:45
Now I actually prefer those air temperatures be closer to like
00:09:49
55 to 60°F consistently, but that's because I wait until the
00:09:54
soil temperatures are higher. So this is all about personal
00:09:56
preference for whenever you are transplanting your plants, no
00:10:01
matter what. You do actually want to start
00:10:03
this process though, about 7 to 10 days before you want to put
00:10:06
them out into the garden. So yes, this takes some
00:10:09
planning. And I know for those of you who
00:10:11
aren't planners, this is going to be a little bit difficult.
00:10:14
And honestly, it's difficult for me too.
00:10:15
I mean, when the weather is beautiful and your plants are
00:10:18
just ready to go, you want to just grab them and go.
00:10:21
But patience is going to be key here, OK?
00:10:25
So on the first day, you want to put the plants outside in a
00:10:29
protected area in shade or sort of mostly shade somewhere where
00:10:35
they're definitely outside of the direct sunlight, and just
00:10:38
for a few hours and then bring them back in again, OK, Usually
00:10:40
you want to start doing this in the morning, and then the next
00:10:44
day you want to add a few more hours to that.
00:10:46
And then the third day, you want to be able to put them out for
00:10:49
most of the day and you still want to do this all in like the
00:10:53
shade or the dappled light. We don't want to expose them too
00:10:56
much to too much sun too quickly.
00:10:58
We also don't want too much wind right away, which is why I say a
00:11:02
protected area at first. A gentle breeze is fine, but you
00:11:05
really don't want them out there like in the gusting winds,
00:11:07
right? So then after a few days of
00:11:11
increasing the time outside in the shade, then you can start
00:11:15
placing them in the direct sun in the morning.
00:11:18
So the morning light for just a few hours and then move them
00:11:22
back into the shade again for the afternoon.
00:11:24
And then you gradually just expose them to more and more of
00:11:27
that sunlight each day. So this is not only exposing
00:11:30
them to increased amounts of sunlight, but also to more wind
00:11:35
and the other elements as you kind of move them out of their
00:11:38
little protected area in the morning, right.
00:11:40
So days one through 3, shade only, days 4 through 7, we're
00:11:45
gradually increasing that sun exposure beginning with the
00:11:48
morning sun. Now I know that not everybody is
00:11:52
home all day to be moving plants in and out all the time, and
00:11:56
that's fine. I get that.
00:11:58
If you can start by putting them outside in the shade during the
00:12:01
day for the first 3 days and bringing them back in when you
00:12:03
get home in the evening. Then the next time see if you
00:12:07
can put them in a spot where they're going to get the morning
00:12:09
sun, but that morning sun is going to move beyond so that it
00:12:13
naturally is going to be put into the shade in that
00:12:15
afternoon. And do that for the next couple
00:12:18
of days. And then maybe squeeze it out
00:12:20
just a little bit more until it's finally sitting outside,
00:12:23
you know, for the for the full 24 hours without any ill
00:12:26
effects. You also want to be gradually
00:12:30
reducing the amount of water that they're getting each day as
00:12:33
you do this. We don't want them to get to the
00:12:36
wilting point, but we do want to prepare them for the fact that
00:12:40
they're not going to be constantly wet out in the
00:12:43
garden. At least they shouldn't be.
00:12:45
I'm hoping that you're not soaking them every single day
00:12:47
when they're out in the garden, right?
00:12:49
So if we let them sort of dry out a little bit in between
00:12:52
waterings while they're in this hardening off process, and then
00:12:56
we water them really well on the day that we transplant them and
00:12:59
we make sure that they're really well watered in when they
00:13:02
actually go in the ground, then they're going to be a lot less
00:13:05
prone to transplant shock because they're not going to
00:13:07
have to focus on getting water. They can just focus on
00:13:09
stretching their roots out into the soil.
00:13:11
But they've been kind of acclimated to not having that
00:13:14
water. See.
00:13:15
So after about 7 days or so, your plant should now be used to
00:13:21
the outside temperatures and most of the elements, right?
00:13:24
You have to give them a little bit of a final Test so you can
00:13:27
take them still in their containers and put them out in
00:13:29
the place where they're going to go permanently in your garden
00:13:32
and just leave them there for 24 hours, 48 hours if you can.
00:13:35
Management watering them as usual, but don't provide any
00:13:39
other protection other than to protect them from like critters.
00:13:42
OK, if they still look good after that 2448 hours, then
00:13:47
they're they're good to go. It's time to transplant.
00:13:49
But if they show any signs, any major signs of stress or shock
00:13:54
at that point or anywhere along the way with this process, then
00:13:57
slow down, back up. We want to reintroduce them a
00:14:01
little bit more gradually. This is why I say 7 to 10 days
00:14:05
because this is giving you some wiggle room just in case the
00:14:07
plants have a negative reaction somewhere along the way.
00:14:09
It gives you the flexibility to be able to slow down the
00:14:11
process. So some tips for this when
00:14:16
you're doing the hardening off process, if you can, pick a time
00:14:19
when the weather is kind of mild.
00:14:22
I know that's hard to do, especially in the spring, but
00:14:25
you know, we really want to avoid days where it's extremely
00:14:29
hot or extremely cold or it's super, super windy outside.
00:14:32
So yes, we're all about kind of keeping to a schedule, but we
00:14:36
have to work with the elements, to be honest, OK?
00:14:38
And just do the best that you can with a protected area near a
00:14:41
building or under tables or chairs if you need to start
00:14:45
slowly, OK, Be patient with this process.
00:14:48
I know we want to hurry up and just be done, but just because
00:14:51
these plants have been under lights in a seed starting room
00:14:55
or in a greenhouse somewhere for 12 to 15 hours a day since they
00:14:58
sprouted does not mean that they are ready for exposure to the
00:15:01
full sun and the elements outside.
00:15:03
So go slow. You also just kind of want to be
00:15:06
mindful of the weather forecast. I mean, if there's a prediction
00:15:09
of frost or storms coming, you know, bring the seedlings back
00:15:12
indoors. This wild weather that we're
00:15:14
having here in Missouri this spring where it's 74° one day
00:15:18
and then all of a sudden we're in a Blizzard warning the next
00:15:20
day. And then we've got heavy winds
00:15:21
and everything else. I've been hardening off
00:15:23
brassicas to go out into the gardens and I've already had to
00:15:27
kind of bring them back into the greenhouse twice because the
00:15:30
weather was supposed to be so severe.
00:15:33
So not only am I trying to harden them off during periods
00:15:36
where the weather is just a little bit more mild, but I will
00:15:39
also be timing my planting for when the weather is a little bit
00:15:44
more wild mild, not wild, it's already wild mild.
00:15:48
Technically speaking, I should be planting those, you know, in
00:15:51
the next day or two, but I likely am going to wait about 3
00:15:54
or 4 days until our weather kind of evens out a little bit and I
00:15:57
can have a good predictor. So just be mindful of your
00:15:59
weather forecast when you're doing this.
00:16:02
You also do not want to feed your seedlings, no, fertilizing
00:16:06
your seedlings during the hardening off phase.
00:16:08
During this part, they are not actively like in growth mode,
00:16:12
right? We're kind of stressing them out
00:16:14
a little bit. So if we were to give them any
00:16:16
plant food or any fertilizer during this period, it can
00:16:18
actually lead them to more stress.
00:16:21
Plus we want them focusing on developing really strong healthy
00:16:25
roots so that they can anchor the plant really well in the
00:16:28
garden soil when they go out. If we give them fertilizer right
00:16:33
now in their little containers, that's actually likely to
00:16:36
encourage more top growth, so the leaves and the stems and not
00:16:41
focus at all on that root development.
00:16:43
So wait until after you're transplanting them and after
00:16:46
they've gotten established in their new little spot in the
00:16:47
garden to feed them then. And then finally, you want to
00:16:52
make sure that you're sort of protecting them from pests.
00:16:55
So depending on where you put your seedlings out to harden
00:16:59
them off, you may need to put them under some insect nettings
00:17:02
so that you're letting the light in, but you're keeping the bugs
00:17:06
out. If you have slugs or you have
00:17:08
snails or something, you can put them up onto a table.
00:17:10
If you have cats or dogs or chickens, you may have to put
00:17:13
them some place where those little companions aren't going
00:17:16
to get to them. I have made the mistake of
00:17:19
hardening them off on a table on my back porch only to have
00:17:21
squirrels in the middle of them digging to like bury their nuts
00:17:25
in, you know, the the soil. So just consider whatever your
00:17:29
particular version of pest is and just protect your plants
00:17:32
accordingly. So what happens if you get
00:17:38
through the hardening off process and you think everything
00:17:40
is good to go and you transplant everything outside into their
00:17:43
new homes, but your plants still start to show some signs of
00:17:47
transplant shock? Sometimes it's just going to
00:17:50
happen. It really does depend on the
00:17:52
plant. Some of them handle transplant
00:17:54
better than others. A little bit of stress, a little
00:17:57
bit of transplant shock is not going to be the end of the
00:17:59
world. They usually will sort of bounce
00:18:01
back after being in place for a week or so.
00:18:04
But if you're seeing very severe things like, you know, severe
00:18:07
wilting, yellowing leaves, very stunted growth, drooping, that
00:18:11
doesn't recover after being watered or after the sun goes
00:18:14
down, there are some ways that you can kind of help the plant
00:18:17
recover a little bit from that transplant shock.
00:18:20
The first thing that kind of starts as we're transplanting,
00:18:22
and that is number one, like I said, make sure that your plant
00:18:25
is very, very well watered beforehand and then make sure
00:18:28
that the soil around the seedling is very moist when you
00:18:33
transplant it. You can continue to water very
00:18:37
deeply and very evenly over the next couple of days to kind of
00:18:39
provide enough moisture for the plant to establish its roots.
00:18:42
We don't want to overwater it obviously, but if you've backed
00:18:47
off of the watering a little bit during the hardening off
00:18:49
process, then this extra water is going to take some of the
00:18:52
stress off the plant and allow it to focus on tissue repair if
00:18:55
it has been damaged in the process.
00:18:58
If they are showing signs of like excessive wilting or sun
00:19:05
scald, you might want to provide some temporary shade.
00:19:09
So if you can use a shade cloth, if you can use some Rd. cover or
00:19:12
some sort of a garden fabric to just make a make a makeshift
00:19:15
kind of cover over them. Even if you've got a cardboard
00:19:18
box with some holes in it for air circulation that you can put
00:19:21
over it like in the afternoon, this is going to help to reduce
00:19:25
that stress from overexposure to the sunlight.
00:19:29
And then you would just sort of gradually reintroduce that that
00:19:32
stronger sunlight over the next several days.
00:19:35
Another thing you can do is make sure that you have put down a
00:19:38
really good layer of mulch on the base of the seedlings.
00:19:40
This is something else that you can do at transplant time.
00:19:43
Mulch is going to help to retain the soil moisture.
00:19:45
It's going to regulate that soil temperature.
00:19:47
So that is going to help reduce the stress on the plants.
00:19:51
And if the plant has had significant damage to its
00:19:55
foliage, like I mentioned, those really bleached leaves, you can
00:19:59
go ahead and prune back some of that damaged part.
00:20:02
That's going to help reduce the load on the plant a little bit
00:20:04
and help it focus on its recovery.
00:20:07
And then finally, don't apply fertilizer or plant food
00:20:12
immediately after transplanting or during that sort of recovery
00:20:16
period, especially if it's showing any kind of stress.
00:20:19
That we already mentioned the fertilizer can actually stress a
00:20:22
plant that is already weakened, so allow it to recover fully
00:20:26
before you introduce any type of a fertilizer.
00:20:29
Now, if you have something like you know I use Elm Dirt's plant
00:20:32
juice and it is more supporting the microbes in the soil versus
00:20:36
actually feeding the plant itself.
00:20:39
That I have actually found to be beneficial when I do
00:20:42
transplanting. So I will actually water in with
00:20:45
the plant juice mixture, but I wouldn't use something like a
00:20:49
Miracle grow or a Schultz or anything like that to feed them
00:20:52
until well after they have already gotten themselves sort
00:20:55
of re established. Sometimes it just takes some
00:20:59
time. You just kind of have to wait
00:21:00
for them to recover. Most plants are resilient and so
00:21:04
long as they haven't been irreparably damaged, they should
00:21:09
bounce back. For you.
00:21:10
It's kind of hard not to panic, but it looks like all of our
00:21:13
hard work or all of our money just shriveled up out in the
00:21:15
garden. Just keep an eye on it, continue
00:21:18
with what you're doing and you know, just see how the plant
00:21:22
reacts and just re evaluate and adjust accordingly when you need
00:21:25
to. So if we follow the steps from
00:21:28
this episode, we can help to prevent our ceilings from having
00:21:32
any type of adverse reaction from severe transplant shock.
00:21:36
And we put them out in the garden.
00:21:37
We want to make sure they are properly acclimated to the
00:21:39
outboard conditions before we move them, and we are able to
00:21:43
help them recover from any transplant shock and just kind
00:21:45
of thrive in their new garden environment.
00:21:49
It just takes patience. Until next time, my gardening
00:21:53
friends, keep on cultivating that dream garden, and we'll
00:21:55
talk again soon.