
Back on episode 200, the Ask Me Anything episode, someone asked if I would do an episode on growing Brussels sprouts. I said no at the time because I hadn’t yet successfully grown them but indicated it may be soon because Brussels were having a moment in my garden this spring and it was looking good.
Well, here we are and we’re talking Brussels because I managed to successfully grow and harvest a summer crop from a spring planting and have round two of seedlings started already for planting soon for a fall harvest.
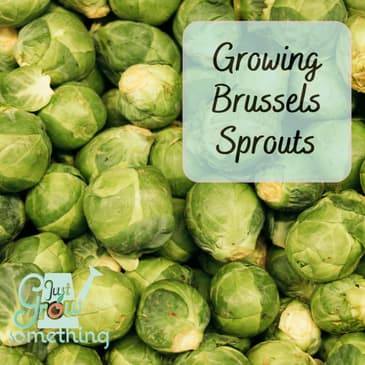
So, today on Just Grow Something, we’re talking Brussels sprouts! The background of the plant, how to grow it, what pests and disease plague it, and how to harvest and store. It’s a full blown crop specific episode that will hopefully demystify growing these teeny cabbage look-a-likes in your own garden. Let’s dig in!
References and Resources:
The Great Marigold Debate - Ep. 147
Weather History & Data Archive | Weather Underground (wunderground.com)
Health Benefits of Brussels Sprouts
Explore Cornell - Home Gardening - Vegetable Growing Guides - Growing Guide
Just Grow Something Gardening Friends Facebook Group
Check out how you can become a patron on Patreon
Merchandise | Just Grow Something
Hosted by Simplecast, an AdsWizz company. See pcm.adswizz.com for information about our collection and use of personal data for advertising.
00:00:00
OK so back on episode 200 the Ask me anything episode, someone
00:00:05
asked if I would do an episode on growing Brussels sprouts.
00:00:10
How many times can I say episode in one sentence?
00:00:13
I said no at the time because I hadn't yet successfully grown
00:00:19
them, but I indicated that it may be soon because Brussels
00:00:22
were absolutely having a moment in my garden this spring and it
00:00:25
was looking good. Well, here we are and we are
00:00:28
talking Brussels sprouts because I managed to successfully grow
00:00:32
and harvest a summer crop from a spring planting and I have round
00:00:37
two of seedlings started already for planting soon for a fall
00:00:42
harvest. So today on Just grow something,
00:00:44
we're talking Brussels sprouts, the background of the plant, how
00:00:47
to grow it, what pests and disease plague it and how to
00:00:51
harvest and store. It's a full blown crop specific
00:00:54
episode that will hopefully demystify growing these teeny
00:00:57
tiny cabbage. Look alikes in your own garden.
00:01:01
Let's dig in. Hey, I'm Karen, I started
00:01:04
gardening in a small corner of my suburban backyard and now 18
00:01:07
years later, I've got a degree in horticulture and operate a 40
00:01:10
acre market farm. I believe there is power or in
00:01:13
food and that everyone should know how to grow at least a
00:01:15
little bit of their own. On this podcast I share evidence
00:01:19
based techniques to help you plant, grow, harvest and store
00:01:22
all your family's favorites. Consider me your friend in the
00:01:25
garden. So grab your garden journal and
00:01:27
a cup of coffee and get ready to just grow something.
00:01:40
Thank you for joining me this week.
00:01:41
If you are new here, I am your host, Karen Velez.
00:01:44
I am glad that you are here for all my junior gardeners.
00:01:47
I am glad that you are listening alongside mom or dad or grandma
00:01:50
or grandpa or whoever it is that is greasing your ear holes with
00:01:53
my voice today. I am very glad that you guys are
00:01:56
all here. If you are new to the podcast, I
00:02:01
have all kinds of other resources over on my website,
00:02:04
justgrowsomethingpodcast.com. You can find articles and you
00:02:08
can sign up for the newsletter and all kinds of other stuff
00:02:11
over there. I've also got a YouTube channel
00:02:13
that feeds onto that website as well.
00:02:17
So Brussels sprouts. Brussels sprouts are a member of
00:02:22
the Brassica family, which means that they are very closely
00:02:25
related to cabbage and broccoli and kale.
00:02:30
They are small leafy green vegetables that look like
00:02:36
miniature little cabbage that grow on stalks and they are
00:02:41
either totally prized for the unique flavor that they give off
00:02:46
or they are totally despised by people who were forced to eat
00:02:50
them in maybe just a boiled, you know, manner or whatever and
00:02:54
never really was treated to Brussels sprouts that were
00:02:58
cooked the proper way. I know a lot of people that
00:03:01
absolutely refuse to touch Brussels sprouts because they
00:03:04
were just served boiled sprouts. And trust me when I say I had
00:03:10
zero desire to eat Brussels sprouts until somebody cooked
00:03:12
them for me the proper way. So this is not going to be a
00:03:15
cooking show, but I'm just telling you, if you can find a
00:03:18
really good recipe, go for it because you would be very, very
00:03:22
surprised. If you like cabbage or anything
00:03:25
sort of in that cabbagey family, you will like Brussels sprouts.
00:03:28
You just got to cook them the right way, OK?
00:03:31
Brussels sprouts are native to the Mediterranean and were
00:03:36
cultivated as early as the 13th century.
00:03:39
They gained their name from the city of Brussels, which is why
00:03:42
they are Brussels sprouts with an S Brussels sprouts, not
00:03:47
Brussels sprouts. It sort of blends together when
00:03:50
we say it, but that's what happens because that is where
00:03:52
they became popular in the 16th century.
00:03:56
They are believed to have been selectively bred from wild kale
00:04:04
plants or wild cabbage plants, which essentially is how we got
00:04:08
all of our brassicas. Everything that we eat that's in
00:04:11
the Brassica family, kale and cabbage and cauliflower and
00:04:15
broccoli and Brussels sprouts all kind of started in the same
00:04:20
space. They were what we would view as
00:04:23
being a wild kale. They weren't a a head developing
00:04:26
type of a plant. And different cultures kind of
00:04:30
took that plant and cultivated them, selecting for the
00:04:34
characteristics that they preferred, Whether it was
00:04:37
forming a head or if it was forming a flower or it was
00:04:41
forming a stalk that had the little tiny heads on it,
00:04:43
whatever it is, or just remaining in a leafy form.
00:04:46
So that's how we have all these different versions of our
00:04:50
brassicas, but they all kind of started with the same wild
00:04:53
plant. And actually the first written
00:04:55
records of Brussels sprouts appear in the 16th century.
00:04:59
And of course, historically they were not just used as a food
00:05:02
source, but they were also valued for their medicinal
00:05:06
properties because they are very rich in vitamins and minerals.
00:05:09
So they were used to sort of boost the immune system and
00:05:11
support people's overall health. Nutritionally, Brussels sprouts
00:05:16
really are a sort of powerhouse. 1/2 cup serving has 28 calories.
00:05:23
It's got less than, you know, a half a gram of fat, about 16
00:05:28
milligrams of sodium, 5 1/2 grams of carbs, just about 2G of
00:05:33
protein and 2G of fiber, which is very notable because that's
00:05:38
about 7% or so of our daily value that we're supposed to get
00:05:44
in fiber every day. And that's from 1/2 cup serving.
00:05:47
So they are very rich in vitamins, particularly vitamin K
00:05:51
and vitamin C. They are a good source of
00:05:53
manganese and potassium and folate.
00:05:57
This that fiber, that dietary fiber they contain helps to
00:06:00
promote digestive health. And they also contain some very
00:06:03
beneficial antioxidants compounds like camphorol and
00:06:06
flavonoids and polyphenols. These are all known to be
00:06:10
anti-inflammatory and anti anti oxidant.
00:06:13
Now of course if you have stomach sensitivities or IBS or
00:06:18
anything that requires a low fiber diet, then Brussels
00:06:23
sprouts may not be the veggie for you.
00:06:26
They are in the cabbage family and those cruciferous vegetables
00:06:30
are notorious for causing stomach upset and that is partly
00:06:35
from that high fiber content. So if you are new to Brussels
00:06:39
sprouts, let's just start your culinary journey with a little
00:06:43
bit of caution. Now what I have found is that
00:06:48
growing Brussels sprouts requires patient and some very
00:06:53
specific care. This year was not my first year
00:06:56
attempting to grow Brussels sprouts.
00:06:59
I have planted them in the spring multiple times and I have
00:07:03
attempted them in the fall a couple of times and neither of
00:07:07
which did I have very good success.
00:07:09
So I was really excited this year to see that they were
00:07:13
developing beautifully and realized at that point that I
00:07:18
had no idea what I was supposed to do with them after they
00:07:21
started to develop. So we'll get into the harvesting
00:07:24
techniques here in a little bit. But what I have figured out is
00:07:28
that the planting time definitely matters, The moisture
00:07:32
level definitely matters, and the temperature, right?
00:07:36
So the first thing that we want to do with Brussels sprouts is
00:07:39
make sure that we're choosing the right variety, something
00:07:42
that suits your climate and your growing conditions.
00:07:47
Shorter plants tend to mature earlier and tend to be more cold
00:07:52
tolerant. So if you are in a short season
00:07:54
area, this may be helpful for you in getting a crop to
00:07:59
maturity. Or if you are in a much warmer
00:08:04
southern climate here in the Northern hemisphere with a very
00:08:07
short window of cool weather, that can also be very helpful.
00:08:12
So some of the really popular varieties are Jade Cross.
00:08:16
This one is fairly early maturing.
00:08:18
It is very disease resistant. It is also fairly heat tolerant.
00:08:22
It matures in about 95 days from transplant.
00:08:25
There is Long Island improved. This is a heirloom variety.
00:08:29
It is known for its very large sprouts.
00:08:32
It takes a bit longer. It's around a 90 to 100 days
00:08:36
maturity from transplants. Diablo is one that is also very
00:08:41
cold Hardy and is supposed to produce very high yields, but it
00:08:44
takes the longest. It's about 110 days to maturity.
00:08:48
So you really do need a long, cool growing season for this
00:08:51
one. What I opted for was Dagon and
00:08:56
it's a mid season variety, so it's sort of, you know, in the
00:09:01
middle of the number number of days to maturity.
00:09:04
But it has a tendency to hold well in the field.
00:09:07
And to me this meant I could have something that I could
00:09:10
plant in both the spring and in the summer for a fall harvest.
00:09:14
So here we are. That's the variety that I'm
00:09:16
growing, and it tends to mature in about 100 days from
00:09:20
transplant. The reason that, you know,
00:09:24
Brussels sprouts are so temperamental is because they
00:09:26
thrive in that cooler weather, which is very typical for our
00:09:31
brassicas. And so that's why Brussels
00:09:34
sprouts are technically usually planted in the late summer for a
00:09:37
fall harvest. That's why they tend to be, you
00:09:40
know, more of a plant that we see used as a side dish for
00:09:45
like, our fall and winter holidays, right, Thanksgiving
00:09:48
and Christmas, that sort of thing.
00:09:49
They require a very long growing season.
00:09:51
Most of them are, you know, maybe the fastest ones I've seen
00:09:55
are about 80 days all the way up to 120 days from transplanting
00:10:00
to maturity. Now, if you live in a warmer
00:10:04
climate that doesn't get a whole bunch of super deep freezes over
00:10:08
the winter time, you can actually plant them in the late
00:10:12
winter for an early spring harvest.
00:10:17
I planted in spring this year like I said, and then I have
00:10:22
started plants already and have those plants getting ready to go
00:10:28
in probably here in the next week or so.
00:10:30
Usually my fall brassicas are going in last week of July,
00:10:34
maybe the first week of August. It all depends on what the
00:10:36
temperatures are doing and with the intention of having them
00:10:40
ready to harvest for those, you know, fall, maybe early winter
00:10:44
time frame. So when you are figuring out
00:10:48
where to plant your Brussels in the garden, we're talking full
00:10:52
sun exposure. So at least six hours of direct
00:10:56
sunlight per day. Again, this can be broken up.
00:10:59
We've talked about this before just because you only get, you
00:11:02
know, a few hours in the morning and then there's a break in the
00:11:04
afternoon. If you get a couple more hours
00:11:06
in the evening then that counts as your six hours, preferably 8.
00:11:12
I've seen with most of the brass because they really do prefer
00:11:15
closer to that 8 hours. But if all you have is 6 hours,
00:11:17
it's fine. They will get there, they're
00:11:20
just going to take longer to get to maturity.
00:11:23
You also want to make sure that the soil is well draining.
00:11:26
It does like the water, it doesn't like standing in the
00:11:29
water so rich and organic matter.
00:11:32
And then they've got a really wide ideal soil pH, anything
00:11:35
from six point O to 7.5. So if you have an area that's a
00:11:37
little bit more alkaline, they will grow just fine.
00:11:41
As a matter of fact, the field that these are planted in this
00:11:44
year actually is on the alkaline side.
00:11:46
I think I was sitting at about 7.2 the last time I checked and
00:11:49
they have done absolutely beautifully.
00:11:52
So of course it's always a really good idea to incorporate
00:11:54
compost or some well rotted rotted manure just to improve
00:11:58
that fertility and to help the drainage.
00:12:01
Just like all the other brassicas, they can be heavy
00:12:03
feeders. So if you need to boost your
00:12:07
soil fertility, you just want to do a sort of balanced fertilizer
00:12:12
like a 10/10/10 that can be added at the beginning in order
00:12:17
to be able to sort of boost that that soil fertility.
00:12:22
But keep in mind that they will benefit from a good amount of
00:12:27
nitrogen just like our other brassicas.
00:12:29
So you could also add something like a blood meal or a fish
00:12:32
emulsion that can be beneficial. But per usual, make sure you're
00:12:37
doing a soil test and you're just not adding these things
00:12:39
Willy nilly into your soil or into your raised containers.
00:12:44
Now, you can grow Brussels sprouts in pots.
00:12:49
I mean, of course you can grow them in your raised planters.
00:12:52
That's fine. They will do just fine.
00:12:53
You want to make sure they're at least about a foot to 18 inches
00:12:57
deep. But you can actually do these
00:12:59
like in a pot on your patio. And these are actually very
00:13:03
beneficial because if it's you're growing in a small space,
00:13:07
they grow vertically on their own just naturally, and you can
00:13:10
harvest off of them pretty continuously.
00:13:13
So you just want to make sure that you have a pot that is at
00:13:15
least 12 to 14 inches in diameter, again, 12 to 18 inches
00:13:20
deep because Brussels sprouts do have a pretty substantial root
00:13:23
system and they're going to need that space to grow and to be
00:13:27
able to feed that green growth. Just make sure that the pot has,
00:13:31
you know, significant drainage because we don't want those, you
00:13:34
know, roots to get water logged. And then just use a high quality
00:13:38
potting soil, something that's rich in organic matter.
00:13:40
Make sure that it's well draining as usual.
00:13:43
I'm going to caution when you're doing containers, do not use
00:13:46
garden soil. That can be too heavy.
00:13:48
It's going to get compacted into those containers.
00:13:50
It's going to be very difficult for those roots to move through
00:13:54
the pot. So make sure that you are using
00:13:56
a potting mix. If you can amend that potting
00:13:59
mix with some compost or again, some well rotted manure, that's
00:14:02
going to provide some of those essential nutrients.
00:14:05
It's always a good idea when you are growing in smaller
00:14:09
containers like that to make sure that you have some sort of
00:14:12
fertilizer or amendment on hand that you can feed those plants
00:14:15
with throughout the season. Because in a smaller volume of
00:14:20
soil they are going to use those nitrogen, those nutrients faster
00:14:25
than they would if they had access to more soil volume.
00:14:27
So just make sure that you are feeding them on a pretty steady
00:14:31
basis. Just set yourself, you know, a
00:14:33
good three or four week schedule and just feed from there.
00:14:38
So if you're going to grow Brussels sprouts from seed, you
00:14:43
are going to want to start them about 6 to 8 weeks before your
00:14:50
last expected frost in the spring or for a fall crop about
00:14:55
four months before your first expected fall frost.
00:15:00
So yes, if you're growing them in the fall, this does mean that
00:15:03
you are going to be transplanting these out in the
00:15:05
heat of the summer. So keeping those transplants
00:15:08
cool with mulch and using good watering techniques is going to
00:15:12
be important. They will mature as the weather
00:15:15
is cooling and so they will be ready for a late fall or an
00:15:20
early winter harvest. They do like a warmer soil
00:15:25
temperature around 70 to 75 Fahrenheit or 21 to 24 Celsius
00:15:29
for germination. So if you can pop those little
00:15:32
seeds about 1/4 inch deep into your seed trays or your pots and
00:15:36
then throw them onto a heat mat and keep the soil consistently
00:15:39
moist, they should germinate for you within just a few days.
00:15:43
You can do these directly sown outside, just like all of our
00:15:46
plants. That is possible.
00:15:49
You just are going to have to pay attention to when they're
00:15:51
popping up to make sure that you're protecting them from
00:15:53
things like cut worms or even birds that will come down and
00:15:56
try to pick at the little seedlings.
00:15:59
And then you make sure that you are thinning them properly.
00:16:02
If you're going to transplant them, you want to wait to do
00:16:05
this until the seedlings are about four to six inches tall
00:16:08
and they have at least two sets of true leaves.
00:16:12
You want to space the plants about 18 to 24 inches apart, and
00:16:15
if you're doing them in rows, you want those rows to be almost
00:16:19
3 inches, 3 inches, 3 feet apart.
00:16:23
So you want to give them room to sort of expand out.
00:16:28
Again, these are growing up and they're going to be tall, these
00:16:31
stalks, but then the leaves get fairly big.
00:16:33
These are abrassica. So think about what cabbage
00:16:36
leaves look like before they start curling in on themselves
00:16:39
or what broccoli leaves look like before they start to form
00:16:41
their heads. Same thing.
00:16:42
So you want to give them enough room to be able to expand out.
00:16:46
Doesn't mean that you can't plant other things in between.
00:16:49
You know, I like to have things interplanted, but you're going
00:16:51
to plant things that are faster maturing.
00:16:54
And a good thing to do is to plant some companions with these
00:16:59
which are going to help with some of the insect pests.
00:17:02
And it's also going to fill up that space to kind of choke out
00:17:04
any weeds, give you a different harvestable crop, and and then
00:17:09
be out of there before the Brussels sprouts truly need that
00:17:13
entire space. So good companions for Brussels
00:17:15
are things like onions or garlic.
00:17:18
I have used sweet alissum and calendula and basically any
00:17:22
strong herbs that you can put in there.
00:17:26
I used to plant marigolds with all of my brassicas and I don't
00:17:32
do that anymore and I will link to the episode where I talked
00:17:36
about why marigolds are not a good idea.
00:17:41
But in short I I was doing that in order to keep the aphids and
00:17:46
the whiteflies out. But I have learned through
00:17:49
various studies that marigolds actually attract leaf hoppers
00:17:53
and spider mites and cabbage loopers and many different types
00:17:57
of flea beetles, which I don't really want in my brassicas.
00:18:02
So I stick to putting marigolds along the outer edges of the
00:18:07
garden and using herbs and alliums and beneficial little
00:18:10
flowers and stuff in between. I also avoid mustard since it is
00:18:16
in the same family and it sort of attracts the same pests.
00:18:19
But so most instances I am interplanting with green onions
00:18:22
or scallions. But I have also done fast
00:18:25
growing lettuces and arugula as well.
00:18:28
And that way those leafy greens are mature and are harvested and
00:18:33
out of the way by the time the Brussels sprouts or the cabbage
00:18:36
or whatever is is spreading its leaves.
00:18:39
So those those companion plants are always a really, really good
00:18:43
idea for a lot of reasons. So one of the things that I
00:18:46
figured out this season really made a huge difference in the
00:18:52
growth of my Brussels sprouts was the consistent moisture.
00:18:56
We have had a really wet spring and it's continued on into the
00:19:03
summertime. We also had cooler temperatures
00:19:06
for longer. So even when we had the
00:19:08
temperature spikes that often will cause my brassicas to bolt,
00:19:12
which it did some of my broccoli and my cauliflower did bolt.
00:19:15
The, the, the Brussels sprouts didn't do that.
00:19:20
And I think part of it was because they were saying so wet,
00:19:24
they were being watered so frequently from the rain.
00:19:27
I haven't had to water anything out there.
00:19:29
And of course it was a very, very deep soaking.
00:19:33
So Brussels sprouts require consistent moisture, especially
00:19:38
during dry spells. And normally in the spring by
00:19:40
the time we hit maybe mid June, Mother Nature has turned the
00:19:44
faucet off. Certainly by July it is bone dry
00:19:48
and usually very, very hot. And it just hasn't done that
00:19:52
this year. So I think that is really one of
00:19:54
the reasons why these Brussels have done so well, which means
00:19:58
to me #1 mulching is going to help retain the soil moisture.
00:20:03
It's going to suppress those weeds.
00:20:04
It's going to help to regulate that soil temperature to keep
00:20:07
them cooler. So if you do anticipate it
00:20:10
getting warmer. Early in the season, then add a
00:20:13
really good layer of mulch to help to mitigate that.
00:20:16
Make sure you have a way to water them, which is also going
00:20:18
to cool the soil and is going to help them to continue to stay
00:20:21
cool. But maybe think about adjusting
00:20:24
your planting dates a little bit.
00:20:26
This is one of the really good reasons why we keep a garden
00:20:29
journal, so we can track when it was that we planted and then
00:20:34
look at the temperatures and the moisture conditions and all the
00:20:40
other weather conditions as the season progressed.
00:20:43
And if we look at the pattern and go OK, well this year they
00:20:46
did fabulously well and this year they did horribly.
00:20:49
What was the difference between the two, if I can push that
00:20:52
planting date just a little bit earlier, maybe using row covers
00:20:57
to protect from severe frost because we don't want to kill
00:20:59
off our little seedlings out there.
00:21:01
But maybe that's going to give them a bit longer in the spring
00:21:07
to be able to get to maturity before we really start to get to
00:21:10
those hotter parts of the day. So we said start your seeds 6 to
00:21:15
8 weeks before that last expected frost date in the
00:21:18
spring. If you've been starting with the
00:21:20
six week mark, maybe it's time to move it to the eight week
00:21:24
mark. If you've been doing it at 8
00:21:26
weeks, maybe it's time to push it another week, start them a
00:21:29
little bit earlier and see if that works for you.
00:21:32
I will probably play around with this a little bit next year by
00:21:35
going back and looking historically at what my seasons
00:21:38
have looked like prior to this year and then making adjustments
00:21:42
for the temperatures. And there are online records
00:21:45
that you can see. If you have not kept these
00:21:46
records for yourself. And trust me, I am not writing
00:21:49
down the take the daytime temperatures every single day in
00:21:52
my garden journal. I'm not that crazy.
00:21:54
But there are online resources that you can use to be able to
00:21:58
look at the historical temperatures, you know, every
00:22:01
year individually or what's the average for the last five years,
00:22:04
whatever, and give yourself an idea of when those temperatures
00:22:07
really start to spike consistently in your area and
00:22:10
when the weather starts to dry out.
00:22:12
And you can make your adjustments accordingly.
00:22:16
The other thing that I think helped this year too is I was a
00:22:20
little bit better about making sure that I amended my soil one
00:22:26
more time prior to planting. A lot of the time I'm just
00:22:30
amending in the fall and allowing that to get worked into
00:22:33
the soil over the winter and then immediately planting into
00:22:36
things in the spring. But this year, with all of the
00:22:39
beds that my brassicas were going into, I added a little
00:22:43
extra at the beginning of the season to make sure that there
00:22:46
was plenty of fertility in there.
00:22:48
And those plants have all looked fabulous.
00:22:52
So that I think has also been a key.
00:22:55
So if if you didn't do that or if you haven't added, you know,
00:23:00
in the beginning of the season, you can also just feed them with
00:23:03
a balanced fertilizer about every four to six weeks during
00:23:05
the growing season. Once the sprouts start to form,
00:23:08
you can go ahead and side dress with a little bit of that
00:23:12
nitrogen that we talked about just to kind of support the
00:23:15
development. But you know from what I have
00:23:18
seen, just using a balanced amendment has worked just fine.
00:23:22
Now when they start to get tall, especially if you are growing a
00:23:27
variety that is super tall, you might need to add steaks to
00:23:32
prevent the plants from toppling over.
00:23:34
They kind of start to look almost like palm trees to me.
00:23:38
I start taking the lower leaves off to help improve the air
00:23:41
circulation. Plus that helps direct the
00:23:43
plants energy towards sprout development.
00:23:46
But you know, that means at the top they're going to have all
00:23:48
these tall leaves and they start to get a little top heavy if
00:23:51
you're growing some of the taller ones.
00:23:52
So you might want to have some steaks on hand just to prevent
00:23:56
them from flopping over on you. As we're going through the
00:24:00
season, what are the common pests and diseases that we are
00:24:03
going to have to worry about? Aphids.
00:24:06
OK, we've talked about aphids before.
00:24:07
They are those soft bodied insects that suck the SAP from
00:24:10
the plant. They cause yellowing, they cause
00:24:12
distortion. You can control these just by
00:24:16
spraying them off with a hose if you have the ability to do that.
00:24:19
You can also use an insecticidal soap or a neem oil.
00:24:24
I tend to not worry about aphids too much until I really start to
00:24:27
see a there's a really bad infestation that isn't being
00:24:31
controlled or it is starting to really 'cause damage to the
00:24:35
plants. But nine times out of 10 in my
00:24:37
garden I will see the aphids and then within about a week or so I
00:24:42
will start to see ladybugs or ladybug larvae.
00:24:45
And ladybug larvae are voracious eaters of aphids and so I don't
00:24:50
generally worried about it. The other one out of 10 times,
00:24:54
usually what I'll see is I'll see aphids and then I will see
00:24:57
ants and I will see that the ants are farming the aphids for
00:25:01
the honeydew. And that's a no, no.
00:25:02
We got to get those out of there.
00:25:03
So I just start spraying them down with with water or whatever
00:25:07
just to knock them off and get them out of there.
00:25:10
Another thing that you'll see problems with this cabbage worms
00:25:12
just like any other Brassica, it's those green caterpillars
00:25:16
that are going to chew holes in the leaves.
00:25:19
You're gonna see the cabbage moths or the cabbage butterflies
00:25:23
1st and then you will see the the cabbage worms and the
00:25:27
cabbage loopers. If you can exclude those moths
00:25:33
and butterflies to start with by using insect netting or row
00:25:36
covers, that will help, which is exactly what I did.
00:25:40
I actually started out with row covers early on to help kind of
00:25:44
keep the plants warm. Once we started to warm up a
00:25:47
little bit in the spring, I took those off and I covered them
00:25:50
with insect netting and everything stayed covered
00:25:53
completely with the insect netting basically until it
00:25:57
started to get too tall. Now with the Brussels sprouts,
00:25:59
they're starting to really push on the insect netting.
00:26:02
So I had to kind of move it or loosen it up.
00:26:05
And then I did start to see some of those moths and butterflies
00:26:07
come in. But the damage really hasn't
00:26:10
been bad at all. So I haven't had to use
00:26:13
anything. But you can use, you know,
00:26:16
biological controls like like BT or again, you can use
00:26:20
insecticidal soaps, that sort of thing.
00:26:22
The insect netting really is though a great way to help
00:26:27
protect your all of your brassicas from any one of the,
00:26:30
you know, insect pests that that you might face.
00:26:32
But usually for me, it is absolutely those cabbage
00:26:36
butterfly and the cabbage moths. One thing I've not had to deal
00:26:39
with, but it is fairly common with Brussels sprouts is cabbage
00:26:43
root maggots. So it's a white maggot larvae
00:26:47
and it tunnels in and it feeds on the roots of of the plant.
00:26:51
You won't even know what's happening.
00:26:52
You'll just start to see the plant begin to wilt early on
00:26:57
with really no reason why. I mean, if they're very well
00:26:59
watered and continue to root, you may have to check the roots
00:27:04
of the plant to see if that's what's going on because
00:27:06
eventually it's just going to kill off the plant.
00:27:08
Flea beetles. These are those small little
00:27:11
jumping beetles that create teeny tiny little holes in the
00:27:14
leaves. Again, the row covers or insect
00:27:16
netting is really good here and helps to keep those away.
00:27:21
Some people have had success using diatomaceous earth around
00:27:25
the base of their plants to help with flea beetles.
00:27:27
And then there's also Harlequin bugs.
00:27:29
These are shield shaped, so kind of similar to the shape of like
00:27:35
a a squash bug, but they suck the plant juices and that causes
00:27:39
wilting and it causes stunted growth and a lot of time you
00:27:42
just need to hand pick these again.
00:27:44
Those insect netting is going to help to prevent an initial
00:27:48
infestation and allow those plants to get to maturity much
00:27:51
more easily. In terms of diseases, you know,
00:27:55
the three things that are prevalent with most brassicas
00:27:58
are the same things that affect Brussels sprouts.
00:28:00
So downy mildew, it's that fungal disease that causes
00:28:03
yellow spots on the leaves with the fuzzy Gray underside.
00:28:07
If you can improve the air circulation, that helps, which
00:28:09
is why because it's been so rainy, I have made sure to
00:28:13
continue to pull the leaves off of the bottom of those plants to
00:28:17
help improve that air circulation.
00:28:19
You can use fungicidal sprays if you need to.
00:28:23
I have used first Saturday lime to sprinkle on it to help to dry
00:28:26
it out and adjust that that leaf pH, the surface pH to to help
00:28:31
keep the downy mildew at Bay. Black rot, this is a bacterial
00:28:35
disease that causes black lesions on the leaves and the
00:28:39
stems there as far as I know, really isn't any kind of a
00:28:43
prevention for this. It gets passed through the soil.
00:28:48
So if you've ever seen this in any of your brassicas, you need
00:28:51
to make sure that you're not planting brassicas in that same
00:28:53
spot for about 3 years. And then you can also choose
00:28:56
disease resistant varieties that that you can grow to help
00:29:00
prevent the spread of the black rot.
00:29:03
And then club root is also a soil borne disease.
00:29:06
This causes these swollen, distorted roots.
00:29:11
A lot of the time club root happens because the soil pH is
00:29:16
out of whack. So you can stick.
00:29:17
If you can get your soil to stay between that 6 and 7.5, then
00:29:21
that'll help. And then also you want to rotate
00:29:23
your crops regularly. OK, so once you get your
00:29:27
Brussels sprouts to maturity, then you have to figure out when
00:29:32
to harvest them. And this was the interesting
00:29:35
part for me because I wasn't quite sure when I was supposed
00:29:39
to start picking them. And I think it's because I had
00:29:42
seen the Brussels sprouts off the stock.
00:29:45
I've seen them in a bag or whatever in the grocery store
00:29:48
and then I had seen people cut the entire stock and sell them
00:29:53
in that manner. And I've never sort of seen the
00:29:56
in between stage. And so I sort of had to look up
00:29:59
what it was I was supposed to be doing, how I was supposed to be
00:30:01
doing it. When you were supposed to
00:30:03
harvest them. Because when we're looking at
00:30:06
cabbages, full-sized cabbages, you generally wait to harvest
00:30:11
them until they have started to fold their leaves in on
00:30:13
themselves and they are nice and firm.
00:30:17
And then basically whatever size you want them at, you can
00:30:19
harvest them whenever they're ready for Brussels sprouts.
00:30:22
They are ready to harvest when the sprouts, just like those big
00:30:25
cabbages, are firm. They are nice and green and
00:30:28
they're about one to two inches in diameter.
00:30:31
There are two different ways to do this.
00:30:33
So you can just let them grow, which is what I've done this
00:30:36
spring, and start harvesting from the bottom of the stalk
00:30:40
where the sprouts mature 1st and you just twist or cut the
00:30:44
sprouts off of the stalks. Now once you have done this, you
00:30:48
will notice as you look up the stalk that there are more teeny
00:30:52
tiny sprouts that are forming. So you can sort of have a
00:30:55
continuous harvest of these so long as the plant continues to
00:30:59
thrive happily in whatever the weather conditions are by
00:31:05
leaving the plant in the ground and just continuing to harvest
00:31:08
as the next set of sprouts are ready to harvest.
00:31:13
Now, if you want them to all mature at about the same time so
00:31:18
that you can harvest the entire stalk, then this takes some
00:31:21
forethought. Once the sprouts at the bottom
00:31:24
begin to form, you want to bend over the top of the stalk so it
00:31:29
kind of looks similar to what our onion plants look like when
00:31:33
they reach maturity and they the top sort of flop over.
00:31:36
You're wanting to sort of pinch the top down of the plant so it
00:31:41
stops the growth. This is going to stop the top
00:31:46
growth of the plant and it's going to force the energy into
00:31:49
the maturing the sprouts that have already started to form.
00:31:53
And so they're going to grow more uniformly in rates.
00:31:56
And then once they're all at that one to two inch diameter,
00:32:00
you can cut the entire stock and bring it in, or you can just
00:32:04
harvest all the heads individually.
00:32:06
So this is likely the technique that I'm going to be using for
00:32:10
the fall harvest since I'll want them to all be about the same
00:32:15
size for holiday meals versus the spring crop that I've just
00:32:20
continued to harvest from as they've come ready.
00:32:22
But I may also leave a few of them to continue to grow to see
00:32:26
just how long I can continue to harvest from them as the weather
00:32:31
gets colder and the day length gets shorter.
00:32:34
I mean, everything is an experiment in the garden, right?
00:32:38
The cool thing about Brussels sprouts is just like our other
00:32:40
brassicas, after you get that first frost, the flavor of the
00:32:45
Brussels sprouts is going to improve.
00:32:47
It's going to become sweeter. Those starches in the plants are
00:32:50
converted to sugars in the cold. So you can continue to harvest
00:32:55
off of that plant if you don't choose to pinch that top.
00:32:59
And at least until the sprouts start to become soft or the
00:33:03
plant finally succumbs to, you know, your weather.
00:33:06
If you have very cold weather and then once you have harvested
00:33:10
them, you can store your sprouts in the refrigerator in a
00:33:14
perforated plastic bag for like 3 to four weeks.
00:33:19
They store very, very well. If you need to store them longer
00:33:23
than that, then you can freeze them.
00:33:24
You want to blanch them in boiling water for about 3 to 5
00:33:27
minutes and then plunge them into ice water to cool, drain
00:33:30
them and then just freeze them either in some sort of airtight
00:33:34
container or in a freezer bag and frozen.
00:33:37
Brussels sprouts can be stored in the freezer for up to a year.
00:33:46
That's Brussels sprouts. I really do think growing these
00:33:51
is just like any other Brassica. It's all about the timing and
00:33:55
the temperature, and I think the soil moisture really does kind
00:33:59
of kick in as a little bonus thing there.
00:34:02
So if you're somewhere where cool weather is the predominant
00:34:06
season, then you likely will have easy success with Brussels
00:34:10
sprouts. If you're somewhere like me,
00:34:12
where cool weather is a total crapshoot, it will absolutely be
00:34:16
hit or miss. I got lucky this year with the
00:34:18
cooler temperatures for longer into the spring and the lovely
00:34:21
rain that we've had. But it taught me what I need to
00:34:26
look for in the fall, for growing these guys, and for
00:34:30
trying again next spring. Hopefully it helped you figure
00:34:33
it out, too. Until next time, my gardening
00:34:36
friends, keep on cultivating that dream garden, and we'll
00:34:38
talk again soon. Thanks for listening to another
00:34:42
episode of the Just Grow Something podcast.
00:34:44
For more information about today's topic and to find all
00:34:47
the ways you can get in touch with me or support the show, go
00:34:50
to justgrowsomethingpodcast.com. Until next time, my gardening
00:34:53
friends, keep learning and keep growing.