
We talked last week about how to time our seed starting so we can get a jump on the gardening season without being too early or too late. This week we’re focusing on what we need in terms of supplies to get those seeds going.
There are tons and tons of options out there from the plain basics to the super fancy and everything in between. There is also a wide range in terms of how expensive those options are.
Today on Just Grow Something we’ll talk about the six things I think you need for basic seed starting and then the items that are either nice to have’s but not necessary or downright scams. If you’ve thought about starting your own seeds indoors but shied away because it seemed like you needed way too much equipment, we’re going to demystify that today. Let’s dig in!
FIRST TEN ORDERS IN FEBRUARY: Save 40% on your Magic Mind subscription! https://magicmind.com/GROWSOMETHING40 with code GROWSOMETHING40
References and Resources
Free Seed Starting eBook: https://justgrowsomethingpodcast.com/seedbook
Garden Planning Workbook: https://www.justgrowsomething.com/shop/p/just-grow-something-garden-planning-workbook
Seed Starting Supplies Options (aff):
Just Grow Something: https://justgrowsomething.com
Just Grow Something Merch and Downloads: https://justgrowsomething.com/shop
Just Grow Something Gardening Friends Facebook Group: https://www.facebook.com/groups/508637300354140/
Check out how you can become a patron on Patreon: https://www.patreon.com/JustGrowSomething
Bonus content for supporters of the Podcast: https://buymeacoffee.com/justgrowsomething
Amazon storefront: https://www.amazon.com/shop/justgrowsomething
[00:00:00] We talked last week about how to time our seed starting so we can get a jump on the gardening season without being too early or too late. This week we're focusing on what we need in terms of supplies to get those seeds going. There are tons and tons and tons of options out there from just the plain basics to super fancy and everything in between. There is also a wide range in terms of how expensive those options are.
[00:00:26] Today on Just Grow Something we'll talk about the six things I think you need for basic seed starting and then the items that are either nice to haves but maybe not necessary or that are downright scams. If you've thought about starting your own seeds indoors but shied away because it seemed like you needed way too much in equipment, we're going to demystify that today. Let's dig in. Hey I'm Karin and what started as a small backyard garden 20 years ago turned into a lifelong passion for growing food.
[00:00:55] Now as a market farmer and horticulturist, I want to help you do the same. On this podcast, I am your friend in the garden, teaching evidence-based techniques to help you grow your favorites and build confidence in your own garden space. So grab your garden journal and a cup of coffee and get ready to just grow something. We're talking all about seed starting this month and so the question of the month for February is what do you struggle with most in starting seeds indoors?
[00:01:25] Let me know in the comments if you're on Spotify or YouTube. Send me a DM on social, put your comment in the Facebook group or just send me an email. What do you struggle with when it comes to starting seeds for transplant? You have until February 21st to get these answers to me. If you are new to seed starting or you need a little helping hand in the what do I need and how do I do this categories, I have a free ebook that you can download with all my seed starting information.
[00:01:55] And like I said, it's free. Just go to justgrowsomethingpodcast.com slash seed book. I will link to that in the show notes. There is no charge for that one. The $10 garden planning workbook to help you finish planning out where all those seedlings are going to go in the garden once you successfully germinate them and get them hardened off is also available in my shop. The link to that will also be in the show notes.
[00:02:19] The first time that you successfully sprout seeds and then get them to grow without getting all leggy and flopping over and then get them nice and strong and finally out into the garden is such a sense of accomplishment. Once you sort of get a system down for starting your own seeds indoors, of course, it opens up a world of possibilities in terms of the different varieties that you can grow.
[00:02:49] And it allows you to grow more plants for less money than buying transplants at the garden center. Now, it might seem like there are a ton of items that you need to buy if you look at all the pictures online, but starting seeds indoors successfully only requires a few key supplies. So while many options are available at a wide variety of different price points,
[00:03:16] understanding what is necessary versus what's just a nice to have or even a luxury and then what is absolutely not necessary can help beginning seed starters make more informed choices. Okay, so let's talk about what I would consider to be the six most essential seed starting supplies, their functions and then sort of the different cost variations. The first one is just your seed starting container,
[00:03:43] whatever it is that you are going to use that provides a space for your seeds to germinate and grow until they're ready for transplanting. This is your first budget item, right? It's you can do this for free. You can reuse containers like yogurt cups or egg cartons or even take out containers that you pop drainage holes into in the bottom. That can cost you absolutely zero dollars. Now, if you want to look at sort of a more mid-range option,
[00:04:09] you can buy plastic seed trays with cell inserts. You can also look at the more expensive seed trays that are a very thick, rigid plastic that are going to last you for a very, very long time. Those have a little bit more of an investment to them. There are also silicone seed starting trays that are going to last you for multiple seasons. And then you've also got soil block makers. We've talked about soil blocking a little bit more in the past.
[00:04:36] Those are a little bit more of a high-end option, but if you are trying to stay away from plastics, then the soil blocks or the silicone seed starter trays are really good options. I always recommend going with sort of the budget option to start with. If you're not sure that seed starting is for you, if this is the first time that you're trying it, don't go out and invest in a ton of different seed starting types of supplies, specifically the containers. Just go for whatever you have around.
[00:05:03] My first, I think, two years starting seeds, I did the majority of them in egg cartons, in the cardboard ones and in the styrofoam ones because people were always giving us egg cartons because we sold eggs. So I had a ton of them laying around. Didn't cost me anything. Reused containers absolutely work. They just might lack a little bit in terms of uniformity. So you want to make sure that, A, you've got the proper drainage for them, so poking those holes uniformly.
[00:05:32] Plastic trays are convenient. They're widely available. The soil block makers, those eliminate the need for plastic and they absolutely promote strong root development, but don't feel pressured into using those right away. The key points that you want to look for in whatever it is that you're deciding to use to start your seeds in is the volume of soil in that container appropriate to the seeds that you are starting.
[00:06:00] So your larger seeds are going to need a larger volume of soil. Your smaller seeds, you actually don't want a huge volume of soil because the whole point of those seed containers is to hold the moisture in the soil enough to where the seed itself is constantly in contact with it. So if you have an itty bitty tiny little seed in a huge volume of soil, you're going to have to continually be checking to make sure that soil is moist.
[00:06:28] Conversely to that, you don't want something that is holding such a tiny amount of soil that you're unable to keep it damp all the time. So there's a little bit of a balancing act. Don't overthink it, but just make sure that whatever it is that you're using has an appropriate amount of soil that it can hold for the seeds that you're wanting to start. You also want to make sure that you're getting proper drainage and that it is easy for you to remove the seedlings at time of transplant without damaging the roots.
[00:06:57] So if you're using something like an egg carton, if it is a styrofoam one where you're just kind of sort of scoop out that soil when it's time to transplant, make sure that it's deep enough in there that you're not going to really disturb or damage those roots. If it's the cardboard version, the fiberboard egg cartons, then those can basically just get planted right into the ground because they're going to fall apart. So you just kind of break the bottom open and drop them in.
[00:07:24] So just consider that step when you're deciding what to use as your seed starting container. The second supply that you need is a seed starting mix or growing medium of some sort. So whatever it is, we want a light, well-draining medium that is going to support the germination of that seed and the early growth of the seedlings. You can do DIY mixes, right?
[00:07:50] Using, you know, cocoa coir and peat moss and perlite, mixing it together. There's all kinds of different recipes out there on the internet for making your own seed starting mix. I generally don't recommend those recipes that contain compost or any type of a soil component for beginning seed starters.
[00:08:13] It can be very difficult to monitor soil moisture when you're using a seed starting mix or an actual potting mix as your seed starting mix. It can often retain too much moisture and that soil component is very attractive to fungal diseases and fungus gnats, right? So I recommend a pre-mixed seed starting mix that is usually a soilless mix.
[00:08:42] You can also go for like the organic or specialty blends here if you want. It's more of a higher end option. But if you are prioritizing organics and sustainability, that might be what you're looking for. DIY mixes are cost effective if you're doing them in bulk. But they do require some effort. And if you're not doing large volumes, then buying all those individual components may end up costing you a lot more than just going and buying a commercial mix.
[00:09:06] Commercial mixes definitely offer convenience and they are more consistent in their sort of soil profile, in their texture. So, you know, you might be tempted to do a DIY mix to start with, but I always recommend for your very first time or if you it's just your first couple of years trying a soilless seed starting mix is what I would go with.
[00:09:28] I do use, and I've mentioned this before, I do use actual potting soil when I'm doing my seed starting just so I don't have to go with a bunch of different blends. I buy one blend and I use it for everything. But I also have about 20 years worth of experience in this. So, you know, purchase the, you know, the seed starting mix or the starting medium that matches your level of experience, I guess, would be my best advice to you.
[00:09:54] The key points that you want to look for in a seed starting mix or medium is, you know, a light, fluffy mix that doesn't have any excessive, you know, twigs or chunks. You want it to be well draining but still retaining enough moisture to facilitate that germination. We also don't want a whole bunch of excess nutrients, right? These fertilizers and nutrients are not necessary for seed germination.
[00:10:19] Those seeds have everything that they need to sprout and get growing until they get their first set of true leaves. And in fact, excessive nutrients can cause damage to the baby roots. So I do not recommend grabbing like your Miracle-Gro potting mix that has a ton of nitrogen and stuff in it and using that as your seed starting mix. You're more than likely to damage those baby plants. So something that is neutral is what you want to go for.
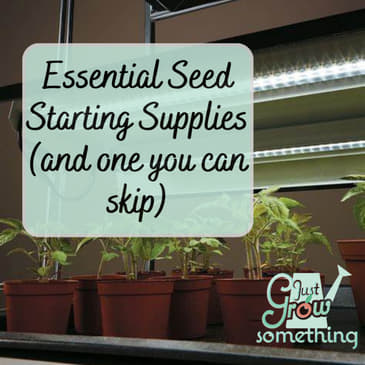
[00:10:46] The third thing that we need when starting seeds is adequate light, right? We need adequate light or those seedlings need adequate light once they sprout to prevent them from becoming leggy. Now, your budget option here is just going to be a south-facing window supplemented with some aluminum foil reflectors. This is going to be okay, but not all of us have enough light at this time of year,
[00:11:14] even if it's coming in through a south-facing window, to really give those plants what they need. So I always recommend adding some additional light. Individual tabletop LEDs or little grow lights that pop into the individual containers are just fine if you have your plants, if you have your seedlings in a window and you just need to supplement.
[00:11:38] If you are not going to have them in a window and they're going to rely on your lights for 100% of their lighting, then you might want to look at just some basic LED shop lights or compact fluorescent bulbs. You want to look in your lights for things that have between 5,000 and 6,500 Kelvin of light. That is the light range that you're looking for. You can also, you know, if you really want to get into it,
[00:12:08] you're looking at like full-spectrum LED grow lights with adjustable height settings and all that kinds of fun stuff. All right? High-end, really cool, really not necessary. Okay? Your basic LED lights are going to do just fine as long as they are in that proper light spectrum. Natural light alone is usually going to be insufficient. Basic LEDs work really well. High-end growing lights are going to, you know, offer a little bit more in terms of the spectrum of the light,
[00:12:36] but that's not necessary in the seedling phase. So what we want to look for in the light is the light color. Day light temperatures are in the 5,000 to 6,500 Kelvin range. And so that is what is best for our seed starting purposes. And now I want you to geek out with me for just a minute. Okay? If the term Kelvin sounds familiar to you, it is likely from one of your science classes in school. It's the SI unit of temperature.
[00:13:05] A change in one Kelvin is the same amount of a temperature change as one degree Celsius. But Kelvin starts at true zero, which equates to negative 273.15 degrees Celsius. Okay? Zero Kelvin is the temperature at which all molecular activity stops. It is literally absolute zero. Okay? So if Kelvin is a measurement of temperature,
[00:13:33] then why are we using it to talk about the color range of lights? So in lighting terms, the Kelvin of a light is assigned using the basis of correlate color temperature, CCT. This is basically if you were to take a metal object and expose it to heat above a certain temperature, the metal appears to glow. Okay?
[00:13:59] So depending on the Kelvin temperature that the object is being heated at between 1,000 Kelvin and 10,000 Kelvin, that glow will be various colors. The lower end of the scale between 1,000 and 10,000 means the warmer the color temperature will be. It emits more yellow and orange hues.
[00:14:22] The higher end of the scale means it will emit a blue-white color temperature that more mimics daylight. So the color temperature rating of a light, like 5,000 K, 5,000 Kelvin, correlates, there's that correlate color temperature, right? Correlates to the Kelvin temperature of the object. Isn't that cool?
[00:14:48] So, and then another fun note, the Kelvin temperature doesn't have a degree symbol. That's why your lights will say 6,500 K and not 6,500 degrees K. This is because the Kelvin scale is an absolute scale, while the Celsius and the Fahrenheit scales are relative based on the freezing point of water. Okay? There is your unexpected science lesson for this week. Okay? You are welcome. If you didn't nerd out enough with me on that little note, I got another one for you.
[00:15:16] And this one comes from just one of the ingredients in Magic Mind, and it's Rhodiola Rosea. This is not one that we've talked about before. It's one that supports mental endurance, and it combats fatigue, promoting sustained energy and alertness. So, fun fact, I ran a 24-hour trail endurance race the last weekend in January. Yes, 24 hours running on technical trails.
[00:15:45] I absolutely had a blast. And I intentionally threw a bottle of Magic Mind in my cooler, along with all my running fuels and supplements for this very reason. I pulled a study that showed taking Rhodiola Rosea can improve endurance exercise performance. So, the purpose of the study was to investigate the effect on reaction time and attention and muscle strength and all these things. I was mainly worried about the attention,
[00:16:12] because when you're running around a lake on frozen, snow-packed, rocky trails in the middle of the night, you need your full attention. Another study tested Rhodiola Rosea on fatigue during night duty among a group of physicians and found a statistically significant improvement in perceptive and cognitive cerebral functions. Did I take Magic Mind during my race? Yes. Yes. In the middle of the night? Yes. Do I feel like it helped?
[00:16:41] Also, yes. And I took third place in that race, by the way. So, I am absolutely convinced. Magic Mind has a very special offer only for the month of February and only for the first 10 orders. You will save a full 40% off your subscription by going to magicmind.com slash growsomething40 this time and use code GROWSOMETHING40. Okay? We're usually at 20.
[00:17:09] This month, we're at 40, but only for the first 10 orders. The subscription is usually $59 and some change, because that saves you 20% off of the one-time purchase price, or I guess it's 28%. And then, if you use this special code this month, you get it for $32.59. But this is only for this special, and it's only during February, and it's only for the first 10 orders. magicmind.com slash growsomething40. And the link will be, of course, in the show notes.
[00:17:38] So, the fourth essential seed starting supply that I think you should have is a heat mat. Now, this is optional, but very beneficial. We want to provide consistent warmth to the soil to promote germination, especially for your heat-loving crops like peppers and tomatoes. But your cool weather ones also prefer a warmer temperature as well.
[00:18:01] Now, your budget option for this is to place your trays, like, on top of a refrigerator or near a heat source or, you know, whatever it is that you are using to germinate your seeds in, not trays, but your containers. Put them somewhere where it's warm and it's consistently warm. You can also kind of double down on this a little bit by watering your seed starting mix the first time with very, very warm water, around 100 degrees Fahrenheit.
[00:18:31] So, this is going to sort of pre-warm that soil. And then when you plant the seeds, then you want to put it someplace where it's nice and warm. This is fine. It's just not super consistent. So, the heat mats definitely speed up the germination. It's just, yes, room temperature seeds can still sprout. They're just going to sprout more slowly. So, I prefer to use a heat mat. I use them on just about everything that I sprout, with the exception of maybe lettuces.
[00:18:57] And a basic seedling heat mat is going to run you about 20 bucks, okay? You also have some higher-end ones. They've got adjustable thermostats and you can daisy chain them together and all the kinds of nonsense. Not really necessary. Might be nice to have if you continue to expand your seed starting setup. The key points that you want to look for in a seed starting mat is it should raise and maintain the temperature at the soil level to between, you know, 70, 75 degrees, maybe 85 degrees Fahrenheit, okay?
[00:19:26] This is generally referenced as 10 to 20 degrees Fahrenheit above room temperature. It also should be water-resistant and it should not be flimsy. You want it to be durable so that it stands up to years of use. My first heat mat is still going strong 18 years later. So, it's a great investment if you get the right one. I will link to some really good recommendations for some heat mats in the show notes for you.
[00:19:54] Your fifth supply for seed starting would be water, okay? And you kind of want a system and this might not be what you think. You need to keep the seedlings evenly moist but we also don't want to be displacing those seeds or causing overwatering. So, the easiest way to do this is to make sure, number one, that your seed starting medium is, you know, well watered before you plant the seeds so that you don't have to pour water
[00:20:23] over top of them again and disturb them in that way. And then use a spray bottle or even, you know, a repurposed water bottle that you've poked holes in the cap with just to be able to spray the water lightly over the top in case the top of the soil dries out. You can also use a watering can with a very, very fine spout and do it very, very slowly. Now, there are high-end versions of this. You can do like a little automated drip system.
[00:20:52] There's capillary matting that you can get and put in the tray and then, you know, fill the water with it and put the trays on top. I don't even have these capillary systems. I don't have automated drip system and I start thousands of seedlings every year. So, don't think that you have to go buy something that's super fancy. You know, a spray bottle will do you just fine. You know, the mist is a better idea anyway because it's going to prevent that soil disturbance. What I will say is it's important not to use trays that hold a ton of water in them until
[00:21:22] after your seedlings sprout. Bottom watering is great for once your seedlings have sprouted because we want to train those roots to go down for the water instead of up. But if you put your seed starting mix into a tray that's holding water, that soil or that seed starting mix is just going to stay waterlogged the entire time and that's actually too much water.
[00:21:46] So, you can actually do sort of a DIY capillary wicking system by placing a couple of layers of felt in the bottom of the tray and then putting water in it. So, the felt soaks up the water and then you put your seed starting containers on top of that and then they soak up from the felt. That's fine. But I would not sit them directly into water. If you are going to do that because you're not going to be able to check on them very quickly, then just do a little bit of water.
[00:22:16] You're better off having it run out and dry out just a little bit than you are having them completely saturated. I just use a spray bottle. If it tends to get very, very dry, I might do a little bit of a watering can with a fine spout, but that's it. Okay. We just need to have something set up ahead of time so we know how we're going to get water to those, the seed starting trays. And then number six is airflow. Okay. Plants need to breathe and they love to dance.
[00:22:44] So, stagnant air around your seedlings can actually create a breeding ground for fungal diseases and the heat from the lights being so close to the plants after they sprout can also heat up the air around the plants and that's going to inhibit growth. Plus, you know, if you get some airflow going, they get that gentle movement of air and that kind of pressing against the plants actually strengthens their stems up as they sway back and forth.
[00:23:13] So, this better prepares them for life outside. It makes them stronger. So, your budget option here is just to open a window. Now, you don't want to do this on a really gusty day. We don't want to damage the baby plants. And also, if it's super cold where you are right now, that might not be the best idea. So, your alternative to this is like a small little desktop fan. Super easy. I prefer an oscillating fan because it kind of mimics the ebb and flow of the wind and it distributes the air a little bit more evenly around the space.
[00:23:43] This is all going to depend on your setup, where you're set up, and exactly how many plants you're working with. Opening a window may be the cheapest, but it's going to be a little bit inconsistent. And if we're starting seeds ahead of spring, it likely is going to be cold depending on where you are. So, a fan is going to be a little bit more consistent. It's a little bit more of an easy to monitor solution. And you can set the fan on a timer so it's only on while the lights are on. So, just look for something that isn't going to blow too strongly against the seedlings
[00:24:12] because we don't want to damage them. So, those are the things that I think are essential for seed starting. The right containers, a proper seed starting medium of some sort, lights, heat, water, and airflow. Okay, pretty much the same things that a seed needs when it's sprouting outside in the garden. Now, you might think that there's a few things missing from that list. Let's talk about which things are more nice to have, but not necessary.
[00:24:39] And the one thing that is downright not needed at all, and I think is a bit of a scam. So, many of the products that are marketed for seed starting absolutely are not essential, especially for beginners. Okay? There are a few items that you might want to consider later on if you expand your seed starting efforts, but I think newbies can absolutely skip these. And the first one that you might have noticed was missing from that first list is humidity domes.
[00:25:07] Seeds will germinate just fine without a humidity dome as long as moisture is maintained. Okay? But if you are growing in a very dry environment, a dome is going to help retain moisture during early germination. This is also even more important if you're using a smaller volume of soil. In my house in the wintertime, it is like 20% humidity in here, and it doesn't matter how many humidifiers we have running. So, it is definitely dry.
[00:25:36] I use humidity domes. This also helps when I, you know, am busy working a lot of hours and I may not get to check the soil moisture as frequently as I like. It prevents them from drying out. But if your setup doesn't come with humidity domes, you don't want to have to go and buy something extra. You can use plastic wrap, cling film. You can use beeswax, you know, coated fabrics. You can repurpose other plastic lids.
[00:26:02] You can use all kinds of different things just to cover up your seed starting containers while you're waiting for those plants to sprout. Just be sure to remove that film or the lid or the humidity dome as soon as the seeds germinate. Number one, if you're using like cling film and it's tight against where the seeds are sprouting, they're going to press up against that film and that can damage them. But we also are trying to avoid damping off disease and other fungal problems.
[00:26:31] So, we want that airflow right away as soon as those seedlings start to come up. You're also going to want to remove these a little bit earlier if your soil seems to be staying too damp or if there are signs of mold. So, if you are starting a lot of seeds and you're having problems making sure that they're, you know, or checking to make sure that they are always as moist as they're supposed to be, you might use a humidity dome. If you're growing in a very dry environment, you might use one.
[00:26:58] Otherwise, seeds are going to germinate just fine without them so long as you can maintain the soil moisture, okay? This thing is pH testers. Most seed starting mixes, especially if you're buying them commercially, have the correct sort of neutral pH already. So, it's not necessary for you to be testing the pH of the water that you're using or the soil or the seed starting medium that you're using.
[00:27:24] If you are creating your own homemade mix, especially one that contains some sort of soil component, then you might want to be testing the pH because you have no idea what that soil, the pH of the soil component is, whether it's a compost or whatever. And there are some components in seed starting mixes in the homemade versions that can actually be fairly acidic and that might not be what you want for your seeds as they're starting out.
[00:27:53] We like them to be a bit more neutral. So, at that point, it might be helpful for you to have a pH tester, but you don't have to go and buy a super expensive, you know, battery operated, you know, testing thing, whatever. Like, you can just get the inexpensive little pH strips and follow the instructions on that in order to test it. So, this is not something that is necessary for you to get unless you are falling under some very specific circumstances.
[00:28:20] And most beginners are not going to fall under those circumstances, okay? The third thing would be really expensive LED grow light stands. These are nice to have if you get to the point where you need adjustable lighting for multiple trays because you are starting so many seeds and you have to rotate them through. Or, if you are very, very limited on space and you really can't come up with some sort of
[00:28:50] a system all on your own. Other than that, you can generally come up with your own sort of DIY shelf setup. Um, with affordable clip-on lights or simple shop lights on chains or whatever it is, okay? Don't be fooled into thinking that you need some fancy setup that's got the lighting already set up for you that you can raise and lower and all these kinds of things. They're fun and they're cool looking. And if that's what you want, then go for it.
[00:29:19] But, you know, you don't think that you need it. It's not, it's not essential, okay? And the first thing that's not essential are these special seeding tools. You'll find them usually like in a pack of four or five. They usually have a couple of little like small dibblers. Um, and you know, maybe like a little seed drill and a little, um, little container for like tiny seeds where you're supposed to just be able to tap them and shake them out. Look, these might look cool. They aren't needed for a very small setup.
[00:29:48] If you're only planting a handful of seeds, you can use the end of a pencil or a pen or a stick even to, to dibble the holes that you want to drop your seeds into. You can use tweezers for small seeds if you're only planting a few. These tools might end up being useful if you are seeding a lot of trays or you are seeding a lot of really, really small seeds over and over and over again. Most of us are not doing that.
[00:30:17] So you absolutely do not need special seeding tools unless you feel like your volume of seed starting has gotten to the point where it would make it faster and easier on you, okay? And that one thing that I say you absolutely do not need and that I feel is a complete and total scam is specialty seed starting fertilizers, okay? Okay.
[00:30:41] Seeds contain enough nutrients to grow until their first true leaves appear. We always say, you know, a seed is a container that has a baby plant and a boxed lunch. That boxed lunch is all of the energy that they need to burst out of their seed coating up through the soil and start growing long enough until their first true leaves appear. They do not need any type of fertilizer.
[00:31:08] And as a matter of fact, if there is too much fertilizer available when they do sprout, it can actually damage the seedling. So don't think that you need some specialty seed starting fertilizer because once those plants do develop their first true leaves, you can actually use whatever liquid plant food you normally use and just use it at half strength. This is enough. You don't need something that is special.
[00:31:37] Now, if you are doing, you know, something that is going to stay in the house for a very, very extended period of time, you've got very long growing transplants like tomatoes in a very short season area, or you have things that are going to be indoors for an extended period of time. Yes, you are going to want to feed these plants, but you do not need something specific for it. Half strength, regular liquid plant food is going to do just fine.
[00:32:05] So hopefully that demystifies a little bit about what is essential for seed starting and what you can do without. My free seed starting essentials ebook goes into much more detail about everything we talked about today and more, and it's totally free. Just grow something podcast.com slash seed book. And it also includes a chart with the preferred soil temperature ranges for germinating the most common vegetable seeds.
[00:32:32] So you can determine whether you really need a heat mat or not. By focusing on the essentials and avoiding unnecessary purchases, beginning seed starters can absolutely be successful without overspending or about getting overwhelmed by all of the options. As your experience grows and your needs grow, then investing in higher end or time saving,
[00:32:58] you know, equipment, then that might make seed starting more efficient and more scalable. It just all depends on your needs. Until next time, my gardening friends, keep on cultivating that dream garden and we'll talk again soon.