
This is the time of year when most gardeners in the Northern Hemisphere begin preserving their harvest. Summer's bounty is giving one last push and the cooling temperatures mean the fall garden is ramping up. Over the next few weeks, we'll talk about preserving that harvest, and this week is no different. But, instead of talking fruits and veggies for eating we're talking seeds for growing.
Saving seeds from our own gardens can have many benefits. Not only are we ensuring we have enough seeds for next seasons garden, hedging your bets against shortages (see also: The Year That Shall Not Be Spoken Of), but seeds we save and replant year after year will also be better suited to our unique climate and gardening situation.
But knowing which seeds to save can give us a little trouble. Will it produce the same fruit we harvested it from or something different? Did it cross-pollinate with something else or is it self-pollinating? And how long will they last in storage before I need to refresh my seed stash? We dig into all this and more while talking the basics of saving seeds on today's episode.
Just Grow Something Gardening Friends Facebook Group
Check out how you can become a patron on Patreon
Merchandise | Just Grow Something
Positively Farming Media Podcast Playlist on Spotify
RESOURCES:
Episode 62 - Properly Saving Seeds in Your Garden (This one is a deeper dive into some of the minutia of saving seeds)
Episode 63 - Proper Seed Storage: Moisture levels, storage conditions, containers and more (prepare to geek out!)
Join the Black Rifle Coffee Club. Save 20% and caffeinate alongside me while providing for military troops and first responders!
--- Send in a voice message: https://anchor.fm/justgrowsomething/message

Karin Velez [00:00:00]:
This is Positively Farming Media. Hello, my gardening friends and welcome back to the Just Grow Something podcast. This is the time of the season for a lot of us when we are starting to think about preserving what is coming out of our gardens. It is that sort of transition period between the end of the summer harvests and the beginning of the fall harvest where the days start to cool down a little bit. And it seems like those summer crops just boom. They take off for one last really good push before, finishing up their life cycle. And that seems to be a time when we just have tons of tomatoes and the peppers really start coming on and now is a good time to start preserving that harvest. So over the next few weeks we're gonna start digging into the different aspects of preserving with a little bit of a refresher course on freezing and canning, both water bath canning and pressure canning, and then also dehydrating.
Karin Velez [00:00:57]:
And I may do a little bit about fermenting too because I've had a lot of questions about that and it's something that I am new to. So as I learn, as usual, I will share that information with you. But this week we're talking about a different type of preserving and that is preserving your seeds. We're gonna go over the seed saving basics again. What to save, what not to save, how to be sure that your seeds are ready to save, and then tips for how to store them, and then how to test for germination rate. With the seed shortages that we have seen from a lot of the seed suppliers over the past few years and the fact that regulations have somewhat changed and seed companies tend to drop some of their older varieties and opt in for other ones, now is a great time to learn how to save your seeds. Let's dig in.
Karin Velez [00:02:44]:
So you may notice that the audio is slightly different today. We are camping. So I am sitting outdoors in a mostly abandoned camp area because, you know, when we get a chance to get off the farm to go camping, we don't leave until Saturday evening because we do our farmers markets and we come home and we take care of all of the livestock, make sure that the greenhouse is all buttoned up for the weekend, make sure the instructions for our farm help is left, and then we take off. We grab the dog, and we jump into our well, now we jump into what is Lulu, our vintage camper, a little tiny camper. It's a 1965 Fleetcraft. She's absolutely adorable. She's a work in progress, but, we've decided a while ago that we are no longer tent campers. After a while, marines do start to get a little bit older, and sleeping on the ground isn't necessarily the best thing.
Karin Velez [00:03:38]:
And we started using an air mattress, and then we're like, yeah. Maybe we should upgrade to just something a little bit better. So we have a little vintage camper. It doesn't even have a bathroom. It's just basically sleeping quarters and a place to cook. But it makes it easier to just kinda throw everything in there, hook it to the truck, and take off, which is exactly what we did. But the cool thing about when we come in camp is the first chance that we usually get is right around the time that everybody is going back to school. So we show up on a Friday evening or I'm sorry, on a Saturday evening, and most of the campsites are are taken up except for the one that we've reserved.
Karin Velez [00:04:14]:
But by 2 o'clock on Sunday, the place is a ghost town because everybody's gotta get back. They've gotta go to work. They've gotta go to school, whatever. And we quite literally have the entire place pretty much to ourselves. The camp hosts come through and wave as they're going, and we usually get to stay until, like, Tuesday morning, and then we will pack up and head home and get the harvest ready and everything else. So, it it was desperately needed for us to just get away from the farm for just a few days after a long, very difficult season. I think our our brains needed it. Our bodies needed it.
Karin Velez [00:04:47]:
We've basically completely unplugged. The site that we're at doesn't even really have anything in the way of signal. So I'm not exactly sure when and how this
Karin Velez [00:04:54]:
is gonna get uploaded.
Karin Velez [00:04:57]:
This might come out late on Tuesday because I might not have enough signal to get it uploaded, but we'll see. I can, hike my way out of here and and go see if I can find some signal somewhere. But if not, it'll be a little bit late, and that's okay. So but that is that is where I am. And I can tell you, even being here right now, I've always got gardening or growing on the on the brain. I don't know how many of you have camped in, in actual campgrounds. Like, we are in our one of our state parks, and there are always camp hosts that dot the area. And, you know, in this instance where we're at right now, there's 3 different sites that are camp hosts.
Karin Velez [00:05:33]:
They basically are here permanently. They have their big RVs, and they have their, pad where they stay, and they sort of rotate duties between, you know, checking people in and, you know, making sure that everything is running smoothly. And so they basically live here. So the cool thing is we drove to the marina today, and we got a chance to see the different, the 3 different, sites where the camp hosts reside. And every single one of them had some sort of a gardening setup going on outside. Some of them were just doing flowers, but, 2 of them at least were growing their own vegetables outside of their little camper. One of them had, you know, sort of a, one of the tiered planters and a couple of pots of what looked like cucumbers, And then there was another couple who had just, I mean, big containers full of tomatoes and peppers and all kinds of stuff. I mean, I just I love the fact that they are living out of these RVs, and they're living at a campsite, and they are still finding a way to grow something for themselves.
Karin Velez [00:06:38]:
I love it. I think it's fabulous. I guess I just always have gardening on the brain, and it just makes me excited. So I was super excited to see that.
Karin Velez [00:06:48]:
Okay. So this episode is gonna be
Karin Velez [00:06:50]:
kinda down and dirty. I'm not gonna do any, you know, DRL. I'm not gonna do a question of the week, because I'm gonna do this, and then I'm gonna go back to, you know, sitting on sitting by the campfire. So let's jump into seed saving basic. Now I did do an episode way back, in episode 62 was all about this, seed saving, and I talked a lot in that one at length about the difference between hybrids versus open pollinated versus heirlooms, and some of the problems that you get with cross pollination. I talked a little bit about how to prevent from passing on diseases in the seeds that you save so that you don't save anything or grow anything the following season that has got some diseases saved over from the previous season. So I will link to that in the show notes because there's a lot of detailed information about that or in that one. This time I just want to kind of do a refresher course on some of the seed saving basics, and and how to get started in that if you've not ever saved seeds before.
Karin Velez [00:07:50]:
And maybe it's a little bit of a refresher course for you if you have. One of the biggest questions that I get during this time of year when somebody gets something from me at the farm stand, they take it home and they absolutely love it. Usually, it is like an end of the season watermelon of some sort. And they'll go home and they'll eat it and they'll come back and they'll go, oh my gosh. That was the best watermelon I've ever had. You know, can I save the seeds from that? And unfortunately, in most instances, the answer to that is going to be yes, but you likely aren't going to get the same watermelon. And part of the reason is because some of what we grow is hybrids, some of what we grow are open pollinated. And, you know, if you save a hybrid seed, a lot of the time it's just not gonna reproduce true to type.
Karin Velez [00:08:37]:
We've talked about that before. But what it boils down to really for us is the fact that we plant a lot of different varieties of the same species and they do them all in the same field. So there's a very good possibility that even if you were to save that seed and it was viable, it more than likely has already been cross pollinated with another plant of the same species. And so it's not going to produce what you think. I only save seeds from our farm out of my gardens out front, out of my raised beds and what we call the home garden or the kitchen garden. And that's because, normally, I am only growing one variety of a species or one type, or one specimen of that species. And that way there isn't much of a chance of there to be cross pollination. So just keep that in mind when you are getting something and you get a fruit from a farmer.
Karin Velez [00:09:33]:
Yeah. You probably need to go back and make sure that it was isolated before you try to save the seed. It's not that it won't grow something. It might. It just likely isn't going to be what you think it was. Right?
Karin Velez [00:09:43]:
So
Karin Velez [00:09:44]:
like I said, this is this is the time when a lot of us are looking at doing seed saving, whether it's fruits or flowers or vegetables or whatever. It is a really good way to preserve some of those heirloom varieties. Again those those seeds that are open pollinated that have been in existence for a very long time it's a way to preserve that type of seed. And it's another really good way to just keep some of the of your favorite varieties around because over the past, I don't know, probably 20 years ish or so maybe a little bit longer, a lot of the seed companies have started to consolidate and they've merged. And then at the same time, regulations about patenting seed varieties have also loosened a little bit. So now you'll see, you know, you may get a seed variety from a catalog this year that you will not see in that catalog next season. They're dropping a lot of the older varieties for the new ones, and those new ones are usually hybrids or they are patented seeds, which means you are not legally allowed to save the seeds from that. So, of course, you've seen a lot of different organizations that are sort of these grassroots efforts to try to save these seeds and inspire gardeners to save their own seeds.
Karin Velez [00:11:05]:
And it's a lot of the time, it usually involves a lot of these older and heirloom varieties. So that's one reason why, you know, you might wanna save seeds. The other one also is that it's just a really good way to develop seeds that are acclimated to your particular growing environment. If you save the seeds from your healthiest plants this season and you grow them again, and then you save them from the healthiest plants the next season, and then you grow them again, you are going to naturally select for those traits that are the most suitable for your growing environment.
Karin Velez [00:11:40]:
Okay. I just moved inside because
Karin Velez [00:11:42]:
it was getting a little noisy out there. So anyway, so this is how you end up with seed strains that are acclimated to very specific regions. And so if you are in a very cold environment or you're in a very hot environment or you are very prone to a specific disease, you can select for that and save those seeds and continue to perpetuate those good genes. And then, of course, again, it's all about, I have this favorite variety, and it did really, really well for me this year. I'm gonna save those seeds, and I'm gonna perpetuate those genes and get the best harvest of this one that I really like next season. And also kind of hedges our bets a little bit against weird things happening with our society, with, you know, diseases, pandemics, that kind of thing. We never saw a seed shortage like we did in 2020 when we had a global pandemic and everybody started growing their own gardens and suddenly there weren't enough seeds to go around. So, you know, don't let yourself get put into that position again, make sure that you have some varieties that you can save your seeds from.
Karin Velez [00:12:48]:
So let's start with sort of the basics of what seeds do you want to save. I always say, yeah, yeah, you can you can plant a hybrid seed and you can take the I mean, roll the dice and see what it is that you're gonna get, but really, I do encourage you to start
Karin Velez [00:13:02]:
with open pollinated varieties. Those are the ones that
Karin Velez [00:13:02]:
are gonna set seeds whose plants, Those are the ones that are gonna set seeds whose plants resemble the parent plants. If you plant hybrids or you plant the seeds that came from a hybrid plant, you very likely are going to get the traits that revert back to 1 or more of the parent plants. You're not sure what you're gonna get. And if the idea for you saving seeds is to get something that is viable for the next season, then saving the seeds from a hybrid are not the way to go. So the plants that we grow in our gardens can sort of fall into 1 of 3 categories. They're either self pollinated, wind pollinated, or insect pollinated. Things that self pollinate are things like tomatoes and peppers, lettuce, peas, beans, broccoli. Those are usually really easy to save seed from because you're not usually going to have any type of a problem with cross pollination.
Karin Velez [00:13:58]:
Can they cross pollinate? Yes. Absolutely. But I have grown tomatoes right next to each other and save the seed from them, and they've come back just fine. In most instances, they're self pollinating. Crops that might be self pollinating but are gonna take a little bit more planning are things like carrots and beets. Those are biennial crops. So they don't set seed until the second season. But if you do wanna save those, those are all self pollinating, also self pollinating.
Karin Velez [00:14:29]:
So you just have to wait until the next year to be able to gather those seeds. So for beginners, yeah, you might wanna stick with the beans and the and the peas and and that sort of thing. Crops that are wind or insect pollinated are all of the things that are in the cucumber family, cucumbers, melons, pumpkins, squash, gourds, and then corn is also wind or insect pollinated, usually wind. So if you want to save seeds from these crops, you wanna make sure that you're only growing one variety of those during any given season. You wanna make sure that they are separate from each other if they are in the same species. So if you look at a packet of seeds and on your melons, your cantaloupe, for example, it says cucumis mellow variety Athena, and then you look on your cucumber packet and it says cucumis mellow variety Bristol, well, guess what? Those are both the same species. They're just 2 different varieties. They can and they will cross pollinate.
Karin Velez [00:15:35]:
So if you have grown both of those in the same field, it is very likely that any seeds that you save from 1 or the other is gonna be a hybrid of the both, and it's not going to reproduce true to type. So if you intend on saving seeds from those types of plants, you wanna make sure that they are either on complete opposite sides of your garden area, which depending on the size of your garden may not be enough, or that you only grow one variety of the species at a time. Now with some of these, like corn, you can grow multiple varieties, but you time it differently. There are some corn species, sweet corn species that are early varieties that mature in just a matter of 68 to 70 days. And then you have later maturing varieties that don't mature for 80 to 85 days. If you plant them both, they're not going to tassel at the same time. So those seeds are not going to be cross pollinating each other. That is one way to be able to do this with varieties that are wind and insect pollinators.
Karin Velez [00:16:45]:
The only other way to really do this is to, if you're growing multiple varieties of the same thing, say those Athena cantaloupe and the Bristol cucumbers is to use insect netting around them, but then you are going to have to hand pollinate. So that's definitely not something that I usually say beginners would be doing, so just keep all of this in mind when you're looking at saving seeds. It's not to say that you can't, it's just to say that you're not gonna have a guarantee of what you're gonna produce the next season if you don't pay attention to some of these things. So once you've decided what you're gonna collect from or what you're gonna save, the next thing is to actually collect those seeds. I mentioned this already. Take the seeds from the healthiest looking plants and the best specimen of fruit from those those plants. I know how tempting it is. You get this big, beautiful tomato, and you just wanna like take it in and slice it up and show it off.
Karin Velez [00:17:37]:
But that's the one that you probably wanna save the seeds from. It's kind of like our livestock. Like, I don't wanna take my laying hens and take the one who, you know, eats more than she should, but still only gives me, like, one egg every 4 days and use her as a breeder. I want to pick the hen who eats a normal amount of food, but is still very healthy and also gives me, like, 6 eggs every 7 days. She's the one that I wanna put into my breeding program. The other one is probably gonna end up in the stew pot. So, I mean, the saying is breed the best and eat the rest. The same thing goes for our vegetables.
Karin Velez [00:18:18]:
Right? So you want to save the biggest and the best of of what you get from your plants, and then just eat all the ugly fruit. You really do wanna make sure that you let the seeds get fully mature before you pick them to save them. So you don't wanna be picking, say, a zucchini, young and small and tender, the way that we normally would eat them. You want them to grow and get baseball bat sized. You want them to start to develop that hard shell. You want that fruit essentially to get to the point where it is naturally going to try to reproduce. Right? So mature seeds are the only ones that are going to be able to be reproduced. So you wanna leave them out there as long as possible.
Karin Velez [00:19:00]:
And here's another thing about, you know, developing varieties that are acclimated to your gardening area. If you live, say, in a really, really hot climate and you are trying to get a lettuce plant that maybe does better in your heat, then save the seeds from that lettuce plant that bolted last. Right? If it's the last one to bolt and last one to set seed, then it's a little bit more tolerant of the heat. Save those seeds, replant from the next season. And then again, save the seeds from the one that bolted last. That's how you develop something that has a little bit more resistance to the heat. You can do the same thing on the opposite spectrum when it comes to, plants that survive, a light frost or a freeze. You know, if you have a frost sensitive plant that survives a freeze and it still has fruit on it, well, by golly, save the seeds from that fruit.
Karin Velez [00:19:55]:
Pass those genetics on for your seeds for the next season. So just make sure that they're mature when you harvest them. Seeds that are in like a pod or in a husk, so your corn or say peas or beans that are in pods, if you can, leave those on the plants and leave them to dry in that way. As long as you're, you know, not having critters coming through and trying to steal them from you and eat them. Or if you're gonna have like really heavy rains or you're gonna have, you know, really, you know, bad freezing weather, they should be left out there. If you have any of those other problems though, go ahead and just harvest as many as you can. You can even pull the entire plant if it's feasible and bring it in and just hang it up and let it finish maturing that way. You just want them to be as dry as possible.
Karin Velez [00:20:42]:
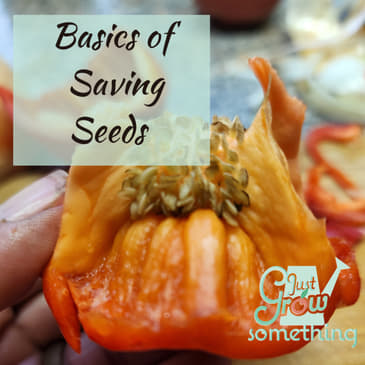
And most of those seeds when they're when they're fully mature, they're gonna have a hard seed coat, or they're gonna darken up a little bit in color. You wanna clean your seeds. That's the next step. You have basically 2 different types of fruits. You have wet seeds, wet fruit seeds, and then you have the dry seeds. So wet processed seeds are the ones that are in, a fruit that has a damp flesh. So fruits or berries, cucumbers, melons, tomatoes, all of those. So you wanna cut open the fruit, scrape the seeds out, get the seeds and the pulp and the juice, get it all rinsed off and cleaned off.
Karin Velez [00:21:20]:
Sometimes you may want to ferment these seeds to make sure that you're getting any of the bacteria to kill off any seed borne diseases. Again, go back to episode 62. We talk more about that. And I talk a little bit about which ones should be fermented and which ones don't need to be. But once you get the seeds out, make sure that you wash them really good, place them in a large bowl or a bucket, add water, and stir the mixture really, really good. The seeds that are viable will tend to be denser, and so they're gonna sink to the bottom. Whereas the immature ones are the ones that are very poor quality or more than likely going to float. So just add more water and keep repeating the process until you only have clean viable seeds that are left.
Karin Velez [00:22:02]:
And then strain them out, wash them under running water, and then spread them out as thinly as possible on a flat dry surface. So, you know, a dish or cookie sheet, a window screen, anything, and let them out lay them out to dry. Kind of toss them around a little bit every couple of days to make sure that every side is getting a chance to get to get air dried. Now if you have the dry processed seeds, right, these are the ones that are in a husk or that are in a pod or maybe in a flower head. If they're in a pod, you're obviously gonna have to take them out of the pod, smash it, peel it, break it open, however. But once they're out of the pods, then you can just separate them. You can do it with a hand screen. Like, if you build a screen that is got a wire gauge that allows the seeds to sort of pass through, that way you leave all the husk behind.
Karin Velez [00:22:54]:
Otherwise, you kinda have to do this by hand and it can be tedious. You're only doing a few, it's not that big of a deal. But if you really start to get into seed saving, you may wanna build yourself a screen specific to some of your seeds. But once the larger paws are moved, then you can get rid of all the the chaff and everything else and make sure that they are all dry. So you don't want the seeds to get above 95 degrees. So I never say use a dehydrator. I've heard people doing this. I don't like that idea.
Karin Velez [00:23:24]:
It's too hard to control the temperature when it comes to that. So air drying is perfectly fine. Fans will help with this. Put some fans. Ceiling fans were great, but you could also just put the put your seeds on on window screens and have, you know, circulating fans going just to get them all air dry. And like dry and brittle is what you're going for. Now I did do an episode, it's episode 63, and I did talk about a sort of scientific and very geeky way to determine whether or not your seeds, are dry enough to store. And I've got a whole formula in there about how to determine whether or not a seed is dry enough based on its moisture content and its weight and all that kinds of stuff.
Karin Velez [00:24:12]:
So I'll link to that one as well in the show notes. But in reality, just look for the seeds to be dry and brittle. You want them to not have very much moisture left in them at all. If you really wanna geek out of it on it, go back to episode 63, and I'll talk all about the, the scientific method on how to do this. Okay. And then so step 4, store your seeds. Right? Really, what you're trying to do with storing seeds is making sure that you're going to end up with a really good germination and that they're going to be able to last in storage for you. So there are 2 ways to go about this.
Karin Velez [00:24:52]:
If you live especially in a very high humidity area, you may want to pick up silica gel packets. Usually, you can get those at the craft store and, store your seeds with those packets for the 1st few weeks. So if you don't live in a really high humidity area, you don't really necessarily have to do this. But if you're unsure in any way, shape, or form about the moisture content of your seeds, it may be a good idea just to hedge your bets. So you want to put the seeds into paper envelopes, put your silica gel packets in there, make sure you're labeling them, especially if you've got different varieties of things that you're trying to remember. And then go ahead and put each of those envelopes into a clean glass jar. After about 2 weeks, then you can pull the silica gel out. And then you can either put the envelope back in the glass jar or just make sure that you have a dark cool place to be able to store your envelopes.
Karin Velez [00:25:47]:
I always, again, hedge my bets on the glass just because as long as the seeds are properly dried, they're better protected in there. And the only problem that I ever see is if the seeds aren't properly dry, then obviously, you're just doing nothing but trapping the humidity or trapping the moisture in there, and that can cause them to rot faster. But honestly, if they're not dry enough, they're gonna rot anyway. So if you have them in glass, there's less of a chance of them getting ruined. I do have a dedicated storage area for my seats. It's actually a metal, medical drawer system. I'm not even sure what it was originally used for. I think it might have been medical instruments of some sort, but it works really, really well.
Karin Velez [00:26:26]:
It keeps the critters out. And we keep ours in in our basement, which stays nice and dry and cool during during the wintertime when I'm storing these. So just figure out what works best for you. You just wanna be sure that they are in a cool, dry place until you are ready to use them. Now how long are these seeds gonna last for you?
Karin Velez [00:27:22]:
So according to my alma mater, Oregon State University, you've got sort of 3 different categories of seeds, short lived, intermediate, and long lived. So your short lived seeds are only gonna last for about 1 to 2 years of storage before they start to reduce the level of germination. And those are things like corn, onions, leeks, parsley, and parsnip. Then we move into the intermediate length ones. Those will last around 3 to 4 years. These are things like asparagus, beans, carrots, celery, peas, and spinach. And then the long lived seeds, which there's a lot more of those than you would think, these should last you around 4 to 5 years before you need to replace them. And those are things like beets and chard, anything in the cabbage family, so brussels sprouts, cauliflower, cabbage, kale.
Karin Velez [00:28:12]:
And then we get into turnips and radishes, cucumbers, and anything in the squash family. So all of your cucurbits, also include a cantaloupe and watermelon and muskmelon, those sorts of things, and all of your nightshades. So eggplant, peppers, tomatoes, and then lettuce also, will last you for about 4 to 5 years. So one thing that you might want to do before you put these seeds away in storage, and certainly something that you wanna do if you're not sure how long or how viable your seeds are anymore after they've been in storage for a while is a germination test. Doesn't make any sense to go through all the work of wanting to save these seeds and storing them up only to find out later on that they weren't any good to begin with. So when you're new to this process and you're not quite sure whether or not you have viable seeds, a seed germination test is a good way. Just sacrifice, you know, 10 of the seeds that you that you're planning to save to make sure that they're good. And then also, again, if if there's any question once you're pulling them out of storage as to whether or not they're still good, this is something that you can do.
Karin Velez [00:29:17]:
Just tear a paper towel in half and get it really moist with water. I basically soak it down and then I squeeze most of the extra out. It should be moist, but it shouldn't be dripping wet. Then fold the paper towel in half and lay it out flat, and then grab 10 seeds from the variety that you're testing. Spread those seeds out on one half of the paper towel so that there's some space in between. You don't want them touching. And then fold the paper towel over on top of the seeds and sort of press them down, lightly. Basically, you're just kinda sealing the the seeds inside the wet paper towel.
Karin Velez [00:29:52]:
And then grab a plastic baggie and write the variety of the seed, the date that you started the test, and the number of days expected to germination. Now if you don't know specifically for that variety, you can just look up a general guideline like, you know, how many days to germination for cucumbers, for example. They're gonna be roughly the same for most of the varieties. And write that on the plastic bag, and then just put the paper towel with the seeds inside the plastic bag and seal it up. You wanna take that bag and put it in a warm place. You don't want it in the direct sun anywhere, but, you know, on top of, say, a refrigerator is usually a good warm place. If you have a seedling starter mat or a heat pad, something like that, put a couple layers of towels down on top of those, and then go ahead and and put the seeds on top of that. You don't wanna overheat the seeds.
Karin Velez [00:30:46]:
Essentially, you'd be cooking them at that point. But just, you know, a warm spot out of direct sunlight is good. And then just check the bag every couple of days. Make sure that it's staying moist. Use a spray bottle to, you know, spray the towel down with water if it starts to dry out and wait for those seeds to germinate. Then you wanna check your results. So once the expected days for germination have passed, count the number of seeds that sprouted. This is gonna give you your germination rate.
Karin Velez [00:31:15]:
So if you got 8 seeds that sprouted out of those 10, then you have a germination rate of 80%, which is pretty good. Anything less than 60% is kinda sketchy. So you either need to make a note that, when you go to plant those seeds, you're gonna have to plant them more thickly than you normally would if they had a better germination rate. But anything that's like 70 or 80% or higher, you can just plan to plant as usual. You may just decide that anything less than 60% isn't worth your time saving and ditch those seeds and then try again. What you're comfortable with planting is gonna depend on how much space you have and the number of seeds that you've got left over. So, I mean, if you've got enough room and you've got enough seeds to over plant and you really want that variety, then go for it. But if you've got limited space and you need what you plant to germinate with some pretty good assurances, you may only wanna keep seeds that germinate at an 80% or better rate.
Karin Velez [00:32:11]:
So that's it. That's the down and dirty of saving your seeds. It's, you know, one other thing that we do as far as preserving the harvest is also preserving those seeds. Again, if you are new to saving seeds, you may just wanna try a few varieties of what you're pulling out of your garden this year. Things like bees, bees, things like beans and peas and lettuce, tomatoes, peppers. Those are great for just starting out. They're annuals. They're self pollinating.
Karin Velez [00:32:42]:
They don't require a whole lot in the way of isolation. And you really only need a few plants to reliably produce enough seeds. For things that cross pollinate by insect activity, you might end up going ahead and trying to save those anyway and to see whether or not they were isolated enough from the other varieties to give you what you want. If you have, you know, room to experiment, go ahead and experiment. Once you get into the more advanced seed saving that requires isolation between varieties, Then you're also looking at other advanced methods like pollination barriers and hand pollination and much larger, you know, isolation distances. That is a whole subject for a whole other day. So I hope that maybe you can just jump into trying to save some seeds. You know a little bit more about what you can save, what you maybe shouldn't save, and inspires you to maybe start your own little seed bank.
Karin Velez [00:33:34]:
So, I hope this was informational for you, and maybe, you know, somebody who is wanting to try to their hand at saving seeds. You might wanna share this episode with them. I will be back again next week. We'll we'll talk a little bit more about preserving the harvest. More than likely, we're gonna start next week with talking about freezing because that is honestly the easiest way to preserve your harvest that are coming out of your garden. But there are a few misconceptions that we may wanna cover because there's things that I totally did wrong when I was freezing the first few years. And so there are some tips and tricks that we'll go over to get you started on on properly freezing the harvest, and then we'll continue from there. So until next time, my gardening friends.
Karin Velez [00:34:17]:
Keep on cultivating that tree garden, and I'll talk to you again soon.