
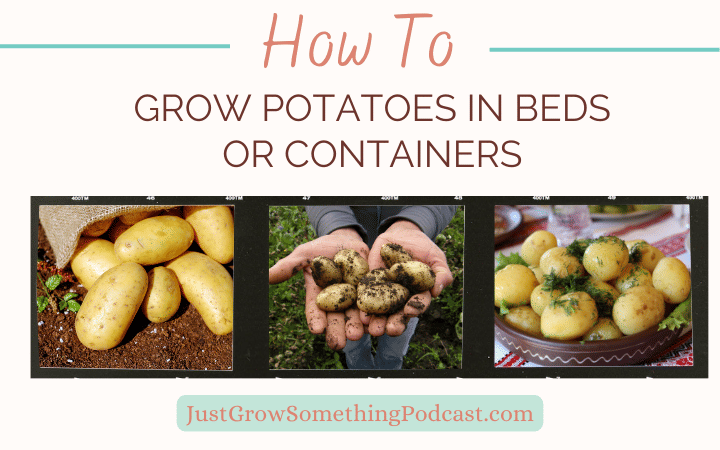
Potatoes are a cool-season crop that is now the fourth most cultivated crop in the world. They are in the Solanaceae, or nightshade, family along with tomatoes, peppers, and eggplant. They are an integral part of most family's food supply, so why not grow them for ourselves? Potatoes can be grown just about anywhere and are easy to grow.
Most varieties need between 60 days to 120 days to mature. You can pick them young for baby potatoes, let them mature to very large potatoes for storage, or harvest them anywhere in between.
Potatoes are typically planted from seed potatoes, not actual seeds. Seed potatoes are just the best specimens from a crop the year before, put in storage and then used the following year for planting. This is true whether you save them yourself, use potatoes from the grocery store that have sprouted on you, or you order seed potatoes from a supplier.
 In-Ground Cultivation of Potatoes
You’re going to want to do a little soil prep to be sure you get the best crop. Remember, these are tubers and tubers are the underground storage organ for a plant. They are going to be hungry as they develop so you want organic matter and fertility. If you are struggling with any of that in your soil, work a good amount of composted manure or high-quality compost into the planting area the season before planting. You can do this just before planting if your compost is biologically active and not too hot, so it won’t burn your plants. Potatoes also appreciate a soil that is loose without obstructions to block the tubers as they grow. Tight soil is going to mean smaller spuds, so if you have heavy clay soil you definitely want to be amending with organic matter.
The ideal soil pH level for potatoes is somewhat acidic, between 6 and 6.5, but they will tolerate soil with pH as low as 5. You want the soil to be well-drained, so the tubers don’t sit in water and rot.
When you get your seed potatoes, store them in a cool place until you’re ready to plant. Once you’re ready, cut those seed potatoes up into smaller pieces to increase your yield. Each piece of a seed potato can produce as much as two pounds of potatoes per plant. So, you want more plants from the same number of seed potatoes. Slice them up into pieces that weigh around an ounce or so, about half the size of a chicken egg, each with two more eyes or sprouting points on them. You can do this a day or two ahead of time, or even the same day.
When you are ready to plant your potatoes, check your soil temperature. You don’t want to plant your potatoes until your soil reaches 45F (7.2C) or above in the spring. When putting the potatoes in the ground, plant seed pieces cut side down, 10 to 12in (or 25.5 to 35.5cm) apart, in trenches that are about three feet, or just shy of a meter, apart. If you want fewer, but larger, potatoes or for a naturally large potato, like a russet, space them a little further apart, like 15in or 38cm. If you want lots of little new potatoes, space them closer together.
How deep should you plant your potatoes? Here’s a little trick. If you are planting somewhere further north in the northern hemisphere and your soil temperatures stay cooler for longer, you can plant your potatoes as shallow as 1in or 2.5cm deep. This will allow the seed potatoes to get more of the sun’s warmth and germinate more quickly. Then you will want to hill those up as they grow to protect the stems and protect the tubers that will be growing underneath. If you’re in a warmer region, you can plant yours deeper, like four or five inches (10 to 12.5cm) deep. This will keep the tubers cooler as your air temperatures begin to quickly rise in the spring and make it easier for them to germinate. It can take as long as three weeks sometimes for the seed pieces to sprout, so keeping them cooler or warmer, depending on your climate, can be the key to getting healthy sprouts.
Hilling potato plants as they grow helps to protect the stems of the plant as they grow and covers the potato tubers as they develop. Potatoes may turn green if they're exposed to too much daylight. While peeling that back may make them safe to consume, the over exposure can actually make them bitter. Plus, the more they’re exposed the more possibility of them being damaged by critters or weather before you get a chance to harvest.
If you plant your seed potatoes deep enough, you may not need to mound around your plants. If you need to plant shallow, though, you’ll need to hill. Once the plants are up out of the soil by about 4 to 6in (10 to 15cm) use a hoe or a good rake to mound the soil up around the base of the stem. You can do this just once or continue to build a nice big hill as the season progresses, mounding up soil from between the rows or just adding fresh layers of compost a couple of times if you don’t want to dig or rake. Another way to do this is to add a heavy layer of straw mulch.
Container Grown Potatoes
You can plant potatoes in anything from raised planters to grow bags, wire mesh cylinders to 5-gallon buckets or other containers. Put about 3 to 5 inches (7.5 to 12.5cm) of a soil-compost mixture in the bottom of your container, then place your seed potato pieces cut-side down on top of the soil, and then cover with another 3 to 5 inches of soil. Instead of hilling, continue adding soil as the plants grow until the container is full.
Your biggest concern with containers of any kind is drainage. I would not recommend using old wash tubs unless you’ve drilled holes in the bottom for drainage. If you use something with a solid bottom on it, you’re likely going to end up with rotted potatoes if you get too much water so have a plan to mitigate that.
Water and Nutrients
No matter where you’re growing your potatoes, they will do well with a little feeding now and then. It takes a lot of energy and nutrients to grow those tubers and if your soil is depleted, the tubers will suffer. Side dressing about four weeks after planting with a little bit of fertilizer or amendment that is mainly nitrogen will give them a boost. You can do this again about two weeks later when you hill up the plants. If you’re in containers, a foliar spray may be more convenient or watering with something like a fish emulsion or a seaweed extract. If you’ve amended your soil really well at the start, though, you may not have to do anything. Always do a soil test at the beginning of the season to know what you’re working with. I generally just make sure to use some really good compost and add a balanced organic fertilizer when I prep the beds and our yields are just fine.
As far as water requirements, potatoes do fine with the garden standard of one inch of water per week, whether that’s rainwater or from you irrigating. Of course, the heavier you mulch the less you’ll have to water, especially if you get some good spring rains. Just know that if you have the nice sandy soil potatoes seem to like, you also likely need to water more frequently because your soil doesn’t hold water as shallowly in the soil as clay soils do (read about how your soil texture and how it affects your garden here). So make sure if you have to water, and this includes containers, be sure you’re doing it deeply and thoroughly. If you check the soil with a trowel and it’s only wet about two inches down, keep watering.
Pests
There are two main potato pests and those are the Colorado Potato Beetle and, to a lesser extent, cutworms.
The beetles overwinter in soil and become active in spring, about the same time potato plants emerge from the ground. Larvae and adults feed on leaves and can completely defoliate plants. They can also attack other plants in the night shade family, including your eggplant, tomatoes, peppers, and ground cherries. Many pesticides are ineffective because of pesticide resistance. Your best bet is to make sure you keep your garden free of weeds in the Solanaceae family, like nightshade and ground cherry, so they don’t become a host for the pest.
Handpicking can be effective if you have a small garden. Drop adults and larvae in a pail filled with soapy water and remove or crush the eggs (look for orange egg masses on the undersides of leaves). New adult beetles can fly into the garden so be sure to check your plants regularly. If they do become a problem, you can cut down on the population by only growing potatoes every other year but this only works if none of your neighbors is growing potatoes within about a half-mile radius. The good news is lady beetles eat potato beetle eggs, so planting things that attract lady bugs may help.
Cutworms will chew off the potato stem at the soil line as it sprouts. They’re not specific to potatoes and there are bunch of different varieties of these worms depending on where you live. Best bet is to remove weeds which can serve as alternate hosts to the larvae and rake up the garden surface really good before planting to expose any larvae that have lived through the winter to kill them off.
Diseases
Anything that effects tomatoes or peppers or eggplant, like early blight or late blight or verticillium wilt, can affect your potatoes, too. Proper crop rotation is very important if you have experienced any of these diseases in your area. Potato scab is another one to watch for. This is a bacterial disease that causes dark, rough spots on the skin of the potato tubers but does not rot them. They may be ugly but are completely edible, so not as bad as the other soil-borne diseases that can cause a complete crop failure.
Once disease spores are in the garden, it is often difficult to get rid of them. This is why it's recommended to always use certified seed potatoes. You’re not going to be bringing in any diseases with your seeds. You can’t guarantee that’s the case when it comes to planting the potatoes you bought at the store that decided to sprout in your pantry. Will they produce new potatoes? Yes. But you do run the risk of bringing a disease into your garden soil, so know that risk before you do it or only plant those store potatoes in a container where you can change the soil out if it ends up contaminated.
There’s one more thing that’s not really a disease, it’s considered a potato disorder. It’s called hollow heart and it causes there to be an irregularly shaped hole in the center of the potato tuber. It is caused by periods of lots of water and then too little water, or by not enough nutrition. Though it does not affect the taste or safety of the potato, if you’ve experienced this in the past be sure to water regularly and add fertilizer or amendments according to your soil test to prevent this in future crops.
Harvest
Tubers will start to develop around the time the potatoes blossom, but don’t count on this as your only indication. Your plants may not always give you blooms. This is going to be variety dependent and weather dependent.
Potatoes can be eaten any time after the tubers start to develop. If you want to check how mature your potatoes are or you want to start picking them early for new potatoes, just pull back some of the soil from your hill or dig some soil out from around the plant in your container. You can actually pull potatoes from the plants as you want them and then leave the rest to continue to develop. Just make sure you cover the back up again.
“New” potatoes are tubers dug before their skins have thickened and become tough. The tenderness of the skins makes them just a bit more special. They’re very tender and the texture is kind of silky. Usually you’re looking at about seven to eight weeks after planting for new potatoes.
For potatoes for storage, you should harvest mature tubers after the plants have dried or when you see they have reached their full size and you want to do this while the soil is dry, too, if possible. The skins are usually thickened about two weeks after the plants have died but if they’re full size and you want to clear that space in the garden you can pull them and put them in a warm, well-ventilated area to allow the skin to set.
Storage
Choose varieties that work best for storage. I used to pick one variety that was just for new potatoes and one variety for storage. No matter how you do it, this information should be in the notes of the varieties you are looking at. Some work better than others, based on starch content.
Potato skins for storage should be difficult to rub off with your thumb. If you rub your thumb across the potato and the skin peels back it needs to be cured. Again, place the potatoes in a warm (60°F to 65°F), well-ventilated area to allow the skin to set. Keep them in the dark and allow about ten days or so for them to cure completely.
Check them over once they’re cured, removing any that are soft or shriveled or bruised. Eat those first, they won't store well. Gently brush any dried soil off the tubers, but do not wash them. You do not want them wet before storage.
Potatoes are best stored in dark, cold, moist conditions, around 32-40°F and 95% relative humidity (like the conditions in our refrigerators!). Something I didn’t know: potatoes destined for frying should be stored at warmer temperatures, between 40-50°F, to avoid discoloration during frying.
Green skin occurs when potato tubers experience exposure to light. Remove any green areas before cooking potatoes. Do not consume potatoes with extensive green areas under the skin as this can be toxic. Remove any sprouts from potatoes prior to using them for food. The longer potatoes are in storage, the more likely they will begin to sprout. This is totally normal. And, so long as you didn’t have any soilborne diseases the previous year, go ahead and plant those in the spring! And, yes, if you knock those sprouts off, they will still sprout again once you plant them.
You're ready to grow potatoes! You can get more info by listening to this podcast episode: Ep. 135 - Growing Potatoes
Your Friend in the Garden,
