
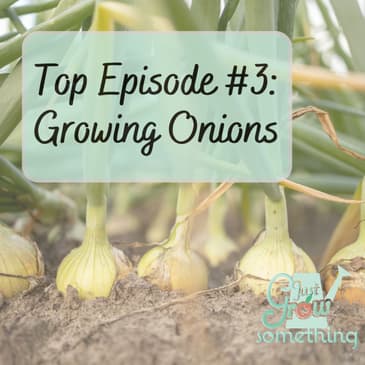
Welcome back, my gardening friends, to another episode of Just Grow Something as we count down the top four episodes of all time throughout the month of December. This week we revisit the #3 most listened to episode of this show: Growing Onions.
Onions are such a staple in most kitchens, it's no surprise many gardeners want to grow their own. The problem is they can be a bit tricky if you don't understand the difference in daylength requirements for growing those giant bulbs. Nutrient needs, soil type, water and storage are covered in this episode, all the things I wish I'd known when I made my own feeble attempts at growing onions years ago! Let's dig in.
References and Resources:
Free Download: Onion Growing Fact Sheet
Ep. 114 - Planting Onions to Overwinter
Onion History - National Onion Association (onions-usa.org)
Nutrition Information for Raw Vegetables | FDA
Explore Cornell - Home Gardening - Vegetable Growing Guides - Growing Guide
Growing Onions: Planting, Growing, and Harvesting Onions | The Old Farmer's Almanac
Onion Planting Guide - Dixondale Farms
Just Grow Something Gardening Friends Facebook Group
Check out how you can become a patron on Patreon
Hosted by Simplecast, an AdsWizz company. See pcm.adswizz.com for information about our collection and use of personal data for advertising.
00:00:00
This is positively farming media.
00:00:04
Welcome back, my gardening friends, to another episode of
00:00:07
Just Grow Something as we count down the top four episodes of
00:00:11
all time throughout the month of December.
00:00:14
As you listen today, I just want to say a huge thank you for
00:00:20
choosing this show as one of the places that you learn about all
00:00:23
things gardening. I am very grateful for you
00:00:27
tuning in, whether you're actively gardening or driving or
00:00:30
exercising or whatever it is that you do when you listen to
00:00:33
podcasts. I am so happy that I have been
00:00:37
able to spend the past three years with you learning
00:00:40
alongside you because I do not consider myself an expert by any
00:00:44
means. I know a lot and I have a lot of
00:00:47
experience and I love sharing that knowledge with you, but I
00:00:51
am always learning too and I think we should all always be
00:00:55
learning. So thank you for being here.
00:00:58
I know you have other options for gardening podcasts and I'm
00:01:00
just happy to be one of them. In fact, I got my Spotify
00:01:05
wrapped for podcasters and it turns out that this is the top
00:01:11
podcast for 64 of you and I'm in the top 10 for 658 of you.
00:01:17
And that's just for Spotify by the way. 70% of you actually
00:01:21
listen on Apple Podcasts or other apps, so it kind of makes
00:01:25
me blush to see those stats. And many of you have been
00:01:30
sharing the episodes either through direct links or texting
00:01:33
or sharing on Facebook or WhatsApp, and it makes me really
00:01:36
happy that you are finding enough value in these episodes
00:01:41
to keep sharing them with your gardening friends.
00:01:44
I feel like I'm actually accomplishing what I set out to
00:01:47
do three years ago, and that was to just spread Good evidence
00:01:51
based gardening information to help you become a better
00:01:54
gardener and a better eater overall.
00:01:57
In that same vein, I know that there is a lot of information a
00:02:02
lot of times in these episodes and not everybody has time to go
00:02:06
back and listen to episodes multiple times or sit down and
00:02:10
take notes. Which is why every week on
00:02:14
Tuesday morning, I send out an e-mail related to this week's
00:02:19
show. In that e-mail, I list some of
00:02:22
what I think are the most important points of the episode,
00:02:26
and include the reference and resource links as well.
00:02:30
This does two things, #1 it gives you a little bit of a
00:02:34
reference so that you have some of those episode details readily
00:02:38
available to you, and #2 gives you an easy way to go back and
00:02:43
find these specific episodes when you need them, because
00:02:47
there are links to the episodes within that e-mail.
00:02:50
So if you're on the e-mail list, a good way to find important
00:02:55
information on specific crops that you plan to grow is to make
00:02:58
a separate Just Grow Something folder or gardening folder and
00:03:02
move the emails that relate to episodes that are important to
00:03:06
you that you want to review again later into that folder so
00:03:10
you can find it when you need it.
00:03:12
The other way folks have told me they earmark episodes is to
00:03:17
create a separate playlist for things that they want to listen
00:03:21
to again or specifically for gardening, and then they add
00:03:24
those episodes to that list while they're listening so they
00:03:27
can go back and review them later.
00:03:29
I have a list, a playlist similar to that too, for things
00:03:32
like fitness and business podcast.
00:03:34
And many of you have said that you've built a library of
00:03:37
episodes to review when it comes time to plant or prune or
00:03:41
harvest. And I often have blog posts or
00:03:44
videos that I've done that relate to those episodes too,
00:03:47
which can be easily found by using the search function on my
00:03:51
website. But I also usually try to
00:03:54
include those in the related emails that go along with these
00:03:58
episodes. So if you are not on the e-mail
00:04:01
list, you can get on it by going to justgrowsomethingpodcast.com.
00:04:06
There will be a pop up on the homepage or you can scroll to
00:04:11
the bottom and get to the sign up there.
00:04:13
If you have previously gotten onto the e-mail list but you're
00:04:17
not getting my emails, be sure to check your Junk folder.
00:04:21
Outlook is notorious for sending my own emails to my Junk folder
00:04:28
like my own. Outlook sends my emails to my
00:04:31
Junk folder no matter how many times I indicate this is not
00:04:35
Junk. It's obnoxious, so if you're
00:04:38
missing my emails, check that Junk folder.
00:04:41
So today we are revisiting. The number three top episode of
00:04:47
this podcast last week was #4 Growing Zucchini and Other
00:04:50
Summer Squashes. This week the number three most
00:04:54
listened to episode is about growing onions.
00:04:59
Now if you're one of my patrons over on Patreon, you got a heads
00:05:02
up about this last week when I posted a video about getting
00:05:05
more onions out of the same gardening space.
00:05:08
If you're not on Patreon, you can check out that at the link
00:05:13
in the show Notes are going to patreon.com/just grow something.
00:05:18
I will also link in the show notes a separate episode from
00:05:23
the growing onions one that is talks a little bit more about
00:05:26
fall planted onions which are just a little bit different than
00:05:29
what we talked about in this main one.
00:05:31
I have edit this ever so slightly from the original
00:05:34
broadcast, so without further ado, let's dig in to onions.
00:05:40
Hey, I'm Karen and I started gardening 18 years ago in a
00:05:43
small corner of my suburban backyard when we moved to A5
00:05:46
acre Homestead. I expanded that garden to half
00:05:48
an acre and I found such joy and purpose in feeding my family and
00:05:52
friends. This newfound love for digging
00:05:54
in the dirt and providing for others prompted my husband and I
00:05:57
to grow our small homestead into a 40 acre market farm.
00:06:00
When I went back to school to get my degree in horticulture, I
00:06:03
discovered there is so much power in food and I want to
00:06:06
share everything I've learned with as many people as possible.
00:06:09
On this podcast we explore crop information, soil health, pests
00:06:13
and diseases, plant nutrition, our own nutrition, and so much
00:06:16
more in the world of food and gardening.
00:06:19
So grab your garden journal and a cup of coffee and get ready to
00:06:22
just grow something. OK, so on to onions.
00:06:31
I did go over some of this information last fall when I
00:06:36
talked about overwintering onions, but we haven't done a
00:06:39
full start to finish Everything You Need to Know episode.
00:06:42
So here we are and as usual with a crop specific episode, we are
00:06:47
going to start with the basics. The scientific name for onions
00:06:51
is Algum Sepa and it is in the plant family, Amarilla Dacier,
00:06:56
That is the Amarillus family. Yes, like the flower.
00:06:59
Many times we refer to this large genus of onion or garlic
00:07:06
scented bulbous kind of herbs that are in this family just
00:07:10
simply as alliums or the allium family just to differentiate
00:07:15
them from the flowers. But technically, Allium is a
00:07:18
genus, and that's a larger part. Or that's a part of the larger
00:07:22
Amaryllis family. So onions, cousins basically are
00:07:27
garlic and chives and scallions and shallots and leeks.
00:07:32
So according to the US National Onion Association, yes, that's a
00:07:37
thing. Many archaeologists, botanists,
00:07:40
and food historians believe that onions originated in Central
00:07:44
Asia, but other research suggests onions were first grown
00:07:48
in Iran and West Pakistan. Now most researchers agree that
00:07:53
the onion has been cultivated for more than 5000 years.
00:07:58
There are historical records with recipes dating from 5000
00:08:02
years ago that include domesticated onions.
00:08:05
So since onions grew wild in so many regions, and they still do,
00:08:10
they were probably consumed for thousands of years in their wild
00:08:14
form and then domesticated simultaneously all over the
00:08:18
world. So that explains the sort of I
00:08:21
don't know. I wouldn't say it's a
00:08:22
disagreement, but the the conflicting research that shows
00:08:25
where they originated from. Which brings me to the cultural
00:08:30
significance and ethno botanical uses of onions.
00:08:34
Remember Etho Botany is the study of a region's plants and
00:08:37
their practical uses through the traditional knowledge of a local
00:08:41
culture and its people. Anytime I cite these, these uses
00:08:45
are cited as a historical and an anthropological resource.
00:08:49
So never ingest the parts of any plant with being absolutely
00:08:52
positive of its effect upon the human body.
00:08:54
OK, but that being said, I don't think that there are any
00:08:58
inedible or unusable parts of the onion plant.
00:09:02
Research has shown that onions, and I'm going to take this
00:09:05
directly quoting from the National Onion Association, are
00:09:09
found to possess a panoply of bio active compounds and
00:09:13
numerous pharmacological properties including
00:09:16
antimicrobial, antioxidant, analgesic, anti-inflammatory,
00:09:21
anti diabetic, hypolipidemic, anti hypertensive, and
00:09:25
immunoprotective effects. That's a mouthful, but this is
00:09:30
very similar to other albums like Garlic.
00:09:34
They all have these organosulfur compounds that are linked to
00:09:38
things like lowering blood pressure and cholesterol levels.
00:09:41
So we have some scientific basis for the benefits of consuming
00:09:46
onions, which is probably where a lot of these older uses and
00:09:52
possibly myths came from. So traditionally, like in the
00:09:56
Middle Ages, it was believed that onion juice could cure
00:10:00
baldness, heal a snake bite, and cure a headache.
00:10:05
Poultice of mashed onions used to be applied as a paste to
00:10:09
cover wounds. It used to be prescribed to eat
00:10:12
a whole onion at bedtime to break a cold overnight.
00:10:17
No thank you. Sliced onions were placed on the
00:10:20
soles of the feet to draw out fever.
00:10:23
And if you were on social media, you likely have seen people
00:10:26
doing this nowadays to supposedly draw out toxins.
00:10:30
I will reserve my comment on that one.
00:10:34
Cough syrup by made by steeping raw onion slices in honey
00:10:38
overnight. I could see how this might be a
00:10:41
cough suppressant in some way for sure.
00:10:43
And then a raw onion rubbed on a bee sting or an insect bite will
00:10:48
relieve the pain and itching. Not so sure.
00:10:50
Reaching for an onion is going to be my first solution to that,
00:10:53
but if it's all I've got around, you might give that a shot.
00:10:56
So for nutrition, one medium onion, about 148g, contains 45
00:11:03
calories, 1g of protein, 11 grams of carbs, 0 grams of fat,
00:11:07
9 grams of sugars, and three grams of dietary fiber.
00:11:11
They are also a good source of vitamin C, vitamin B6,
00:11:14
potassium, folate, calcium, and iron.
00:11:17
There is a good reason that we use onions in so much of our
00:11:21
cooking in so many different cultures.
00:11:25
For growing your own onions, let's let's talk a little bit
00:11:28
about the cultivation of onions right.
00:11:30
One of the hardest things to learn when figuring out to how
00:11:35
to first start to grow onions was that onions are photo
00:11:39
periodic or sensitive to daylight.
00:11:42
They start forming bulbs based on day length.
00:11:45
So there are three different types of onions, short day, long
00:11:48
day, and intermediate or day neutral.
00:11:51
Most onion varieties are going to start forming their bulbs
00:11:55
based on the temperature and the number of daylight hours.
00:11:58
Short day onions start forming their bulbs when the daylight
00:12:02
hours are between 10 and 12 hours.
00:12:04
Long day onions don't start developing until the daylight is
00:12:08
at least 14 to 16 hours per day and then you have day neutral
00:12:12
onions that will bulb during that sort of in between day
00:12:16
length of 12 to 14 hours. OK, this was the part that
00:12:20
tripped me up the most because I couldn't figure out which one of
00:12:24
those I fell into. Should I be doing short day?
00:12:27
Should I be doing long day? The border between like where
00:12:32
you grow long day and where you grow short day varieties lies
00:12:36
roughly at a latitude of 36° N, the 36th parallel.
00:12:41
So anybody north of that should plant long day onions, anybody
00:12:46
South of that should plant short day onions and just about
00:12:50
everybody can grow day neutral or intermediate varieties.
00:12:54
They're going to bulb just about anywhere.
00:12:56
They do best at 12 hours of daylight, but they will form
00:12:58
bulbs in just about any growing zone.
00:13:00
OK. So we'll we'll touch on that
00:13:03
again here in a little bit and the importance of choosing the
00:13:07
right type of onion for your region.
00:13:10
But first let's talk about the difference between seeds, onion
00:13:15
sets and plants or transplants, because this is another point of
00:13:20
confusion about when and how to grow onions.
00:13:26
Yes, they can be direct seated, it just depends on where you
00:13:29
are. But most commonly they are grown
00:13:31
from transplants, either started inside or purchased or from
00:13:35
sets. So what is a set?
00:13:39
An onion set are small bulbs and they are grown from seed.
00:13:44
The previous season this was the 1st way that I started growing
00:13:48
onions. The problem with this is that
00:13:50
the ones from the garden center and some of your catalogs do not
00:13:54
list whether or not these onion sets are long day or short day
00:13:59
onions. So while they're going to grow
00:14:03
for you, they may not actually form a bulb.
00:14:06
You may only get the green part of the onions, or some puny
00:14:10
little bulbs with a lot of green growth.
00:14:12
So unless you are absolutely sure that what you have is a
00:14:17
long day onion set to plant in your long day area or a short
00:14:23
day to plant in your short day, you may be very disappointed
00:14:26
with what you get. In most instances from what I
00:14:30
have seen the onion sets that you can buy in the garden center
00:14:33
or or online or out of catalogs are long day onions.
00:14:38
So if you are a southern grower or even if you're sort of in the
00:14:41
mid range area like where we are, we are sort of right on
00:14:46
that border between long day and short day.
00:14:49
A lot of times these just aren't going to do well for you.
00:14:51
We use them as green onions in the spring.
00:14:55
I will take those little sets and plant them very closely
00:14:58
together and we use them as green onions.
00:15:00
I also use sets as my overwintered onions in the fall.
00:15:05
That's that's what a set is. OK.
00:15:07
And then plants or transplants, these are just newly sprouted
00:15:10
onion seeds grown to about the size of like a skinny pencil or
00:15:15
so before you transplant them, they're going to have a thick
00:15:19
bottom on them and a little bit of roots ready to go and and the
00:15:22
green top and they're ready to drop in the ground.
00:15:24
OK. So that's the difference between
00:15:26
a set or a plant or a transplant.
00:15:30
So I mentioned we would talk both in ground cultivation and
00:15:35
planting in containers. Let's talk about in ground
00:15:37
cultivation because there are several different ways that you
00:15:40
can do this. Of course, you know, the
00:15:42
sunlight and soil conditions are going to be very similar
00:15:44
regardless of where you're growing them.
00:15:45
But we'll focus on in ground first.
00:15:46
OK, you definitely want to have full sun.
00:15:49
This does not mean you have to have 10 to 12 hours a day, 6 to
00:15:52
8 hours preferably towards the 8 hour side, but 6 to 8 hours is
00:15:56
fine. OK for soil conditions, well
00:15:59
drained soil and high fertility. Now I know we always say, oh, it
00:16:03
needs to be planted in rich soil high in organic matter.
00:16:05
Yes, for most of our garden plants that's what we're
00:16:09
recommending. But for onions it is
00:16:11
particularly important, and I'll talk about that here in a little
00:16:15
bit. They do prefer a slightly acidic
00:16:18
pH at about 6.2 to 6.8. That's pretty common for most
00:16:22
garden vegetables, and even moisture and and plentiful
00:16:27
moisture right? Good soil moisture is is
00:16:29
important for good yields of bulb onions.
00:16:33
You want a weed free, well drained location.
00:16:37
Raised beds are fantastic for this.
00:16:39
Onions are really good for intercropping with other garden
00:16:42
plants too, especially early maturing spring greens.
00:16:46
And they also vacate the bed partway through the season so
00:16:49
you have time to get another crop in as a succession.
00:16:52
So absolutely you can grow onions and intermix them with
00:16:57
other crops. You just don't want to plant
00:17:00
them where anything else in the onion family, those alliums have
00:17:06
been grown in like the past three years.
00:17:08
So this includes that garlic and those chives and shallots that
00:17:11
we talked about at the beginning.
00:17:13
If you want to grow them directly from seed, just keep in
00:17:17
mind that direct sowing in the garden may not allow enough time
00:17:22
for long season varieties to mature.
00:17:25
But if you have a shorter season variety, or you are in a warmer
00:17:29
area, or you just want to grow them from for scallions, the
00:17:33
skinny little onions that are harvested before the bulb forms,
00:17:37
then you can absolutely direct. So OK, you want to wait until
00:17:42
the soil gets around 50°F before you plant them directly in the
00:17:47
ground. They will germinate at the
00:17:49
temperature between 45 and 95 Fahrenheit, but 50 is kind of
00:17:53
where I say the minimum is for your best, your best germination
00:17:57
percentage. You plant the seed about 1/4
00:17:59
inch deep, half an inch apart, Do them in rows that are about
00:18:02
12 to 8 inch, 18 inches apart. And then once they come up and
00:18:07
and they start to get their green tops on them, then you're
00:18:09
going to want to thin them down to about a four inch spacing in
00:18:14
between each plant. If you want those nice big large
00:18:17
bulbs or you can do 2 inch spacing for smaller bulbs, you
00:18:21
know you'll get more onions in that instance.
00:18:23
They'll just be a little bit smaller.
00:18:25
Or if you want to just do the scallions, then just do them in
00:18:29
one inch spacing. OK, so that's direct sewing.
00:18:32
Now if you want to use sets, this is another area where I
00:18:37
sort of screwed up. You want to choose bulbs that
00:18:39
are no larger than three quarter inch in diameter.
00:18:43
I used to pick the biggest of those sets to use for my spring
00:18:48
onions and then if I had room to plant the little skinny ones,
00:18:52
then I would go ahead and throw them in there.
00:18:54
But the larger bulbs, when they start at A at a size that's
00:18:58
bigger than about 3/4 of an inch, are much more prone to
00:19:02
bolting before they start to size up.
00:19:06
And I absolutely noticed this every single year.
00:19:09
There are some that will bolt way earlier than anybody else.
00:19:13
And I think this is because you know, those sets are the storage
00:19:18
organ and for energy for the plant.
00:19:21
So I think when they're bigger than like that, they
00:19:23
automatically recognize, you know, just in their biology that
00:19:27
oh, this is a second year that we're growing, it's time to go
00:19:31
to seed, it's time to flower and put that seed out.
00:19:33
So the lot bigger is not better in this instance.
00:19:36
So 3/4 of an inch or so in diameter, and then just gently
00:19:40
press those into your soil about two to four weeks before your
00:19:44
last frost aid in the spring. Space them four to six inches
00:19:49
apart again for those larger bulbs, or two inches apart for
00:19:52
smaller ones. And then if like me and you want
00:19:55
to use them for scallions or green onions, use an even closer
00:19:59
spacing if you want to pull them when they're immature.
00:20:02
Just keep in mind it is important that onions aren't
00:20:04
planted too deep. This can affect the bulb
00:20:07
development. We'll talk more about that here
00:20:10
later on. And then finally there's
00:20:13
starting, you know, doing them from transplants, which is the
00:20:15
way that we do it. You can start your own or you
00:20:18
can purchase them from a catalog or from an online supplier.
00:20:23
Very easy to start your own. Put your plant, your seeds in a
00:20:27
flat or a different cell trays. You want to start this probably
00:20:31
about 8 to 12 weeks before your last frost date.
00:20:34
Four or five seeds in each cell. Or you can do them just in flats
00:20:38
about 1/2 an inch apart. Let them go ahead and sprout up.
00:20:42
If the tops start to grow too tall and they start to droop,
00:20:45
you can trim them back about to about a three inch height with
00:20:49
just scissors. And then you want to make sure
00:20:52
that you start them early enough to give yourself time to harden
00:20:54
them off and get them into the ground about two to six weeks
00:20:58
before your last frost. That's a little bit wider of a
00:21:01
range then say from set, because these plants are going to be a
00:21:07
little bit more sensitive. These are actively growing green
00:21:10
baby plants. These are seedlings for all
00:21:12
intents and purposes and so you need to make sure that you
00:21:15
harden them off a little bit. And depending on your area and
00:21:18
how early you are trying to plant, you may have to adjust
00:21:23
your timing. The earlier the better.
00:21:25
But you know, the transplants can handle frost, but they may
00:21:28
not survive an extended deep freeze.
00:21:31
So just keep that in mind when you're starting these out.
00:21:34
So whether you started them yourself or you've purchased
00:21:37
them again, put them out about two to six weeks before your
00:21:40
last estimated spring freeze. Trim the roots to about 1/2 an
00:21:44
inch before you transplant them, and then trim those tops back to
00:21:47
about that three to four inch height.
00:21:49
This is going to spur the growth in both the roots and the
00:21:52
shoots. It's going to encourage nutrient
00:21:54
and water uptake as soon as you plant and get them off to the
00:21:57
best start. Now, there are multiple ways
00:22:06
that you can grow onions in ground.
00:22:10
The way that professional commercial onion farms grow them
00:22:16
is by the trench method. So you are going to dig a trench
00:22:22
that's about four inches deep and four inches wide.
00:22:24
And this is where you're going to put your fertilizer or your
00:22:27
soil amendments, whatever it is that you're going to use to feed
00:22:30
these plants. And we'll talk about nutrients
00:22:32
here in, in a second. So put that in the trench and
00:22:37
then cover your fertilizer or your amendments up with about
00:22:40
two inches of soil. And then you plant the onions on
00:22:45
both sides of the trench. You don't plant them in the
00:22:49
trench, you plant them on the sides.
00:22:52
So 6 inches from the edge of the trench on both sides.
00:22:55
Start planting your onions there. 4 inches apart, one inch
00:23:00
deep, you know, deeper, 4 inches apart for the large bulbs, 2
00:23:04
inches you know for the smaller ones, just like we talked about.
00:23:07
And if you want like both, If you want some green onions and
00:23:11
you also want the big onions that if you plant them two
00:23:14
inches apart and then pull every other onion during the growing
00:23:17
season, you use those as green onions and then you can leave
00:23:20
the rest to grow to maturity. So you can get both out of the
00:23:23
same bed. That's the trench method.
00:23:25
The row method is basically the same way that you would plant
00:23:29
any other crop in your garden, you just need to mind the
00:23:32
spacing. So 2 to 4 inches however you
00:23:34
want plant them in rows that are 10 to 12 inches apart.
00:23:40
Now again these are all just recommendations and based on how
00:23:44
your or your garlic. Based on how your garden is
00:23:48
configured and grows, you can probably get away with judging
00:23:52
this around a little bit. I use the same dibbler for
00:23:57
planting my onions as I do for my garlic, and so basically my
00:24:02
onions are planted at the same spacing as my garlic.
00:24:06
So my dibbler is spacing the plants 6 inches apart across.
00:24:14
So I'm not doing these individual little rows, I'm
00:24:18
doing them more in blocks and then I will.
00:24:21
I will plant them 4 inches apart as I go so I'll just space.
00:24:26
The plants basically are 4 inches apart in rows that are
00:24:29
only 6 inches apart. But then after I get 6 plants
00:24:33
wide, then there's like a 12 to 18 inch gap between that block
00:24:37
and the next. It just works better for me
00:24:39
because it's a tool that I already have and it makes it go
00:24:42
faster for me. So keep this in mind, you know,
00:24:45
as you hear all these different recommendations for spacing and
00:24:49
do what you need to to fit them into your garden plan and your
00:24:54
garden layout. If you're just going to put them
00:24:56
all six inches apart completely, you know, next to each other,
00:25:00
that's fine as long as they have enough room that it more than 4
00:25:04
inches is OK. If they have 6 inches all the
00:25:06
way around, but if you go 4 inches apart in the row, then
00:25:09
make sure you've got about a foot between that row and the
00:25:11
next one. They need to have that air flow
00:25:13
OK. With the ROW method, you either
00:25:17
want to incorporate your fertilizer or your amendments
00:25:20
into the bed before you plant or you can side dress with it after
00:25:26
you plant and then water it in really well.
00:25:29
My recommendation and what I like to do is to incorporate
00:25:31
into the soil 1st and then save the side dressing for the
00:25:36
subsequent feedings, which you're going to need to do about
00:25:38
every two to three weeks. And we'll talk about that in the
00:25:41
in the next section. And there is one more method for
00:25:45
planting in ground and that is the group method.
00:25:48
So you are going to plant groups of three onion plants 10 inches
00:25:54
apart in rows that are 10 to 12 inches apart.
00:25:59
OK, so three onions plants in the same hole, but you're
00:26:02
planting them 10 inches apart instead of, you know, the two to
00:26:06
four inches apart. This allows for all three onions
00:26:10
to spread out and grow to full size.
00:26:15
Doing it this way makes it easier for wedding in between
00:26:18
the plants when they're really small, and it can make for a
00:26:21
very quick method of planting, and it may work better for some
00:26:25
bed spaces. It's kind of fun to watch these
00:26:27
little triple bunches of onions grow to maturity and sort of
00:26:32
outgrow their space. It just means at harvest you'll
00:26:35
be pulling them apart at the roots because they will
00:26:38
intertwine with each other. But this is kind of a fun, a fun
00:26:41
method to to to use to to grow onions, which leads me into
00:26:45
container growing. You can absolutely grow onions
00:26:49
in containers. You just need to be sure that
00:26:52
the container is somewhere where it's going to get the 6 to 8
00:26:55
hours of of sun, preferably 8. We're looking for good top
00:26:59
growth and the more daylight the better.
00:27:01
Doesn't have to be 10 or 12/6 to 8 is fine.
00:27:04
Use a good potting soil or a potting soil compost mix.
00:27:07
Nutrients and proper drainage are key here.
00:27:10
And then you want to make sure you're using a good fertilizer
00:27:12
or nitrogen amendment. Feeding is going to be done on
00:27:15
the same schedule as the in ground plants.
00:27:17
More on that in a minute. I keep saying that I know, but
00:27:19
we'll get there. Your consideration for your
00:27:23
spacing when you are growing in containers, either be sure that
00:27:27
the containers are wide enough to accommodate multiple plants
00:27:31
at 4 inches apart or use the grouping method that I just
00:27:36
mentioned. If you're using smaller
00:27:38
containers, just be sure that you have about 10 inches or 25
00:27:42
centimeters of soil in the container.
00:27:45
This will prevent the plants from drying out too quickly,
00:27:48
which can absolutely stunt their growth.
00:27:51
So in this case, wider is better than deeper.
00:27:54
So if you use smaller containers, just be prepared to
00:27:58
water more, OK? And Speaking of water, you want
00:28:01
to make sure that these containers are well drained, but
00:28:04
you also don't want to let them get bone dry.
00:28:06
So you're going to need to check pretty frequently.
00:28:09
And when the soil 3 inches down is dry, you're going to have to
00:28:12
water. Onions, like most of the rest of
00:28:15
our garden plants, really only require about an inch of rain
00:28:21
every rain or water. However you get to them of of
00:28:25
water a week right when they're in containers.
00:28:28
You're probably looking at closer to two to three inches or
00:28:32
5 to 8 centimeters just so. Be prepared to water more
00:28:37
frequently than for like larger raised beds or for in ground
00:28:40
growing. Now no matter the method of
00:28:45
planting or growing, there are certain tips that will help you
00:28:47
get your best harvest of onions. OK, mulch once again, always
00:28:53
your friend. Mulching with straw in between
00:28:55
the rows is going to help retain moisture and it's going to keep
00:28:57
those weeds down. Onions have shallow root systems
00:29:01
and so they need consistent moisture and they really rely on
00:29:04
good weed control because they don't do well with the
00:29:06
competition. You may need to water weekly if
00:29:11
the weather is very dry, so mulching to retain that moisture
00:29:15
is is going to be very important.
00:29:18
One thing to understand about growing onions is that we kind
00:29:24
of want to think of them more as a leaf crop like lettuce or kale
00:29:29
and and treat them as such with regards to their water needs and
00:29:33
also their nutrient needs. So don't think about it as a
00:29:36
root crop. It's not a beet or a carrot.
00:29:38
The more leafy growth that you have at the top of the onion
00:29:42
before that bulbing process starts, the larger the onion
00:29:46
will be. We're looking ideally for 13
00:29:49
leaves. That's like the epitome of the
00:29:52
of the best top growth and and big green foliage.
00:29:56
Large healthy tops lead to that optimum bulb size, so it's
00:30:00
important to give the plant enough time to size up prior to
00:30:05
bulbing. So this is where that line of
00:30:08
latitude comes in. Understanding what your
00:30:11
temperature conditions are, where you garden when the
00:30:14
daylight hours begin to lengthen after winter, right?
00:30:18
So when are your days between 10 and 12 hours, and and how warm
00:30:25
is it when that happens, right? If it's late winter or it's
00:30:27
early spring and your temperatures are already pretty
00:30:29
mild and your garden is taking off nicely, yeah, you likely
00:30:33
live below the 36 parallel and you are somebody who needs short
00:30:37
day onion varieties. OK, so when planted at the right
00:30:40
time, your onions will have plenty of time to grow those
00:30:44
leafy green tops before starting to form their bulbs.
00:30:50
If your temperatures don't really start to warm up until
00:30:53
your daylight hours hit at least 14 hours per day, then you are
00:30:57
likely above the 36th parallel and you need to grow long day or
00:31:03
day neutral onions. Your plants need more time to
00:31:07
put on those leafy greens because the temperature
00:31:10
conditions are colder for much longer and that slows the plant
00:31:15
growth. If you were to grow short day
00:31:17
onions, there won't be enough time for those onions to grow
00:31:20
their tops before the day length triggers that bulbing process
00:31:24
and you end up with small onions.
00:31:26
This was the part that I just could not wrap my head around
00:31:31
when we first started growing onions.
00:31:32
And it makes more sense now. But of course, here we are over
00:31:36
a decade later. And so now I know, but back then
00:31:40
I had no clue. OK.
00:31:42
And again, if you live in a warmer climate and you're
00:31:45
somewhere S you know, Southern California, you know, down in
00:31:48
Texas or Southern Florida, and you have very, very mild
00:31:52
winters. You.
00:31:54
Very well. Are a candidate for actually
00:31:56
planting in the fall and having them over winter because as soon
00:32:01
as the daylight hours start to to lengthen again and as soon as
00:32:05
it starts to warm up, that growth is going to take off.
00:32:08
And so you are going to have a a better chance of having that
00:32:12
leafy growth before the onions start to form their bulbs and
00:32:16
you're also going to get an earlier harvest, OK.
00:32:20
So fostering all of that healthy foliage growth is going to
00:32:25
ensure that your plants have enough energy to form large
00:32:30
bulbs under the soil. How do we get lots of leafy
00:32:33
growth in all of our other plants, especially our leafy
00:32:36
greens nitrogen, right. So for the best growth and
00:32:40
yield, onions need to be fed right from the start.
00:32:44
That's why I talked about using an amendment or a fertilizer at
00:32:47
the very beginning when you are prepping your bed.
00:32:50
And that initial feeding should be around equal amounts of your
00:32:57
nitrogen, your phosphorus and your potassium.
00:33:00
So if you're using a fertilizer or something like a 10/10/10 or
00:33:03
even a 10/20/10 would be fine if you're using an organic
00:33:06
amendment, making sure that you have equal levels of nitrogen,
00:33:10
phosphorus and potassium is what you want in the soil prior to
00:33:14
planting. After that, you'll focus on
00:33:18
amendments that are mainly nitrogen.
00:33:20
Remember, we're looking for big foliage here and so you're going
00:33:24
to side dress with that nitrogen.
00:33:27
Or if you use the trenching method, you're going to put it
00:33:30
right over top of where your initial amendments went every
00:33:34
two to three weeks after planting.
00:33:36
OK, they are heavy nitrogen feeders because they want that
00:33:40
green growth. OK, you're going to stop
00:33:43
fertilizing when the onions begin to bulb.
00:33:47
Now, because this is triggered by day length, when this occurs
00:33:53
after planting is going to vary based on when you planted them
00:33:58
and the region you live in. This is why I can't say.
00:34:00
Well, stop feeding them, you know, four weeks after you
00:34:04
planted them or six weeks after you planted them, because I
00:34:07
don't know when you put those in the ground.
00:34:09
I don't know what your, your temperatures have been like,
00:34:11
what your day life is. So I can't give you a specific
00:34:16
time for when you should stop feeding.
00:34:17
The only surefire way to know is a visual inspection.
00:34:21
So when the ground begins to crack around the plants and the
00:34:24
soil starts to push away, that means that bulbing has started.
00:34:28
So stop feeding the plants at that point.
00:34:31
Those bulbs are now going to rely on the energy stored in
00:34:36
those green tops to move down into the storage organ, which is
00:34:41
what the bulb is. OK.
00:34:44
So while our early plants should stay covered with that light
00:34:48
mulch to protect them and retain the moisture and suppress the
00:34:52
weeds, we do not want to cover our emerging onions.
00:34:57
Do not put the soil back around the onions as they pop up out of
00:35:00
the soil. It needs to emerge above the
00:35:03
soil for best growth. And that mulch that you had down
00:35:08
should mean that you don't have to consistently water.
00:35:11
Like I mentioned, about an inch of water per square foot per
00:35:15
week, including rainwater, is sufficient.
00:35:18
Now, if you want sweeter onions, you can water more, and if
00:35:24
you've got a really hot spell, you can actually water more,
00:35:30
even up to two inches per week to prevent them from bolting.
00:35:34
OK, so long as your soil is well draining and the roots and the
00:35:36
bulbs aren't sitting in that water.
00:35:38
Now that being said, we don't irrigate our onions because
00:35:43
spring is our wet season and we generally get enough water that
00:35:48
it doesn't affect bulb size as the plants move more toward
00:35:51
maturity. But in years where we get very
00:35:54
little rain, we do have smaller onions and they are definitely
00:35:58
more pungent so that, you know, watering them to make them a
00:36:02
little bit sweeter. Dad, that's absolutely true.
00:36:04
So just understand, soil moisture is going to affect both
00:36:08
size and flavor. And so you've got your onions
00:36:17
planted, you've got a mulch, they're growing nicely, they're
00:36:20
starting to bulb. What pests and disease do we
00:36:23
have to worry about with onions? I will say thankfully onions are
00:36:27
one of the crops that I have not ever had a pest or a disease
00:36:31
problem in, knock on wood because you know, everything
00:36:34
else has had a pest or disease problem.
00:36:36
So hopefully it stays that way. I I do know though, in my area
00:36:41
for sure, that some growers have had problems with thrips.
00:36:45
Thrips are tiny little insects. They're like about as fat as the
00:36:49
tip of a sewing needle, so very hard to see.
00:36:52
You can tell if you've got thrips if you take a dark piece
00:36:57
of paper out into the garden and you knock the onion tops against
00:37:00
it. If thrips are there, you're
00:37:01
going to see them. They're tan colored, almost
00:37:03
white, and you'll see them on the paper.
00:37:06
Generally speaking, a couple treatments with an insecticidal
00:37:08
soap will kill them off. You always follow the directions
00:37:11
with whatever it is that you're using, but spray the plants
00:37:14
twice, three days apart, and the thrips should disappear.
00:37:18
That should take care of them. If you see that this is a
00:37:20
problem and you think there's you know it's going to be a sort
00:37:23
of a a repeat infestation every single season, then you may want
00:37:27
to use insect netting that is specifically designed for
00:37:32
thrips. It needs to be a specific sized
00:37:34
mesh in order to keep them out because they are so tiny, but if
00:37:38
you put that over top of your plants after you put them in the
00:37:41
ground then that'll keep the thrips away.
00:37:44
The other pest that I know of for onions is onion maggots.
00:37:48
The onion maggot fly likes to lay its eggs at the base of
00:37:51
plants, so again, if you're using an insect netting that's
00:37:55
going to prevent that. You just need to make sure that
00:37:58
you seal that insect netting down by mounding the soil around
00:38:03
the edges to keep the fly from going underneath.
00:38:05
And then if you do know that you have a problem in it with maggot
00:38:09
fly, then you also probably want to keep the mulch away from the
00:38:12
base of the plant because the insects like the decaying
00:38:15
organic matter. And then just make sure that
00:38:17
you're harvesting your onions, as the season progressive onion
00:38:20
maggots are usually a problem in very rainy periods.
00:38:23
So this you know these precautions may be unnecessary
00:38:26
if you have a really dry season. And then with diseases, white
00:38:32
rot is is a bad one. It's actually a pretty serious
00:38:36
disease. If it's not already in your
00:38:38
soil. You get it through infected
00:38:40
plant material. So before you go to plant
00:38:43
onions, check your university extension website to see if they
00:38:46
have any mention of white rot. And that way you know you should
00:38:51
probably stick to starting your onions from seed yourself or
00:38:56
using onion sets or transplants that you buy from an inspected
00:39:00
producer to make sure that they do not have it in their soil.
00:39:03
With white rot, the foliage on your onion plant will start to
00:39:08
yellow and wilt, but the problem really is below ground because
00:39:13
it gets this white fluffy fungal growth at the base of the bulb.
00:39:18
And unfortunately, once white rot sets in, there is no fix for
00:39:23
it. You have to dig up the crop and
00:39:24
dispose of it in the trash. Do not compost it because you
00:39:28
don't want to keep it around. You also want to avoid growing
00:39:31
onions in or anything in the onion family in the same
00:39:34
location and future seasons because unfortunately it will
00:39:38
remain in the soil for years so hopefully you don't have to deal
00:39:43
with white rot. The only other two onion
00:39:46
diseases that I've seen that are prevalent in any areas are
00:39:50
purple blotch and betritis leaf blight.
00:39:54
With both of these, you can usually prevent them by keeping
00:39:59
the foliage dry. I mean obviously other than
00:40:02
rainfall, but if you water like early in the day so that the
00:40:06
above ground plant parts dry as quickly as possible, avoid
00:40:11
wetting them if at all possible. Avoid crowding your plants.
00:40:14
Make sure you have plenty of space for air circulation, which
00:40:17
also means keeping the weeds pulled around the plants just to
00:40:21
help with that air circulation. OK, so you've navigated your way
00:40:25
through the pests and the diseases, and so now it's time
00:40:28
to harvest, right? First things first, If at any
00:40:32
point during the season you see onions that start to send up
00:40:36
flower stalks, make sure you harvest them right away.
00:40:39
This means that the bulbs have stopped growing.
00:40:41
They're not going to store well, they're not going to get any
00:40:43
bigger at that point. You can still use them,
00:40:46
absolutely. I would use them probably within
00:40:48
a few days to a week, but you're not going to be able to cure
00:40:51
those and store them long term. Spring planted onions tend to be
00:40:56
ready for harvest by about Midsummer fall.
00:41:00
Planted onions in the warmer areas are going to mature much
00:41:02
earlier than that. So keep an eye on them because
00:41:05
again, if you leave them in the ground too long then they're
00:41:06
going to try to bolt and go to flour.
00:41:10
So when onions start to mature the tops, the foliage will start
00:41:15
to become yellow and sort of wilt over or fall over.
00:41:19
At that point you can actually like bend the tops down.
00:41:23
I've even seen people stomp on the foliage to speed the the
00:41:27
ripening process up. You don't have to do this, it's
00:41:31
just a way to kind of encourage them to hurry up and finish up
00:41:34
the process. You also could loosen the soil
00:41:38
up around the bulbs to encourage them to sort to dry out already
00:41:41
while they're still on the ground.
00:41:43
You don't have to do any of this.
00:41:45
You can just wait until they completely fall over on their
00:41:48
own and then you'll know that that they are mature.
00:41:52
Usually the tops are going to be mostly brown at this point.
00:41:56
You do want to harvest though, while the weather is dry.
00:42:01
If the onions are still wet when they're harvested, they don't
00:42:04
tend to cure as as well and they might rot while they're in
00:42:07
storage. You also want to handle them
00:42:10
fairly carefully when you are harvesting them.
00:42:12
Any bruising, either now or while they're in storage will
00:42:16
actually encourage them to rot. So once you've got them out of
00:42:20
the ground, if it's warm and there's a nice breeze, you can
00:42:23
absolutely set your onions on the dry ground for a few days to
00:42:27
cure in the sun. Now, if your sun is blazing, you
00:42:31
can prevent them from getting Sun Skull by just laying the
00:42:34
tops of each other over top of each other's bulbs, if that
00:42:37
makes sense. You sort of overlay them, but if
00:42:40
this makes you nervous and you're worried about Sun skull,
00:42:42
you can absolutely move them out of the direct light.
00:42:45
We have wire shelves that or wire racks I guess that we set
00:42:50
up under a tree line. So if the sun is being
00:42:53
completely unrelenting we will lay them out on those on those
00:42:57
racks and lay them out to dry that way.
00:43:00
You can also put them in a protected place like a garage or
00:43:03
a barn or a basement if the weather isn't going to be dry
00:43:07
enough to do this outside. But how long your onions will
00:43:11
keep absolutely depends on how you treat them after harvest.
00:43:15
They have to be dried thoroughly in order to avoid problems with
00:43:19
rots. So you can either do this by
00:43:21
leaving them outside, or again, if you don't have a good place
00:43:25
to do this or the outside of the rain is expected, then you need
00:43:28
to dry them indoors. So they need to be in a warm,
00:43:32
dry place with really good air circulation.
00:43:35
Either hang them up to allow the air to reach all sides of the
00:43:39
onions, or lay them out in a single layer and then just sort
00:43:42
of periodically roll them over to allow them to dry evenly.
00:43:48
If the weather isn't conducive to doing this outside, I like to
00:43:51
put mine down in the seedling room downstairs where it's cool
00:43:54
we just lay them out on the wire racks that I usually use for the
00:43:57
plants and then I have the fans going to help dry them out.
00:44:00
This is basically the same way that I do my garlic.
00:44:03
I do prefer to cure them outside if possible because it's
00:44:06
definitely faster and I seem to get better results.
00:44:09
Your onions are going to be fully cured and ready for
00:44:12
storage when the necks are no longer green and the necks of
00:44:17
the bulb are completely closed up the entire neck where the
00:44:21
leaves meet the bulb should be dry all the way to the surface
00:44:25
of the onion, and then the skin should have a more uniform
00:44:29
texture and color than they were when you first pulled them out.
00:44:34
You don't want to cut the tops off prior to knowing that they
00:44:39
are bone dry like this because you're at a higher risk for
00:44:41
bacteria getting into the bulb and starting the spoiling
00:44:44
process. So once the onions are
00:44:47
thoroughly dry then you can clip the roots off.
00:44:51
You can cut back the tops to about an inch, unless you're
00:44:54
doing a braid for storage and now they're ready to eat or to
00:44:58
be put away in storage before you put them away.
00:45:02
Look for signs of sprouting or damage or bruise or anything
00:45:06
before you put them away. A sprout or a bruise is
00:45:09
definitely going to shorten an onion's shelf life.
00:45:12
They're still edible, so take those ones and put them in your
00:45:15
kitchen and use them first because they will likely go bad
00:45:19
sooner than the other ones will. Once you've inspected them and
00:45:23
you want to put them away from storage, you either can hang
00:45:26
them like in a mesh bag or in a nylon stocking.
00:45:29
You can spread them out up to two layers deep in a box with
00:45:34
some holes for ventilation, or you can keep the tops on and
00:45:38
braid them and then hang them in a cool, dry, well ventilated
00:45:43
area. I've not done the braid thing
00:45:45
with onions like I have my garlic, but I may do this just
00:45:49
once for just showing them off in my kitchen like I do my
00:45:52
garlic. We generally put them into mesh
00:45:55
bags and then we lay the bags flat on wire racks so that
00:46:00
they're not piled on top of each other in the bag more than two
00:46:03
onions deep. It works better for us than
00:46:06
hanging, but that's because we're storing several £100.
00:46:09
If I were just storing for us, I'd definitely just be hanging a
00:46:14
few smaller bags in my basement and calling it good, because
00:46:17
then I could save the shelf space for other things.
00:46:20
The key is you just don't want them piled on top of each other
00:46:23
for long term storage. OK, the ideal temperature range
00:46:27
for storage is 40 to 60°F or 4 to 15 Celsius.
00:46:32
Do not store them in your refrigerator.
00:46:35
It's going to be too humid for them in there and they will
00:46:38
either sprout or they will start to rot.
00:46:41
And then once they are in storage, just check periodically
00:46:43
for them sprouting or rotting. Pull those ones out.
00:46:46
You also don't want to store your onions with apples or
00:46:51
pears. Apples and pears both give off
00:46:53
ethylene gas and that will interrupt the onions dormancy
00:46:59
and they will try to sprout. So definitely don't store those
00:47:02
together. And you usually don't want to
00:47:05
store them with potatoes either because the onions can spoil the
00:47:07
flavor and give the potatoes an off flavor.
00:47:10
They can do the same thing with apples or pears too.
00:47:12
So and then keep in mind with storage, a pungent onion, those
00:47:18
hotter onions are going to store longer than a sweet onion.
00:47:23
So sweet onions have a higher water content so they don't keep
00:47:26
well in storage for an extended period of time.
00:47:30
Sweeter onions like the Walla Wallas that we grow each year
00:47:33
have a storage time of about a month or two, whereas like a
00:47:37
well cured and properly handled more pungent onion like the
00:47:41
Spanish yellow that we grow can keep for like four to seven
00:47:45
months, sometimes longer. So we will grow both.
00:47:49
We grow the Walla Wallas and we sell those as our sweet onions
00:47:52
and sell them all the way through the summer into the
00:47:54
early fall. Once we run out of those, then
00:47:58
we start to sell the Spanish Yellow because we know those
00:48:01
will keep and so we'll sell those through the fall and then
00:48:04
those are our winter storage onions.
00:48:06
We use those all winter long and continue to sell them as well
00:48:09
until we basically run out. So if you're growing multiple
00:48:12
varieties, eat the sweet varieties first and save the
00:48:16
more pungent onions for later. That's it for onions.
00:48:20
I know that that is a ton of information to process, so I
00:48:24
threw together a quick reference sheet for you that I will link
00:48:28
to in the show. Notes that you can keep with
00:48:30
your garden journal or your crop plan, so it's handy throughout
00:48:33
the season. Like I said, it took me a while
00:48:36
to get a handle on all of this in my own gardens, and I have
00:48:39
resources that I refer back to every single year because it's
00:48:43
virtually impossible to remember all of this for every single
00:48:46
crop, every single season, right?
00:48:48
So if you're feeling a little overwhelmed by this or any crop
00:48:52
in your garden, that's completely normal.
00:48:55
Keep references on hand while you're planning and while you're
00:48:59
working, and you'll feel a little more confident that you
00:49:02
do know what you're doing. Or at least you're faking it
00:49:06
really well, right? Until next time, my gardening
00:49:09
friends, Keep on cultivating that dream garden and we'll talk
00:49:12
again soon. You just finished another
00:49:14
episode of the Just Grow Something podcast.
00:49:17
For more information about today's topic, go to
00:49:19
justgrowsomethingpodcast.com where you can find all the
00:49:22
episodes, show notes, articles, courses, newsletter, sign up and
00:49:26
more. I'd also love for you to head to
00:49:28
Facebook and join our gardening community in the Just Grow
00:49:31
Something Gardening Friends Facebook group.
00:49:33
Until next time, my gardening friends keep learning and keep
00:49:36
growing.