
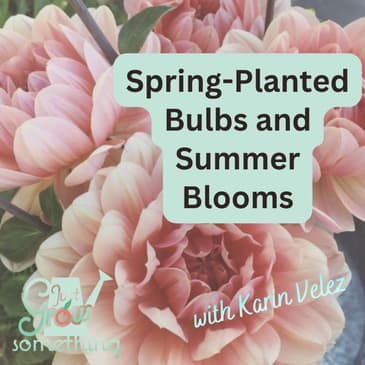
A listener asked for a deep dive on dahlias and I’m delivering, from the ground up (pun intended). But we’re not stopping there. In this episode, I’m covering the full world of spring-planted bulbs: dahlias, gladiolus, cannas, calla lilies, and tuberous begonias. You’ll learn when and how to plant them, how to grow them for maximum blooms, how to cut them for the vase (because that’s half the fun), and, critically, how to handle end-of-season care based on where you live. If you’re in a warmer zone, some of these can stay in the ground. If you’re in a colder zone like me, we’re digging them up, curing them, storing them, and doing it all again in the spring. Let’s dig in!
Quick-Reference: Zone-Based Overwintering Guide
Zone 9-10+: Leave everything in the ground. Mulch lightly after frost. Let plants rest and re-emerge in spring.Zone 8: Cannas and callas can stay with heavy mulch. Dahlias and glads: consider digging, especially in colder parts of the zone.
Zone 7: Mulching is a gamble. Reliable: dig dahlias and glads. Cannas may survive with very heavy mulch in milder Zone 7.
Zone 6 and colder: Dig everything. Cure properly. Store in cool, dry, dark, frost-free conditions. Replant after soil warms to 60°F in spring.
Bloom Timing and Vase Life at a Glance
- Dahlias — Bloom: midsummer to first hard frost | Vase life: 5–8 days | Zone to leave in ground: 9+
- Gladiolus — Bloom: ~70–90 days after planting | Vase life: 7–10 days | Zone to leave in ground: 8+ (with mulch)
- Cannas — Bloom: midsummer to frost | Vase life: 4–7 days | Zone to leave in ground: 8+ (with mulch)
- Calla Lilies — Bloom: summer | Vase life: 10–14 days | Zone to leave in ground: 8–9+ depending on type
- Tuberous Begonias — Bloom: summer all season | Vase life: 3–5 days | Zone to leave in ground: 9+
- University of Minnesota Extension — Dahlias: From Garden to Vase. extension.umn.edu
- University of Missouri Extension — Growing Dahlias (G6600). extension.missouri.edu
- NC State Extension Gardener Toolbox — Dahlia pinnata. plants.ces.ncsu.edu
- Colorado State University Extension — Dahlias, Fact Sheet 7.418. extension.colostate.edu
- Iowa State University Extension — Gladiolus for the Home Garden (PM 874). extension.iastate.edu
- University of Florida IFAS Extension — Gladiolus Production. edis.ifas.ufl.edu
- University of Illinois Extension — Canna Lily in the Garden. web.extension.illinois.edu
- Michigan State University Extension — Digging and Storing Tender Bulbs. canr.msu.edu
- University of Vermont Extension — Storing Tender Bulbs Over Winter. uvm.edu
- USDA Plant Hardiness Zone Map (2023). planthardiness.ars.usda.gov
Gardening Courses: https://justgrowsomething.com/courses
Just Grow Something Merch and Downloads: https://justgrowsomething.com/shop
Just Grow Something Gardening Friends Facebook Group: https://www.facebook.com/share/g/18YgHveF5P/
Check out how you can become a patron on Patreon: https://www.patreon.com/JustGrowSomething
Feed my coffee habit: https://buymeacoffee.com/justgrowsomething
Amazon storefront: https://www.amazon.com/shop/justgrowsomething
Get 10% off and FREE shipping on my favorite raised planters at Planter Box Direct using code JUSTGROW10: https://planterboxdirect.com/?ref=593
Hosted by Simplecast, an AdsWizz company. See pcm.adswizz.com for information about our collection and use of personal data for advertising.
[00:00:01] Alright my gardening friends, I want you to picture something with me. It's mid-July, you walk out into the garden with a pair of scissors and a bucket of water, and you come back inside with an armload of dinner plate dahlias in colors that don't even seem real. Deep burgundy, sunset orange, lavender that shades into cream at the tips. Absolute flower drama. You put them in a vase on your kitchen table and they are so big and so ridiculous,
[00:00:31] and so beautiful that every single person who comes into your house stops and says, where did you get those? And you get to say, I grew them. That is the promise of Spring-Planted Bulbs. And today, because a listener asked so nicely, we're getting into it. Welcome back to Just Grow Something, I'm Karin Velez, specialty crop farmer, horticulturist, and homesteader in the wilds of rural Missouri. And today we are stepping away from talking about growing your own food and shifting really
[00:01:01] quick to flowers, specifically summer blooming bulbs. We're talking dahlias, gladiolas, cannas, calla lilies. We're talking planting, growing, cutting for the vase. And because a lot of us live in places where the winter will absolutely murder these things if we leave them in the ground, we're talking about what to do when the season ends. If you've been curious about summer bulbs but felt a little intimidated, this episode is where you start.
[00:01:29] And if you're already growing some of these, I think you'll pick up a few things that you maybe didn't know. Let's dig in. Okay, really quickly before we jump in, I wanted to highlight a really cool happenstance for you. And I want you to get ready to really nerd out with me, okay?
[00:01:50] After last week's Q&A episode, specifically the question about identifying what's wrong with your tomato plant by looking at the symptoms and how they're appearing, I got an email from University of Missouri Extension and inside was a link to an article written by Extension agent Justin K.
[00:02:08] or Justin Key, I think, in Northeast Missouri, in Northeast Missouri. And it was all about mysterious damage to a group of pepper plants that took me right back to our tomato discussion because it was so, so similar. The interesting thing about this situation was he included a photo in the article and one look and I immediately thought, oh, that looks like herbicide damage.
[00:02:35] The plants had been started on a light bench in the grower's basement, just like what I do. And they had recently moved those plants out to a bench in a high tunnel for a period of hardening off before actually planting them in that tunnel. And the pictures that the grower sent showed some very distorted leaves on the new growth of the pepper plants. The leaves were curled downward, just like the telltale signs of herbicide damage in tomatoes.
[00:03:05] And the Extension agent had the same thought that I did, that it must have been herbicide damage. But here's where it gets interesting. Even though the symptoms looked very similar to the classic damage that we get from a broad-leafed herbicide, since these were started in a basement and they began showing the leaf distortion in the basement, then herbicide drift didn't really seem like it was the right thing.
[00:03:33] And yes, you can get herbicide damage coming in through contaminated growing media or amendments like compost, like we talked about last week. But the growing media that this grower was using was a bagged product from a reputable company. And the other plants that were started in this same media weren't showing any similar symptoms. So the second possibility that would produce similar symptoms to this would be damage or infestation from mites.
[00:04:03] Now, certain types of mites are so small that they are only visible under a microscope. And they are most problematic in greenhouses and high tunnels. So this might make sense since these plants were in a tunnel. So feeding from these mites can actually cause very severely distorted growth. And so the grower sent some samples to the MU plant diagnostic clinic so they could look at them under a high-powered microscope.
[00:04:31] And the samples did not have any mites or mite eggs or any evidence of mites feeding. So, okay, strike number two. So I'll quote the article here. Since both herbicide and mite damage had been eliminated, there was only one potential culprit remaining.
[00:04:51] I showed these pictures to a colleague of mine, and she noted that the peppers showed symptoms she had seen in transplants grown in her greenhouse several years ago. In that case, the culprit was neither herbicide or mites, but a faulty greenhouse heater releasing ethylene. So, ethylene damage in plants can happen in any enclosed structure where you're running a heater of some sort.
[00:05:19] If a heater is not properly ventilated, or it doesn't have sufficient clean air intake, or there's leaks, like in the heat exchanger, ethylene gas can be released into the growing environment. It's odorless, it's colorless, and it acts like a plant hormone. Now, those broad-leafed herbicides that we talked about also act as plant hormones, producing very similar symptoms in the plants that they're being sprayed on.
[00:05:48] This is exactly the reason why both I and the extension agent had looked at those photos, and that was our initial thought. And the grower had mentioned that he had an old coal furnace in the basement, and he used it to burn wood to heat the basement, in addition to having a gas-powered central heating unit. So, the good thing is that once the plants were moved out into the high tunnel, they actually started to outgrow the problem.
[00:06:13] Although, the plants were severely stunted, so they're likely going to have a reduced yield over the season. But the new growth appeared normal, which tells us that the ethylene pollutant was no longer present. So, in the case of like an herbicide contamination, there wouldn't be a very stark contrast like there was in those pictures between the distorted old growth and the healthy new growth. And that's what was happening in those transplants.
[00:06:40] So, this just goes to show you that it can be really difficult sometimes to narrow down the issue with plants, even if you're an expert in your field. There is a lot of sleuthing that sometimes needs to happen, and if you haven't had personal experience with the problem and its solution before, it can be very challenging. So, don't ever feel bad or think that you're asking a dumb question when it comes to growing plants.
[00:07:11] Okay, today we are taking on a listener request from DobbinsJ3 on Spotify, who sent in a message asking for a full episode on dahlias. Now, I was happy to oblige because I did something last season that I said I would never do, and that is dig up bulbs at the end of the season to store and replant the next season, and that included dahlias. But I also thought if we're going to talk about dahlias, then we might as well talk about the whole world they live in.
[00:07:38] Because dahlias belong to a larger category of plants, I guess, that home gardeners often overlook, and once you start growing them, you usually start growing all of them. So, these are what the gardening world loosely calls spring-planted bulbs. They are tender plants. They get started in the ground after your last frost, and they produce some of the most spectacular flowers through summer and fall. I started last season with dahlias and gladiolas, and I have a lot of thoughts.
[00:08:08] So, let's get into it. First things first, let's clear up some vocabulary, because if you go to the garden center and you ask for spring bulbs, you might accidentally end up in the fall-planted section with the tulips and the daffodils, and then you're going to wonder what happened. In the gardening world, we use the terms spring bulbs and spring-planted bulbs to mean two completely different things.
[00:08:37] Spring bulbs or spring-flowering bulbs are planted in the fall. So, think tulips, daffodils, hyacinths. They bloom in the spring. They go in the ground in October. Spring-planted bulbs are planted in the spring after your last frost. They bloom in the summer and the fall, and that's the category that we're talking about today. So, we have spring-flowering bulbs. We have spring-planted bulbs.
[00:09:07] And here's where it gets technically interesting, because the things we call bulbs in this category aren't all actually bulbs. I know, I know. More science stuff, but stick with me. A true bulb is a layered structure. So, think like an onion or a tulip, right? It has a basil plate and fleshy scales packed around a bulb. But here's what we're actually dealing with in terms of the spring-planted world.
[00:09:35] Dahlia's grow from tubers. So, a dahlia tuber, it looks like a sweet potato, and it's attached to a central stalk. So, the energy for the whole plant is stored right there in that tuber. Gladiola's grow from corms. C-O-R-M as in Mike. S. Corms. So, a corm is a solid, compressed stem. Think like a flat, round disc with a very papery wrapper. It's not layered like a bulb.
[00:10:04] It is solid all the way through. Cannas grow from rhizomes, which are thick, horizontal, underground stems that spread as they grow. So, ginger root, if you see ginger root in the grocery store if you've ever grown it, ginger root is technically a rhizome. And that's what that looks like. Calla lilies grow from rhizomes as well, though a lot of gardeners and nurseries just call them bulbs because it's simpler to do.
[00:10:32] And then tuberous begonias grow from tubers, like dahlias. That's the name tuberous begonias, right? And that's to differentiate them from like your fibrous root begonias. So, why does this matter? Because the storage structure tells you something about how these plants survive. They're packing carbohydrates and energy into those underground organs to get them through a dormant period.
[00:10:58] And knowing what the organ looks like helps you dig it up, identify it, store it correctly, and then replant it with confidence in the spring. So, from here on, I'm going to use bulbs interchangeably, kind of as shorthand for all of them, the way most gardeners do. Just know that what we're really talking about could be any number of those things. Rhizomes, you know, corms, tubers, whatever. One more important concept before we get into the individual plants. These are all tender plants.
[00:11:27] Tender, meaning they cannot survive hard freezes in the ground. Okay? How tender they are varies. Some can handle a light frost. Some die if they even sense a frost is coming. So, that tenderness determines everything about how you manage them at the end of the season. And we'll talk about that in more detail later. But for now, let's meet our plants. And we're going to start with dahlias.
[00:11:50] They are, in my completely unbiased opinion, the greatest flowering plant a home gardener can grow. And honestly, I didn't start growing them until last year. And so, I am very adamant about this. They are spectacular. They bloom from midsummer until the first hard frost, which is a longer cutting window than almost anything else I've got in the garden. They come in hundreds of varieties. They attract pollinators.
[00:12:19] And once you know how to manage them, they're actually not that hard. I always assumed that they were just fussy and they were a royal pain. And I didn't mess with them. And I randomly decided at the last minute last year to do dahlias along with some other things. And I was very pleasantly surprised. The dahlia world, however, has a whole classification system based on the form of the flower. And it's kind of worth knowing the basics so that you can shop intentionally. Definitely.
[00:12:48] Dinner plate dahlias are what most people picture. Those are these enormous blooms. Sometimes they're like 12 inches or more across. And they've just got layers upon layers of petals arranged in a very just classic decorative form. Okay. They are the absolute showstoppers, both in the garden and cut and put into the vase. Ball dahlias are smaller and tighter.
[00:13:14] They are perfectly round or globe-shaped blooms with very tightly rolled petals. These are great for mixed arrangements. They have a very long vase life. You've also got pom-pom dahlias. And these are even smaller. They're still like a ball type, but they're little. They're like bite-sized. They're very adorable. Then you also have water lily dahlias. They have a more broad, open petal arrangement. Kind of flatter, more open shape. Very soft. Very romantic looking.
[00:13:42] And then anemone dahlias. They have an outer ring of flat petals surrounding a very dense kind of cushiony center. Very unusual. They're very pretty. And then you have single dahlias. These look more like very simple daisies with just one ring of petals around a central disc. The pollinators actually love these because they can very easily access the pollen.
[00:14:06] So for home gardeners, like wanting cut flowers, you know, what I started with is this just kind of mix of dinner plate types because you just get that drama. But then also you can add in like the ball types, which is what I'm going to do this year, just kind of for some versatility and some vase life. And the height matters too. Dahlia's range from dwarf varieties to about 18 inches all the way up to like 6 feet.
[00:14:35] So most of your classic cutting types are going to round around 3 to 5 feet or so and they're going to need staking. I figured that out the hard way last year. So plan for that from the beginning. So you want to plant dahlia tubers after your last frost date when the soil has warmed to at least 60 degrees Fahrenheit and it's staying there. So here in west central Missouri, that would be around the second week of May, but I still have not planted mine yet.
[00:15:04] Don't rush this, okay? Cold, wet soil is the absolute enemy of dahlia tubers. They will rot before they sprout. And we've been kind of getting bucket loads of rain at a time here, so I'm waiting just a little bit longer to, you know, just to cover my bases. If you're eager to get started, you can pot tubers up indoors in containers. And you can do this about four weeks before your last frost and then just transplant them outside once the weather cooperates. This is actually very helpful if you live in a zone that has shorter summers.
[00:15:33] So this is going to give you a head start and get you some earlier blooms. Dahlia's do like full sun, a minimum of six hours per day. More if they can get it. They are very sun hungry. Less sun actually means fewer flowers and you're going to get weaker stems. They also really like good drainage. They absolutely will not tolerate sitting in water. They are heavy feeders. They love a loose, well-draining, fertile soil. So if your soil is heavy clay, amend it generously.
[00:16:03] Compost is your friend here. This is what I had to do last year, especially in a couple of spots where I was kind of trying to force those dahlias in. They do need to be planted about four to six inches deep with the eye, which is the little bump or growth point where the sprout is going to emerge. You want that facing up. So the spacing is going to depend on the variety. The larger types are going to need like 24 or as much as 36 inches apart. The smaller varieties, you can go down to about 18 inches or so. You just don't want to crowd them.
[00:16:34] Here is the mistake that I made. Waiting until the dahlia is like two or three feet tall to put in a stake and then spearing a tuber or disturbing the root system. So put your stakes in at planting time. Use a sturdy stake and you will absolutely be glad you did, especially if you have a really heavy July thunderstorm rolling through and it wants to knock them all over. Do I sound like I'm speaking from experience? Yeah, that's because I am. So stake from the start. It's going to be your best friend there.
[00:17:01] And then the thing about watering dahlias is you do not want to overwater right after planting. This is another reason why I have waited just a little bit to get mine in the ground. The tuber needs to wake up and start growing before it wants a lot of moisture. So you want to water kind of lightly at planting time and then just hold off until you see the sprouts start to emerge unless your soil is genuinely like bone dry.
[00:17:28] But overwatering a dormant tuber is one of the most common ways to actually lose it. So in terms of growing the dahlias, the technique that makes the difference between like a dahlia that produces three or four really large blooms and one that produces dozens of stems is pinching.
[00:17:49] So when your dahlia reaches about 12 inches tall and it has like three or four sets of its leaves, you pinch out the center growing tip, the very top of the main stem. We talked about this during the pepper topping episode. This is the same concept. This forces the plant to branch and become bushy, giving you far more flowering stems. Yes, it delays your blooms by a week or two, but the payoff is enormous. I will be pinching every single dahlia this season.
[00:18:18] And then in terms of feeding them, once the plants are established and they are actively growing, dahlias are going to benefit from regular feedings. So a low nitrogen fertilizer once the plants are established. Too much nitrogen is going to give you lots of beautiful foliage, but very few flowers. So think low on that first number, higher on the second and third number. So something like a 5, 10, 10. That's going to be perfectly fine. Or something that's just labeled for blooming, right? It's a blooming formula.
[00:18:48] Once your dahlia starts to set buds, then you can kind of ease up on the fertilizer. You do want to water, I guess, consistently. Or they like consistent moisture once they are established. Okay, so, you know, kind of a standard moisture we see in our gardens. One to two inches per week. Okay, and then of course we're going to mulch around the base of the plant. That's going to help to retain that moisture and suppress weeds. But you do want to keep the mulch a couple of inches away from the crown of the plant because we don't want it to rot.
[00:19:19] And then the thing with dahlias is you want to remove the spent blooms promptly. This is called deadheading. This keeps the plant directing energy into the new flowers rather than seed production. I'll talk more about cutting for the vase in a minute, but just know that every time you cut a stem, you're essentially doing a combination of harvesting and deadheading at the same time.
[00:19:42] And the other thing to be aware of is that dahlias attract Japanese beetles, aphids, earwigs, and thrips. And the earwigs are sneaky because they hide in the blooms and they chew on the petals overnight. So you want to check the blooms in the morning. And for most pests, intervention early is what matters. So knocking the aphids off with water, handpicking the beetles, using row cover on the young plants if you have a serious pest problem.
[00:20:12] Powdery mildew also can show up in the late summer, especially if the air circulation is really poor. So just space the plants appropriately and water at the base, not overhead. Okay. If dahlias are lush and round and romantic, gladiolus are spiky and architectural and dramatic.
[00:20:40] They're tall, they're bold, and they make a statement in the vase that nothing else quite matches. These are what I paired with my dahlias all along our driveway last year. And I'm doing it again this year amongst the new irises and my lavenders that came back. So gladiolus, or glads as most gardeners call them, produce tall flower spikes and they are covered in florets that open sequentially from the bottom up.
[00:21:09] So a single spike can give you a week or more of flowers in a vase as the florets continue to open. So most glads fall into the large flowered hybrid category. That's the classic tall spike that you see. They're pretty widely available, fairly easy to grow. And then they also have nanus types and these are very compact and a little bit earlier blooming. So these are good for smaller spaces.
[00:21:35] The timing on planting the corms of glads is a little bit earlier than dahlias. They can, you know, handle again, after the fast, the last frost, but when the soil temperature is around 55 degrees Fahrenheit or warmer. So, I mean, like the dahlias, they're not going to tolerate frost. So in colder zones, again, this might mean mid to late May for a lot of us in the middle of the country. Some earlier, some later. I just plant them at the same time that I'm planting my dahlias, okay?
[00:22:02] But the really fun part about glads is succession planting because glads go from planting to bloom in roughly 70 to 90 days. If you have a long enough season, you can plant a new batch of corms like every two weeks from your last frost date until about 10 weeks before your first fall frost.
[00:22:26] This gives you a continuous parade of flowers all summer long instead of one big flush that's over in a couple of weeks because they don't bloom continuously like the dahlias do. So, you know, I just planted them all at once at the same time as my dahlias and just decided to let them do their thing because I don't have space in my calendar to add another succession planting. But, you know, if this is something that you would want to try, then just put it on your calendar as to when.
[00:22:55] Go ahead and plant the next round and just make sure that you finish that up about 10 weeks before your first frost and you'll get some continuous blooming. The corms on glads need to be planted about 3 to 6 inches deep. And I say 3 to 6 because you want it a little bit deeper in sandy soils, a little bit more shallow in the heavier soils, which is what I ended up with. They were only about 3, maybe 4 inches deep at that.
[00:23:23] You do want to space them about 6 to 8 inches apart. That's pretty standard. And you can plant them either in rows or in clusters. And how you decide to do this might also determine whether or not you're staking them because those very tall glad varieties, especially in very exposed locations, are going to lean and topple in the wind without support. You can stake individual plants or just plant them close enough together in a block that they
[00:23:53] support each other. You know, a lot of people will plant them in rows with like stakes and then string down the length of the row. That works pretty well. I planted mine in clusters last year. And with the exception of one or two, they did pretty well just leaning on each other without flopping over. For sun and soil, they, you know, have the same basic requirements as the dahlias. Full sun, well-drained soil, good fertility. Lads are a little more forgiving about watering than dahlias, but they still don't want to sit
[00:24:21] in wet all the time. They don't like wet feet. And the one pest that you have to worry about with glads are thrips. Gladiolus are the number one target of Western flower thrips. They are tiny, almost invisible, and they feed inside the florets and they cause streaking and distorted flowers and silver scarring on the leaves. They are the most common and damaging gladiolus pest. You may not even see them. You'll just see the damage.
[00:24:51] So you can either treat the quorms with an insecticidal dust before planting and just monitor them throughout the season to kind of help manage that. If you don't like that idea, then neem oil or spinosad can also be used on the plants. Okay. We've given dahlias and gladiolus their proper attention. Now let's do a tour of a few others that might be worth your garden real estate. The first one is cannas. If you want something tropical looking that makes a very bold statement with the foliage and the flowers, cannas are your plant.
[00:25:20] Cannas, like I said, grow from rhizomes. They are essentially foolproof once you get them in. They want full sun and consistently moist, warm soil. They produce enormous paddle-shaped leaves in green and bronze or like even a deep burgundy color depending on the variety. And the flower spikes come in like really vibrant, like hot shades of red, orange, yellow, and coral.
[00:25:49] I did not grow cannas last year and I am rectifying that situation this year. I have grown them in the past and they are just showstoppers. So for these guys, again, planting the rhizomes after your last frost, you want to do this about two to four inches deep with the growing points, those little rounded buds on the rhizome facing up. They should be spaced about 12 to 24 inches apart depending on the variety. Cannas are big plants, so give them the room.
[00:26:16] Standard varieties can reach like four to six feet or more. You do have some dwarf types that will stay around two to three feet. The thing with these guys is you want to water consistently. You want to fertilize or feed them with a balanced fertilizer about once a month and then deadhead the spent blooms by cutting the flower stalk back to the next lateral bud. Cannas are heavy feeders and so they're going to reward really good soil prep with very dramatic foliage.
[00:26:45] The next one would be calla lilies. They have an elegance that is kind of hard to match. They're just, you know, they've got those sleek like funnel shaped blooms on those really long stems. They're just iconic. And what I found is they're not as finicky as their reputation might suggest. The classic calla produces large white blooms and is actually the most cold tolerant of the group.
[00:27:14] It can survive in zones eight and warmer in the ground. The colored calla hybrids, they can come in like yellow or pink, deep purple, orange, and there's like a cream color. They're a little bit more tender. So I would say they're typically hardy only down to zone nine, maybe eight B if you're lucky. You want to plant the rhizomes about three to four inches deep. Um, the hollow or concave side of the rhizome should be facing up again after your last frost.
[00:27:43] They prefer part shade to full sun. So unlike our other bulbs that we're talking about today, callas can actually handle and actually appreciate some afternoon shade, especially if you're in a hotter climate. They also love moisture more than the others. They're native to marshy areas in South Africa. So that let that be your guide in terms of the moisture requirement. The good, the cool thing is they actually do beautifully well in large containers, which also makes overwintering them easier.
[00:28:12] You can just bring the whole pot inside. You're not having to dig anything. They are also outstanding cut flowers because they have an incredibly long vase life. Like two weeks is pretty common. So we'll talk a little bit more about cutting technique here in the next segment. The exception in this group is the tuberous begonias. They are actually shade lovers, not sun lovers.
[00:28:36] So if you have a spot with like filtered light or morning sun and afternoon shade, then tuberous begonias would be a great solution for that spot. They prefer only about two to four hours of direct sunlight during the days and preferably the milder morning sun. They produce large, lush flowers in all shades of red, orange, pink, yellow, salmon, white, and they bloom all summer long.
[00:29:03] And they have these beautiful cascading types that do really well in hanging baskets too and in window boxes. So on these guys, you know, the tubers need to be started indoors like six to eight weeks before your last frost. They're really slow to wake up and come out of dormancy. And again, you want to plant them with the concave or the hollow side facing up, just barely covered with the potting mix, and then pop it into a warm spot with some indirect light. Once the sprouts appear and the weather finally settles and is nice and warm, then you can move
[00:29:33] them to their outdoor location. They are very frost sensitive. Now, obviously it's a bit late to start this process now, but you can find potted versions of tuberous begonias sprouted and blooming at the local nursery that you can bring home and transplant, and then you can save them for next season. You just have to make sure that you're checking on the tag to see whether it's a tuberous begonia or if it is a fibrous or wax begonia.
[00:29:59] Tuberous begonias like consistently moist but well-drained soil. They do not like dry conditions. And they will actually drop buds if they're stressed out. And they would appreciate a balanced fertilizer about every two to three weeks once they're actively growing. And this just keeps them blooming prolifically. And I'm telling you, they will just keep going all season long. And then there's a couple of quick mentions for bulbs that are worth exploring, I think, once you're comfortable with the basics.
[00:30:29] The first one is elephant ears. This is colacacea or alacacea. These are grown for dramatic foliage rather than flowers. If you've never seen elephant ears, they quite literally are shaped like an elephant's ear and they are huge tropical leaves in like greens and purples and like near black colors. They want heat. They want heat. And they want moisture. And they also prefer some filtered light all the way up to some full sun depending on the type.
[00:30:58] So these are grown from corms and you would plant them after your last frost once that soil is consistently warm. And then there's acidanthera. Sometimes it's called peacock orchid. And it is also in the gladiolus family, I believe. It produces these very fragrant star-shaped white flowers with like a little purple blotch on it. The care is very similar to what you do with glads. They are just delicate and very beautiful.
[00:31:28] And honestly, I think they're kind of underused. Okay, so let's talk about what I think is the most fun part of growing these plants and that's cutting them. And I know a lot of people grow dahlias and gladiolas and they feel almost guilty about cutting them like they're taking something away from the garden. And I want to reframe that just a little bit because cutting is not diminishing.
[00:31:56] For dahlias especially, cutting is actually what keeps the plant producing. The more you cut, the more it makes. And with the glads, I think you just get so much more enjoyment out of them over the long haul if you have some in the house and you have some in the garden. So grab your scissors and let's go. Let's talk about the stage of the bloom, okay? This matters. The timing of when these flowers are blooming and when you cut them matters. And it's different for each one. And the dahlias are probably the one that I have to point out first.
[00:32:25] Because you need to cut dahlias when the bloom is just at or past full open. Unlike a lot of other flowers, dahlias do not continue to open after they're cut. So what you see is what you get. When you cut it and you bring it in, that's where it's going to stay. A half-open dahlia is not going to open any further in the vase. So wait for the bloom to reach the stage you want and then cut it.
[00:32:53] So one of the tests that you can do is to press the back of the bloom very gently. If it's still soft or spongy in the center, then maybe wait one more day. And then go ahead and cut it and bring it in. Now with the gladiolas, you want to cut these when the bottom one to three florets florets are just starting to show their color and beginning to open. The rest are going to open in the vase sequentially over the next week or so from the bottom up.
[00:33:20] This is actually a huge advantage of the glads. You get a prolonged display from one single stem. So yes, the glads are one and done. But if you group them together in the garden, you can cut one or two for the vase and then leave the other ones to just party on outside. For cannas, you want to cut the spike when several of the florets are open. The spike will continue to open further in the vase.
[00:33:46] For calla lilies, you want to cut when the spaith, which is the funnel-shaped part, is fully open or almost fully open. The stems are just long and elegant and they hold up exceptionally well in a vase. And then for tuberous begonias, you want to cut when the flowers are just fully open. These have a somewhat shorter vase life than the others, like three to five days is kind of typical.
[00:34:13] So I don't usually cut these too often, but they're so beautiful in small arrangements that I do use them for short-lived arrangements, like for when we're having guests or something and I just want some more pops of color around. The other option too is just doing them in pots or containers, which is generally what I've done, and then just bring them in the house temporarily and then put them back outside again. So when you're cutting your flowers, you want to make sure that you are cutting
[00:34:38] in the early morning or in the very late evening, never in the heat of the midday. I always prefer the morning before the heat of the day has settled into them, but if evening is the only opportunity you have, then go for it. Try to do it as late as possible. Plants are under the least heat stress in the very early morning, and the stems are very full of water, which gives you the longest possible vase life. But again, if you have no choice, then in the evening is fine.
[00:35:06] Use sharp, clean snips or scissors. Dirty or dull tools are going to damage the stem tissue, and that can introduce bacteria, which also shortens the vase life. You want to cut at an angle, so a 45-degree cut. That's going to increase the surface area for water uptake once you get it in and put it in the vase. And you want to bring a bucket of water right out into the garden with you and put the stems in that water immediately after cutting.
[00:35:31] Do not carry around an arm load of flowers for like 15 minutes before bringing them in and putting them in water. Immediate hydration matters in terms of vase life. And for dahlias, you want to cut the stem as long as you possibly can to just above a lateral bud or a leaf node, so the plant can branch from that point and produce another stem. For the glads, you also want to leave like four or five leaves on the plant when you cut
[00:35:59] because those leaves are what fuels the corm for the next year. So you don't want to take care. You don't want to remove all of that. So once you've brought your stems inside, you want to recut the stems underwater immediately before putting them into fresh water. This removes any air bubble that may have formed and seals the cut end. You also want to strip off any lower leaves. Any foliage that would be submerged in the vase should come off. Those are going to rot really quickly. They contaminate the water. That dramatically shortens your shelf life.
[00:36:27] You also want to use clean vases with fresh water. If you have floral preservatives, like the little packet that comes with the store-bought flowers, right, that contains a bactericide and a sugar source. So you can make a DIY version with just a teaspoon of sugar and a couple of drops of bleach in a full quart of water and use that as your floral preservative.
[00:36:52] You also want to allow the stems to hydrate in a cool, dark place for a couple of hours before you sort of arrange them. This is called conditioning. It actually makes a really big difference in how long the flowers hold. So basically you're trying to handle them as little as possible while they rehydrate and then go ahead and, you know, make your arrangement in the vase. And for dahlias specifically,
[00:37:17] some gardeners swear by searing the stem ends in boiling water for 30 seconds immediately after cutting them and then plunging it into cold water. So the heat seals the end in a way that prevents the stem from getting slimy. I haven't tried this yet, but I will be this year to see if it can extend the vase life a little bit. It seems a little fussy, but, you know, maybe it's worth it for your real showpiece flowers, right?
[00:37:46] So the typical vase life for these guys, dahlias you're looking at like 5 to 8 days, gladiolus about 7 to 10 days as those florets continue to open, cannas are around 4 to 7 days, the callas you're looking at 10 to 14 days, and then with the tuberous begonias, again, that's only like 3 to 5 days. So sometimes they're not, you know, worth cutting, but, you know, for short-lived little cute arrangements, you know, sometimes they're fun.
[00:38:21] All right, my gardening friends, here's the segment I know a lot of you have questions about because the answer is different depending on where you live. These are tender plants, okay? Most of them cannot survive the kind of winter that a zone 5 or 6 or 7 garden delivers, okay? But gardeners in warmer areas don't have to do anything except maybe tuck them in a little bit. So let's go by zone on what our end-of-season care should be for these guys.
[00:38:48] If you're in zone 9 or warmer, so 9, 10, 11, all of the plants that we've discussed today can remain in the ground year-round. Dahlias, glads, cannas, callas, begonias, all of them. Your main job in these zones is to allow the plants to go dormant naturally, cut back the dead foliage after the first significant cold snap, and let the soil do the rest. Dahlias in warm climates may actually not go fully dormant. They may just slow down and then pick back up again in the spring.
[00:39:18] Gladiolus in warm climates can actually be left in the ground and will multiply and naturalize over time. Um, calla lilies in zone 9 and up are essentially perennials and they just require like no intervention whatsoever. If we move into zone 8, this is sort of the marginal zone. This is the it depends zone. The average minimum winter temperatures here are going to range from like 10 to 20 degrees Fahrenheit. So that's cold enough to damage or kill tubers and rhizomes
[00:39:47] that are close to the surface. So the cannas and the calla lilies can usually survive a zone 8 winter with a really heavy layer of mulch, like three to four inches worth over the planting area after the foliage dies back. This is going to insulate the soil. It's also going to prevent the hard freezes from really penetrating too deep. Dahlias in zone 8, I would say are riskier. Um, a mild zone 8 winter. Okay. They're going to, they're often going to make it,
[00:40:16] especially if you're like zone 8B, you're kind of pushing zone 9. Hard winters though, they're absolutely not going to make it. So if you want to protect your investment, especially if you have one of those expensive varieties, um, digging them is the reliable choice. Mulching heavily, that's the gambling choice. And then the glads in zone 8, most gardeners just kind of mulch and hope, cross your fingers or dig them up, depending on how attached they are to their specific corm variety. So when in doubt, dig it. Okay.
[00:40:47] Zone 7. Uh, this covers a huge swath of the U.S. So parts of the mid Atlantic into the Carolinas, the middle of Tennessee, northern Arkansas. You guys see average minimums of 0 to 10 degrees Fahrenheit. In zone 7, I would not leave dahlias in the ground unless you are willing to lose them. Um, cannas with very heavy mulch might make it through a mild zone 7 winter, but it's a gamble. Glads, same story.
[00:41:16] So my honest recommendation for a zone 7, if you care about the plants, dig them. Okay. It takes maybe an hour for a normal size planting. I think the peace of mind is probably worth it. And then zone 6 and colder. This is the dig and store crew for sure. Okay. This is where I'm at. We're a zone 6B here. We get hard freezes. We get polar vortexes. We get nights in the single digits. Nothing tender is surviving in my soil from November through April. Okay.
[00:41:44] So if you are in zone 6 or colder, which includes a huge chunk of the Midwest and the Northeast and the Upper South, you are digging these bulbs every fall and you're storing them. Full stop. I always swore I would not do this. If I was going to buy bulbs and plant them, then I would just let them rot and I would buy new ones the next season. I was not going to miss with digging and storing. But I loved my displays so much last year. I said to heck with it and I got to digging.
[00:42:13] And honestly, once you get into the rhythm of it, it's not that bad. It's actually a satisfying fall ritual and then it's even more satisfying to pull those out of storage and see that they survived and are ready to thrive the next spring, right? So here's how we do this. For dahlias, you want to wait until after the first light frost has blackened the foliage. That frost is going to signal to the tumor that it's time to go dormant and the skin on the tuber toughens up slightly, which helps them store better.
[00:42:43] Do not wait for a hard freeze. A hard freeze can actually damage those tubers. So light frost, yes. Hard freeze, no. Okay. With the gladiolus, you want to dig the quorums after the foliage has yellowed and died back naturally or after the first frost, for zones where the frost comes early, you can also dig glads a few weeks before the expected first frost if the foliage is already dialing back, okay? The quorum is fully mature when that foliage is mostly yellow.
[00:43:12] I just dig them up at the same time I dig up my dahlias because if I'm going to do it, I'm just going to do them all at once. You do you, okay? With cannas, you want to cut back the foliage after the frost kills it and then dig the rhizomes. They're usually really large by the end of the season and you may have several times as many as you started with. And then with the calla lilies and those tuberous begonias, dig after the frost kills the foliage before the ground freezes.
[00:43:42] For all of these, you just want to use a garden fork or a spade and work outward from the base of the plant. The farther out than you think you need to go. Dahlia tubers spread surprisingly wide. And specifically, when we're talking about dahlias, you actually want to leave a little bit of the soil attached and just gently lift the entire clump. You don't want to grab the individual tubers and try to yank them out. You're going to break off the neck of the tuber where it connects to the main stalk and that's the part
[00:44:11] that contains the eye, that growth point. So no eye, no plant next year. You want to cut the stem back to about three to four inches above the tuber clump and this is going to give you a little bit of a handle for moving them around during the curing process. So of course, let's talk about that curing. Curing is just a period of controlled drying before we store them. It's the same type of thing that we do for storing vegetables like onions. It helps the skin tighten and it reduces the risk of rot during storage. So for the dahlias, you actually want to set
[00:44:40] the clumps upside down. So with the stem side down in a dry ventilated space for at least a few hours, maybe a day, this just lets any moisture sort of drain away from the tubers. Don't cure them too long. We don't want them to dry out too much. With the GLADs, you want to cure these guys for about two to three weeks in a warm, well-ventilated area around 60 to 70 degrees. This is important because GLADs need this longer cure time for the corm to properly harden.
[00:45:10] So during the curing, you can actually twist or cut off the old corm tissue from the bottom of the new corm, the old shriveled corm from last year is no longer useful. The new corm is above it. And then with the cannas and the callas, it's a shorter cure of a few days in a dry space. That's sufficient. Same with your tuberous begonias. So in terms of storage for all of these, we want cool, dark, dry, and obviously frost-free. Okay? So the target temperature
[00:45:40] is roughly 35 to 50 degrees Fahrenheit-ish. So we're talking like a root cellar or an unheated garage, but one that is insulated, maybe a basement, even a spare refrigerator. That's fine. Mine were in my seedling room in my basement, which goes unused until the beginning of the year when I start my seeds. The problem I faced is I forgot that's where I stored them. And so of course, the heat and the humidity in there started to build up from growing the seedlings. And when I finally remembered
[00:46:10] and I looked at them, I realized that had caused them to actually break dormancy early. So I've been watching really closely until it's time to put them out and they're fine. Now, I'm going to tell you what the experts say to do in the terms of storage, and then I'll tell you what I actually did. So for the dahlias, they say to pack the cured tuber clumps in a cardboard box or a wooden crate with barely damp medium. So peat moss or coco coir or like barely damp
[00:46:39] like wood shavings, those would work well. And by barely damp, I mean if you like grabbed a handful and you squeezed it really hard, no water should drip out. So the tubers need just enough moisture that they don't completely desiccate, but too much moisture can cause some rot. So you want to kind of check on them monthly and pull out any that are getting soft or rotting because you don't want that to spread. A little wrinkling is okay, but soft and mushy is not. And as far as the gladiolus go,
[00:47:09] storing them in mesh bags or an old pantyhose or just in shallow trays with really good air circulation is what the recommendation is. You don't want to seal them up tight. They need some airflow. So again, a cool basement or a garage shelf would work. For cannas, you're supposed to store the rhizomes very similarly to the dahlias, so barely damp medium in a cool dark spot. They're actually a little more forgiving, I think, about the storage conditions than the dahlias are. For the calla lilies, you want to store those rhizomes also in barely damp,
[00:47:39] you know, peat or something in a cool spot. They're also fairly tolerant of more imperfect storage conditions. And then, the tuberous begonias, after the stems die back, you want to allow them to dry in a warm spot for about a week or so and then store them in dry peat or vermiculite in a cool area. These need to be kept slightly more on the dry side than the dahlias. I guess they're more rot prone in storage. Now, did I follow any of this when I stored my dahlias
[00:48:08] and my gladiolus? No, I absolutely did not. I basically threw them into a little wicker basket and made sure I had a tag that told me what it was and I tucked them in the corner of my seedling room. Now, I think that was probably my saving grace with the dahlias because it did end up being humid down there after, oh, about a month or two of them being stored. Let's see, I dug them in October and I started my first set of seeds
[00:48:39] in February, I think. So, they were down there for a few months without, you know, having any moisture in the air down there until I started those plants up. So, you know, they tended, they did just fine. They were fine, you know, and the glads were right next to them. So, you know, technically, do they need different situations? Yes. If you have some expensive varieties and you really want to make sure they come back, you might want to pay more attention than I did. I will probably be better about it this year, but we were leaving town
[00:49:09] and I was in a hurry. So, I just found them a spot and tucked them away and thankfully, it all worked out. So, one more thing on dahlias specifically. Over time, your dahlia clumps get large, sometimes very large and each tuber in the clump can produce a new plant. So, dividing is how you multiply your collection for free. You can divide either at the time that you dig them up in the fall or you can divide them in the spring just before replanting.
[00:49:39] I think spring division is a little bit easier because the eyes, those growth points, are easier to see and right now, mine are way easier to see. They've all swelled up and are very obvious looking because they've gotten that humidity. So, and that becomes a little bit more obvious as that spring warmth kind of approaches. So, each division that you make needs to have at least one eye and a section of the neck attached to a plump healthy tuber. So, those thin like pencil-like tubers that don't
[00:50:09] have an eye, they're not going to produce a plant. So, you just use a sharp clean knife to make the cuts and let the cut surface callous over for an hour or two before you plant them or before you store them depending on when you do this. And when you go to replant these in the spring, pull your stored bulbs out about a week or two before you intend to stick them outside just to let them kind of come back to room temperature gradually. You want to look for any rot and trim that off if you needed. Each year
[00:50:38] that you store and replant successfully, you're going to get better at reading the signs and understanding your storage conditions and knowing what works for your specific setup. The first year is a learning year. If you're lucky like me and you throw them into a corner and they come back out surviving, great. But the next year you know better and by the third year it's just a part of the rhythm. Alright my gardening friends, that is spring planted bulbs from the ground up. Pun intended, I can't help myself, I'm sorry.
[00:51:08] In the show notes I am going to include links to extension resources from Minnesota, Missouri, Iowa State and several others that go deeper on each of these plants. I'll also link to the USDA Plant Hardiness Zone Map so you can find your exact zone if you're not sure and if you have an idea for an episode just like this one reach out to me wherever it's convenient. Leave a comment in Spotify, send me a message from my website, respond to my email newsletter, DM me on socials, wherever. If it's something
[00:51:37] I have some experience in and can talk about I will happily do so. Thanks again to listener Dobbins J3 on Spotify for this episode suggestion. Until next time my gardening friends, keep on cultivating that dream garden and we'll talk again soon.