
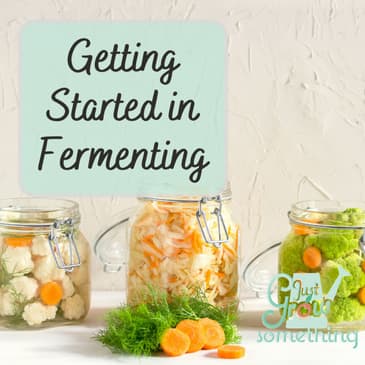
Fermenting foods can be a fun and rewarding way to both preserve the harvest and enhance the flavors of our garden bounty. If you're a beginner looking to get started with fermenting your own foods, I’ve discovered it’s not hard, but there are some essential things to know. Today on Just Grow Something we’ll look at the key tenants behind fermenting foods, the basics of getting started, what types of equipment are necessary and what are just nice-to-haves. Ready to start fermenting? Let’s dig in!
Episode Resources and References:
Preserving Episodes | Just Grow Something with Karin Velez
Plan Like a Pro Fall Registration
National Center for Home Food Preservation | How Do I? Can (uga.edu)
Health benefits of fermented foods: microbiota and beyond - ScienceDirect
Eating Fermented: Health Benefits of LAB-Fermented Foods (mdpi.com)
Are Fermented Foods Effective against Inflammatory Diseases? (mdpi.com)
Just Grow Something with Karin Velez (justgrowsomethingpodcast.com)
Hosted by Simplecast, an AdsWizz company. See pcm.adswizz.com for information about our collection and use of personal data for advertising.
00:00:01
This is Positively Farming media.
00:00:04
Last fall, I did a whole series here on different ways to
00:00:08
preserve our harvest. I'll link to those episodes
00:00:11
below in the show description. One of the things that I
00:00:14
mentioned I didn't have any experience in but was planning
00:00:17
on dabbling with was fermentation, and I am happy to
00:00:21
say I took the plunge and have discovered some fantastically
00:00:24
yummy ways to preserve some of the garden goodness when I'm
00:00:27
overrun. And in a way that's great for my
00:00:30
gut health, fermenting foods can be a fun and rewarding way to
00:00:34
both preserve the harvest and enhance the flavors of our
00:00:37
garden bounty. If you're a beginner looking to
00:00:40
get started with fermenting your own foods, I've discovered it's
00:00:43
not hard. But there are some essential
00:00:45
things to know. Today on Just Grow Something,
00:00:47
we'll take a look at the key tenants behind fermenting foods,
00:00:51
the basics of getting started, what types of equipment are
00:00:54
necessary, and what are just nice to have ready to start
00:00:58
fermenting? Let's dig in.
00:01:00
Hey, I'm Karen and I started gardening 18 years ago in a
00:01:03
small corner of my suburban backyard when we moved to A5
00:01:06
acre homestead. I expanded that garden to half
00:01:08
an acre and I found such joy and purpose in feeding my family and
00:01:12
friends. This newfound love for digging
00:01:14
in the dirt and providing for others prompted my husband and I
00:01:17
to grow our small homestead into a 40 acre market farm.
00:01:20
When I went back to school to get my degree in horticulture, I
00:01:23
discovered there is so much power in food.
00:01:25
And I want to share everything I've learned with as many people
00:01:28
as possible. On this podcast, we explore crop
00:01:31
information, soil health, pests and diseases.
00:01:34
Plant nutrition, our own nutrition, and so much more in
00:01:37
the world of food and gardening. So grab your garden.
00:01:40
Journal and a cup of coffee and get ready to just grow something
00:01:43
so the weather is gorgeous here today, and I have all the
00:01:47
windows open in my house on a very rare, overcast and breezy
00:01:52
August afternoon. So if you hear the sounds of
00:01:54
chickens or pigs or birds in the background, just pretend we're
00:01:58
having a conversation on my back porch listening to the farm
00:02:01
animals and the wildlife. Grab a cup of coffee and pull up
00:02:04
a chair next to me. OK, quick reminder, this is the
00:02:06
final week to sign up for fall registration of my plan.
00:02:09
Like a pro garden planning course or spring registration if
00:02:12
you're in the Southern hemisphere.
00:02:14
The course takes you step by step through the garden planning
00:02:18
method that I spent 10 years developing and that I use here
00:02:21
in our own gardens. Every single year there are
00:02:25
pages of downloads, hours of video, a private community where
00:02:28
you can ask questions and share ideas.
00:02:30
It's self-paced and you have access for as long as I continue
00:02:34
the course, which means getting all the updates I make along the
00:02:37
way. As soon as I make those changes,
00:02:40
go to justgosomethingpodcast.com.
00:02:42
Plan to get all the details and I will put that link in the show
00:02:46
description below. Let's just start this
00:02:50
conversation by saying fermenting is an ancient
00:02:55
preservation method. It has been used for centuries,
00:02:58
for thousands of years literally.
00:03:00
While it is generally safe and can be done properly with 0
00:03:04
experience and only basic instructions, I am not an
00:03:08
expert. I am just sharing with you what
00:03:11
I've learned in my very brief journey in Fermenting So if you
00:03:14
have any questions or concerns, I'm going to link to all kinds
00:03:19
of references and resources in the show notes so that you have
00:03:22
access to the same learning resources and tools that I have
00:03:26
been using. If you are not on my e-mail list
00:03:29
and you want to have these resources automatically sent to
00:03:32
you when they're posted with each episode, just head to my
00:03:36
website and get signed up and you will get these links in your
00:03:38
inbox every week so it's super easy to find and you don't have
00:03:42
to remember to go and write down a link.
00:03:44
So let's start by answering the question, what is fermentation?
00:03:49
Fermentation is a natural process where microorganisms
00:03:55
like bacteria, yeasts or molds break down sugars and
00:03:59
carbohydrates in our food, converting them into acids or
00:04:04
alcohol or gases. Now this process not only
00:04:08
preserves that food, but it also adds very unique flavors and
00:04:13
enhances the nutritional benefits of that food.
00:04:16
So at its core, these microorganisms are sort of
00:04:20
predigesting our foods, which is increasing the availability of
00:04:25
those nutrients to our system. So some of the key health
00:04:31
benefits of consuming fermented foods include improved
00:04:35
digestion. Fermentation breaks down complex
00:04:38
carbohydrates and proteins into simpler forms, which makes them
00:04:42
easier to digest. It also produces enzymes that
00:04:47
aid in digestion and that promote a healthy gut
00:04:50
environment. Fermented foods are very rich in
00:04:54
probiotics. Those are those beneficial live
00:04:57
bacteria that support our gut health.
00:05:01
These help maintain a balanced gut microbiome which is linked
00:05:05
to improve digestion, immune function and mental health.
00:05:09
We talked about the gut brain connection back on a Focal Point
00:05:13
Friday episode about the link between ultra processed foods
00:05:16
and mental health. A significant portion of our
00:05:20
immune system is located in the gut, so probiotics that are
00:05:26
found in fermented foods can help manage our immune response
00:05:31
and enhance our body's ability to fight off infections and
00:05:34
diseases. Now, fermentation can also
00:05:37
increase the bioavailability of certain nutrients in our foods,
00:05:41
like vitamins and minerals and antioxidants, which makes them
00:05:44
more accessible to us in the body.
00:05:47
These are things our modern diets are often definitely
00:05:50
lacking. The studies have shown a
00:05:53
connection between eating fermented foods and reduced
00:05:58
inflammation. Some fermented foods contain
00:06:01
antiinflammatory compounds and those probiotics, again, that
00:06:04
may help reduce inflammation in the body.
00:06:07
Now, much of this is tied to fermented dairy products like
00:06:10
yogurt and Kiefer, but to a lesser extent, certain fermented
00:06:14
vegetables also carry these benefits.
00:06:17
So even though we're primarily talking about vegetables today,
00:06:20
fermented dairy products are also very beneficial.
00:06:24
It is important to note that the health benefits of fermented
00:06:29
foods can vary depending on what type of food it is that we're
00:06:33
fermenting and the fermenting process that we are using.
00:06:37
Of course, individually we are all going to respond to
00:06:40
fermented foods differently. So it's essential listen to your
00:06:43
body, figure out which ones work for you.
00:06:47
Some people tend to jump into fermented foods very quickly
00:06:51
trying to get all of these health benefits from them, but
00:06:53
it can often disrupt your digestion a little bit.
00:06:57
So what I have done is started with small servings to just sort
00:07:00
of allow my digestive system to adjust, and then I slowly added
00:07:06
more and more fermented foods each week.
00:07:08
So if you have specific health concerns or conditions, it's
00:07:13
always a good idea to consult with your professional, like a
00:07:16
registered dietitian or somebody who is very well versed in these
00:07:20
types of things before making any kind of a significant change
00:07:23
to your diet. So as a beginner, I found it was
00:07:28
best to start with very simple fermenting recipes.
00:07:32
Sauerkraut, kimchi, Pickles, these are all very popular,
00:07:35
beginner friendly choices. They generally have a shorter
00:07:39
fermentation time and they require next to nothing in the
00:07:42
way of equipment. So we get that sort of instant
00:07:46
gratification of that short fermenting without any type of
00:07:50
large commitment when it comes to buying things.
00:07:53
Now when we're talking about our equipment, the first thing is
00:07:57
just to make sure that when we're working with ferments, all
00:08:01
of our utensils are containers, our hands, all of that is clean
00:08:06
before we start the fermentation process.
00:08:08
Keeping these sort of sanitary conditions is going to help the
00:08:12
beneficial microorganisms thrive, and it's going to help
00:08:16
prevent contamination from the ones that we don't want around.
00:08:20
The other thing that I'm going to recommend here is to choose
00:08:24
fresh organic produce when you can, whether that's coming out
00:08:29
of your garden or it's coming from the farmers market or from
00:08:31
a neighbor's garden, whatever. With canning and other types of
00:08:35
preservation, we know that using those high quality ingredients
00:08:38
leads to a higher quality result and fermentation is no different
00:08:42
from that. But even more so when we're
00:08:45
using fresh and organic vegetables, they are going to
00:08:49
contain more of those beneficial microorganisms.
00:08:51
Because you know, those chemicals that are used in
00:08:54
agriculture and in gardening are going to kill off all the good
00:08:57
bugs with the bad bugs. And we want those good bugs, we
00:09:01
want to encourage them to flourish.
00:09:02
So choose non sprayed veggies when you're going for
00:09:05
fermenting, and then just remember when you're getting
00:09:09
started. That patience is key here.
00:09:12
Fermentation is not an instant process.
00:09:15
It takes time for the flavors to develop.
00:09:19
So depending on the food and depending on the ambient
00:09:22
temperature of where you're storing your ferment, it can
00:09:25
take anywhere from just a couple of days to several weeks.
00:09:28
So you need to be patient and allow the process to complete
00:09:32
before you decide that maybe fermentation isn't for you.
00:09:35
You're also going to want to be available to monitor the
00:09:40
fermentation process as it goes. You're going to want to check on
00:09:43
it regularly just to ensure that everything is going smoothly.
00:09:47
So I have found keeping them handy in just my kitchen
00:09:50
cupboard makes it very easy for me to check on them frequently
00:09:54
to keep an eye out for things like mold or any kind of off
00:09:57
smells or any kind of sliminess which could indicate that it's
00:10:01
spoiling. So if you encounter any of
00:10:04
these, ditch that sucker into the compost pile and then just
00:10:07
start all over again. I have found it helpful to have
00:10:10
image resources available just to be sure that what I'm seeing
00:10:15
is a good bacteria or a good yeast and not a bad one.
00:10:19
After a few tries I've begun to be able to sort of assess these
00:10:24
things myself. Just like any with new any new
00:10:26
skill, it's going to take some practice.
00:10:28
So having a visual reference handy will make you more
00:10:32
confident that you're not planning on serving your family
00:10:34
something that's going to like taste gross or make them sick.
00:10:37
So just Google some images of what you know the proper
00:10:41
fermentation process looks like and you should be able to find
00:10:44
some images of the good versus the bad.
00:10:47
And I know we're talking the basics here, and the basics is
00:10:52
far as equipment is really all you're going to need for some of
00:10:55
the more simple, fast fermenting batches.
00:10:58
But for things that require longer aging, you might also
00:11:01
consider using airlocks. These things are going to help
00:11:04
the gases to escape while preventing any oxygen or
00:11:07
contaminants from getting into the container.
00:11:09
So I'll talk about these a little bit as we get into the
00:11:11
actual process of fermenting. I've found that having a couple
00:11:14
of little extra tools have helped make fermenting a little
00:11:17
bit more foolproof, as I have learned the process and as I've
00:11:20
started experimenting. Now, two things that we want to
00:11:24
consider before we get started is storage of our ferments
00:11:30
during the actual fermentation and then storage after the
00:11:33
fermentation is complete. So understand that different
00:11:38
types of ferments like different conditions while they are
00:11:43
fermenting. So vegetables typically prefer
00:11:45
something around 65 to 70 Fahrenheit, but things like
00:11:49
kombucha, which is a ferment likes, you know, 70 to 75
00:11:53
Fahrenheit. And then if you've ever done
00:11:55
sourdough starter, you know that it likes it a little bit warmer
00:11:59
for the yeast component closer to 80 Fahrenheit, but cooler for
00:12:04
the bacteria closer to 70. And then even cooler still for
00:12:08
it to be in sort of a stasis like a refrigerator temperature.
00:12:11
So be prepared with a space like a dark cupboard or a closet or
00:12:15
some other area where your ferments can sit undisturbed
00:12:20
with as little light as possible.
00:12:22
This also may mean that you need different spaces for different
00:12:25
ferments because bacteria like to travel.
00:12:27
So if you don't want your kombucha to taste like your
00:12:30
sauerkraut then you may need to keep them in separate spaces.
00:12:34
I've done lots of vegetables next to each other, but when I
00:12:37
was also doing my own apple scrap vinegar or apple cider
00:12:40
vinegar right alongside my kombucha, I noticed things got a
00:12:44
little off with the vinegar. I think the Scobee jumped ship
00:12:49
into the vinegar. So if you start to really get
00:12:53
into this, just be aware that you may need a little bit of
00:12:55
space do multiple ferments at once.
00:12:58
But if you're just doing a few jars of veggies, a shelf in my
00:13:01
kitchen cabinet has worked just fine and then we need to
00:13:05
understand our storage after fermentation.
00:13:08
So properly stored fermented foods can last for several
00:13:12
months without too much fuss, just putting them in a cool
00:13:16
space. When we're storing them, we're
00:13:18
just slowing down the fermentation process to a crawl
00:13:22
with cold temperatures. And while this is an ancient way
00:13:26
to store food and it's been used for generations, and it is a
00:13:30
great way to give us access to nutritious and probiotic rich
00:13:35
vegetables during the time of the year when we really don't
00:13:38
have fresh available to us. Storing those fermented foods
00:13:42
for the long term requires a little bit of care just to
00:13:46
maintain the quality but also the food safety.
00:13:49
So refrigeration #1 is probably the most common way to store
00:13:56
fermented foods now, and it's actually probably the safest.
00:14:00
Once you've gotten your ferment to its desired level of
00:14:04
fermentation, how you like it, you're just going to transfer it
00:14:07
into a different, clean, airtight container and stick it
00:14:11
in the fridge. Those cold temperatures are
00:14:12
going to slow down that fermentation process, and that's
00:14:15
going to extend the shelf life of the food, and most of them
00:14:17
are going to last for several months in the refrigerator.
00:14:21
But if you're fermenting a lot of foods, you can very quickly
00:14:24
run out of space in the fridge. I have a whole shelf on my
00:14:28
refrigerator door that is full of fermented foods.
00:14:31
If you don't want to have to have a second fridge for your
00:14:34
ferments, there are other options.
00:14:36
The first one of those being root cellaring if you have an
00:14:39
access to a root cellar, or you just have a cool, dark and
00:14:44
slightly humid storage area like a basement or even an insulated
00:14:49
garage. If you're in an area where you
00:14:51
won't get freezing temperatures in your garage, you can store
00:14:54
fermented vegetables in ceramic Crocs or large glass jars for
00:14:59
longer storage in. In this instance, the larger
00:15:02
containers for storage might be a little bit better because it
00:15:05
preserves the food longer, but the idea is just to cover the
00:15:09
croc or whatever you're using to store it in with enough brine to
00:15:13
completely cover the food and then keep it in any area that is
00:15:17
under 50 Fahrenheit but above freezing.
00:15:21
You can keep your ferments like this for an extended period of
00:15:24
time, like a year. You can also instead of using a
00:15:28
croc there are water sealed Crocs.
00:15:31
You can use airlocks on glass jars.
00:15:33
Any of these things are an option so long as you can keep
00:15:36
it cool and you can keep it under the grind.
00:15:40
Another method is through canning.
00:15:43
Now if we're heating up the Pickles or our sauerkraut or
00:15:46
whatever it is to can it for storage then we're obviously
00:15:50
killing off many of the beneficial biota.
00:15:52
But if we need longer term storage of low acid foods that
00:15:57
we are pulling out of our garden, that would normally need
00:15:59
to be pressure canned. Fermenting them first is a great
00:16:04
way to get that pH down to where they can simply be water bath
00:16:08
canned for storage. In this instance, you're going
00:16:11
to need to pick up some pH test strips to be sure that you
00:16:14
ferment your foods to below APH of 4.6.
00:16:18
But that then makes them safe to water bath can and you can
00:16:21
follow the USDA guidelines for boiling water canning and I will
00:16:26
link to the National Center for Home Food Preservation website
00:16:29
that has all of those guidelines.
00:16:31
So if you have a ton of cabbage and you've got no good cold
00:16:36
storage to keep it in, if you like sauerkraut, ferment some
00:16:39
big old batches of sauerkraut and get them down to the proper
00:16:43
acidity level and then you can can those babies up and they are
00:16:45
now shelf stable. Now for some fermented foods
00:16:48
like yogurt or Kiefer, the dairy ones can be frozen to prolong
00:16:53
their shelf life. I mean that's again stop the
00:16:55
fermentation process and so it's going to preserve the food
00:16:58
quality. I wouldn't recommend doing this
00:17:00
with any others, but I think the dairy ones seem to do OK with
00:17:04
this. And then other fermented foods
00:17:06
like you know tempeh or some types of salami, you can also
00:17:09
further preserve those by drawing them.
00:17:12
But just remember that the shelf life of the fermented foods is
00:17:16
going to vary depending on the type of the ferment, what
00:17:19
ingredients you're using, and the storage conditions.
00:17:21
So you're going to regularly want to check for any types of
00:17:25
signs of spoilage, mold off, smell, slinliness, any of those
00:17:28
types of things. And again, if you notice any of
00:17:30
those issues, just like during the fermentation process, after
00:17:34
the fermentation process, if you see this, you just want to get
00:17:37
rid of it, toss it in the compost pile, whatever.
00:17:40
So after the break, we're going to talk about the types of salt
00:17:44
used in fermenting, the steps to create your first fermented
00:17:48
vegetables, and what types of equipment you should have on
00:17:51
hand, along with a few that I've found have made the process just
00:17:54
a little bit easier. I'll be right back.
00:18:06
OK, let's talk salt now. I'm not going to discuss
00:18:09
fermenting with starter cultures like way.
00:18:11
I have no experience in that yet, but I will update that if
00:18:14
and when I dig into it. We're talking lacto fermented
00:18:17
veggies here without starter cultures and that means salt.
00:18:21
Salt is the most crucial component of most ferments.
00:18:25
It not only enhances the flavors of what we're fermenting, but it
00:18:29
also enhances the texture because it's hardening the
00:18:32
pectin in the cells of the vegetables.
00:18:35
But most importantly, salt is going to inhibit the growth of
00:18:40
the harmful bacteria while encouraging the lactic acid
00:18:44
bacteria that is responsible for the benefits that we're looking
00:18:47
for here. Lactic acid bacteria are
00:18:56
anaerobic, which means they don't need oxygen.
00:19:00
While they're nasty, competitors like bacteria and fungi do.
00:19:04
So the purpose of the salt is to create a nice brine where all
00:19:08
the good bacteria can do their good work undisturbed by the bad
00:19:12
buggies. It also inhibits yeast growth,
00:19:16
which would breakdown the sugars in our veggies into alcohol
00:19:19
instead of lactic acid, which of course is a whole different kind
00:19:23
of ferment. The other thing to think about
00:19:25
is that the right salt to water ratio is what is essential for
00:19:29
proper fermentation. So a common ratio is 2 to 3% of
00:19:33
salt to the weight of the vegetables that we're
00:19:36
fermenting. The other component to this is
00:19:39
using the right salt and the right water.
00:19:42
So let's discuss salt options. Land salts like rock salts or
00:19:48
Himalayan salts are great. They're usually finely ground,
00:19:51
which works great for creating a brine, and they have a great
00:19:54
mineral content. Sea salts also have great
00:19:58
minerals and other micronutrients that are made
00:20:00
more available to us through the fermentation process.
00:20:03
Sea salt has a higher moisture content, which means they're
00:20:06
generally more coarse. So sometimes this can affect how
00:20:09
much brine you get initially or how much you know elbow grease
00:20:12
it takes to get you to the brine.
00:20:14
But you can always just grind it up and make it easier to work
00:20:16
with. Kosher pickling salt sounds like
00:20:20
exactly what you would want to use for fermenting, since
00:20:22
essentially we are pickling these veggies and the flaked
00:20:26
crystals of kosher salt do have more surface area to be able to
00:20:30
draw out more liquid from what it is that we're fermenting.
00:20:34
This is the salt that I tend to use for most of my ferments.
00:20:37
Just be aware that not all kosher pickling salts are the
00:20:42
same. It is still a refined product,
00:20:45
so it's been processed through dehydration and then it's been
00:20:48
treated with carbon dioxide and such.
00:20:50
But there are some brands that then add anticaking agents to
00:20:55
their salt. So be sure that you look at the
00:20:57
label to be sure that the only ingredient listed is salt.
00:21:03
So if you can use an unrefined land or sea salt, great.
00:21:07
If not, go for the kosher salt and just be sure that it doesn't
00:21:10
have any kaking agents in it. And then there is iodized salt,
00:21:14
our common table salt. It is a very refined salt that
00:21:19
is likely had all of the minerals leached out of it so we
00:21:22
don't get those benefits. And then you have the addition
00:21:25
of iodine. It is possible that the addition
00:21:29
of this iodine could not only inhibit the fermentation
00:21:33
process, but it can also cause an off color to our final
00:21:37
product. So For these reasons I stay away
00:21:40
from refined iodized table salts and I stick to the first three
00:21:44
that I mentioned. Now, not all ferments are going
00:21:47
to require water to create a brine, so sauerkraut for example
00:21:51
uses only the salt and it creates its own brine.
00:21:55
But if you're doing things like cucumber, Pickles or fermented
00:21:58
carrots, which is one of my favorite snacks by the way, then
00:22:01
you will need to make a brine. It's important to use the best
00:22:05
water that you can, preferably spring water.
00:22:09
Our tap water is chlorinated and that can prevent the growth of
00:22:13
the good bacteria we're going for.
00:22:14
So if you don't have access to a good unchlorinated spring water,
00:22:19
then you'll need to boil your tap water 1st and then let it
00:22:23
fully cool before using it for your brine.
00:22:26
Now essentially for the basic basic fermentation, all you need
00:22:31
is a container, the proper salt and maybe water, primary and
00:22:36
secondary followers, a weight and a cover.
00:22:40
Now of course you'll need things to cut or shred or whatever, but
00:22:43
I'm assuming you have all that stuff in your kitchen already.
00:22:45
Just be sure as your ferments begin their process that you're
00:22:48
using non reactive utensils and containers.
00:22:52
So no aluminum, no copper, no cast iron or low grade stainless
00:22:56
steel. We don't want metals leaching
00:22:59
into our ferments when they start to acidify, so stick to
00:23:02
things like glass, wood, silicone, and high grade
00:23:05
stainless steel. So let's start with containers.
00:23:09
For fermentation containers you can use stoneware, Crocs or you
00:23:13
can use glassware. I use wide mouthed Mason jars.
00:23:18
I'm a canner so it's something I have a lot of.
00:23:21
For larger batches of ferments. I do plan on getting some
00:23:24
stoneware Crocs, but those can be pretty pricey these days.
00:23:27
So glassware is where it's at for me right now and I have half
00:23:31
gallon sized Mason jars that I use for larger batches of
00:23:35
ferments. Now we already talked about the
00:23:38
salt and the water, so let's talk about those last four, the
00:23:41
two types of followers, the weight and the cover.
00:23:44
So the primary follower right? This is just something that you
00:23:48
are going to use as a barrier between the air and your brine.
00:23:54
It can be a piece of plastic wrap, cheesecloth, a piece of
00:23:57
silicone, even a cabbage leaf or a great leaf, a grape leaf.
00:24:01
So when I make sauerkraut, I have a leaf that I leave
00:24:06
unshredded and I place it on top of the shredded ones inside my
00:24:12
glass jar and it acts like a blanket between the shredded
00:24:16
cabbage and the air. So whatever thing that you are
00:24:18
using, this is the primary follower.
00:24:21
It is just a blanket between whatever you're fermenting and
00:24:25
the air above. And then you have a secondary
00:24:28
follower, which is exactly what it sounds like.
00:24:30
It is a second thing that you are going to Nestle over top of
00:24:34
the primary follower and the contents that are believed it
00:24:37
just to sort of keep it pressed down.
00:24:39
We don't want anything floating up above the brine because it
00:24:42
can spoil. You can use a plate that fits
00:24:45
inside your container. You can use a piece of hardwood
00:24:48
that's been cut to size anything that's going to trap that
00:24:51
primary follower and the other contents under the brine, and
00:24:54
then you need a weight. This is going to keep your
00:24:58
secondary follower in place when the fermentation process starts
00:25:03
to cause the carbon dioxide to bubble up.
00:25:06
So if your followers are just sort of floating there on the
00:25:09
surface and the fermentation action really gets going, it can
00:25:12
bounce the followers up enough for some of your vegetables that
00:25:16
you're trying to ferment to float up and out.
00:25:19
So this exposes it to the air and that can cause spoilage.
00:25:22
Plus the more weight you have the better able you are to keep
00:25:25
the brine contained in the veggies and not flowing up and
00:25:29
over the edge of your jar or your crock.
00:25:31
During this sort of bubbling process any heavy sanitized non
00:25:36
reactive item can do the trick. It can be even be like a large
00:25:40
river stone or river rock or something.
00:25:42
I have a glass weight that came with a kit that my lovely
00:25:46
sister-in-law got me for Christmas last year and it works
00:25:49
beautifully well. So I'll use a cabbage leaf as my
00:25:52
primary and then maybe a small plate to cover that completely
00:25:56
while pressing down with the glass weight on top.
00:26:00
Now, another method that I use with smaller containers is to
00:26:03
just use a zip lock bag as a combination secondary follower
00:26:09
and weight so you can put your primary follower in the jar.
00:26:12
In this case, we'll save my cabbage leaf, right?
00:26:16
And then you put a Ziploc bag in place over top of that,
00:26:20
completely covering the cabbage leaf, and then you fill that bag
00:26:24
with brine until it completely fills the void and it weighs
00:26:28
everything down at the same time.
00:26:30
It works phenomenally well in smaller Mason jars when I'm not
00:26:33
making a big batch of something. None of this is super technical,
00:26:38
we just want to make sure that anything that we have that's
00:26:41
supposed to be in the brine stays in the brine.
00:26:46
However you manage to do that in a non reactive way is completely
00:26:49
up to you. And then finally we need
00:26:52
something to cover our jar or our croc that allows the CO2 and
00:26:58
the lactic acid gases to escape while keeping oxygen and any
00:27:03
other contaminants out. So initially I just put my Mason
00:27:08
jar lids on and then I would turn it back one turn so there
00:27:11
was enough of a gap to allow gases to escape out of that lid.
00:27:15
It was perfectly fine, but the kit my sister-in-law sent me
00:27:18
also included some lovely airlock lids that screw right
00:27:22
onto the Mason jars. So I just put them in place and
00:27:24
it allows the gases to escape without letting anything else
00:27:27
in. It's easy peasy.
00:27:28
You can also use the ones that are intended for making wine
00:27:32
that have water in them, which also do the trick, but you would
00:27:36
need to modify your canning lids to accommodate those, or you can
00:27:39
buy ones that are already retrofitted.
00:27:41
So if you're going to go the budget route when getting
00:27:44
started, like me, just put a lid on your ferment and then loosen
00:27:47
it up just enough to let the gases escape out and call it
00:27:50
good. Now, of course, there are all
00:27:53
kinds of extra things that you can get that may not be
00:27:56
necessary, but are those sort of nice to haves?
00:27:59
Like the airlocks I referred to, There's wooden tampers, there
00:28:02
are fancy slicing and shredding tools, stone Crocs, pH test
00:28:06
strips, all those things. But we're talking about getting
00:28:09
started with the basics, and so we'll just stick with those and
00:28:13
get into the actual process itself, which is surprisingly
00:28:16
simple, that have plenty of liquid already in them, like
00:28:27
cabbage or when making relishes, chutneys and salsas, you will
00:28:31
use nothing but salt, and the vegetable itself is going to
00:28:35
create the brine. So you will rinse the vegetables
00:28:38
in cool water and you will prepare them according to
00:28:41
whatever recipe you have. Usually this involves slicing or
00:28:45
shredding, and then you're going to transfer them to a large
00:28:47
bowl, add half of the salt that the recipe calls for, and then
00:28:52
with your hands you are going to massage it in.
00:28:54
You're going to do this like you're kneading bread dough and
00:28:57
then taste it. You should be able to taste the
00:29:01
salt, but it should not be overwhelming.
00:29:04
If it's not salty enough then you can continue to add a little
00:29:06
bit of salt at a time, massaging it in as you go until it tastes
00:29:11
to your liking. So it should taste really nice
00:29:13
while it's fresh because that taste is only going to be
00:29:16
enhanced once you actually start the fermentation process.
00:29:19
Now the vegetables that you are needing are very quickly going
00:29:23
to look sort of wet and limp. This is a good thing.
00:29:26
Depending on the amount of moisture that is in the
00:29:29
vegetable and how hard you are doing this, some amount of
00:29:32
liquid is going to start to pool in the bottom of your bowl.
00:29:35
This is good. If you've put in a really good
00:29:38
effort and you don't see a whole lot of brine in there, then you
00:29:41
can just let the vegetables stand covered on the counter for
00:29:44
about 45 minutes and then repeat the process.
00:29:47
Once you've done this, then you're going to put your
00:29:49
vegetables into your crock or your jar.
00:29:51
Whatever you're going to use to ferment in, Press down the
00:29:54
vegetables with your fist or this is where one of those
00:29:58
wooden tampers comes in handy. And that's going to release even
00:30:01
more brine. Don't be gentle with this,
00:30:04
really shove those vegetables down into the bottom of your
00:30:07
crock or your jar. There's going to be some brine
00:30:10
visible on top of the vegetables when you press them down.
00:30:14
Don't worry if this brine sort of disappears when you release
00:30:18
the pressure. If you can at least see it
00:30:20
coming up over top while you're pressing down, then that's
00:30:23
enough. If you don't, then put them back
00:30:26
in the bowl again and massage again until you get enough of
00:30:29
that brine released and then you're going to pack the
00:30:32
vegetables down into your croc or your jar.
00:30:36
You want to leave enough headspace for you to be able to
00:30:40
put in your followers and your weights.
00:30:43
So if you're going to like a large croc, it's probably about
00:30:45
four inches. If you're using a Mason jar,
00:30:47
it's about 3 inches or so. And then go ahead and use your
00:30:51
primary follower again. In this instance, I usually use
00:30:53
a cabbage leaf or use a bit of plastic wrap and then put your
00:30:58
secondary follower and your weight on top of that.
00:31:01
That's it. That's all you need to do.
00:31:03
At this point, you were going to set aside your jar or your croc.
00:31:07
Typically you want to put it on top of something.
00:31:09
I usually put it on top of a small plate and then put it
00:31:12
somewhere out of direct sunlight in a coolish area.
00:31:16
Again, somewhere between 55 and 75 will work.
00:31:19
The cooler side is probably a little bit better, and then
00:31:22
you're going to start the fermentation process.
00:31:25
Whatever recipe you're following is going to tell you
00:31:28
approximately how long it takes for this to be completed.
00:31:32
You want to check daily to make sure that your vegetables are
00:31:36
still submerged under the brine. Press down on them as you needed
00:31:39
to get the the brine back up to the surface again.
00:31:42
Now you might see some scum on the top.
00:31:44
It's generally harmless. Again, Google those images to
00:31:47
see what it is that you might be looking for.
00:31:49
If you see mold, you want to get the mold off of the top.
00:31:53
That's not going to ruin your whole batch, but you want to get
00:31:55
it out of there so it doesn't continue to multiply.
00:31:58
And this is where you want to make sure that you are using non
00:32:00
reactive utensils. OK, because we're going to start
00:32:03
tasting these things. This is how you know your
00:32:05
ferment is done. It's entirely up to taste.
00:32:08
You're going to look for the telltale signs that the
00:32:10
fermentation process has begun, which is indicated by like the
00:32:13
bubbling of the gases in the brine.
00:32:15
And then after a few days just start taste testing with things
00:32:19
like sauerkraut. The color is going to change.
00:32:22
It should smell a little sour, and the texture to me should
00:32:26
still be firm, not really soft, certainly not slimy.
00:32:30
And then the flavor should just be to your liking.
00:32:33
You know when it tastes, how you like it, which may require a
00:32:36
little experimenting over a few batches.
00:32:38
Then you just transfer the veggies to their final home to
00:32:40
stop the fermentation process and just enjoy.
00:32:43
Now for things that need a little bit of help in the brine
00:32:47
area, like cucumber, Pickles and other garden vegetables, you're
00:32:50
going to need to add water. The rule here is still the same,
00:32:54
you want to keep the veggies submerged at all times.
00:32:58
The difference here is that you'll create the brine instead
00:33:01
of forcing the brine from the veggies.
00:33:03
And there are general sort of guidelines when it comes to the
00:33:08
brine ratio. So unless you have a very
00:33:11
specific recipe that you are following, that indicates
00:33:13
something different. A basic brine is about 1/2 a cup
00:33:17
of salt per gallon of water. For cucumbers, you can increase
00:33:22
that to 3/4 of a cup of salt to a gallon of water.
00:33:25
And then for kimchi, which we're not going to go into because I
00:33:29
have not done kimchi yet, but I do know that you actually
00:33:33
increase that salt to a full cup of salt to a gallon of water.
00:33:37
And then essentially the process is going to be the same.
00:33:39
You prepare the saltwater brine ahead of time.
00:33:42
And then of course you rinse the veggies in cold water and you
00:33:45
prepare them however your recipe calls for.
00:33:48
In most instances it's diced or it's sliced or whatever, You're
00:33:51
going to toss the vegetables together in any spices.
00:33:54
If there is a recipe that involves spices in a large bowl,
00:33:57
mix them together and then you're going to pack the veggies
00:34:00
into your crock or your jar first, leaving plenty of
00:34:04
headspace so that there's room, and then pour in enough brine to
00:34:10
cover your vegetables completely.
00:34:12
So if you're in a jar, this might come up really close to
00:34:15
the rim. Make sure that you leave
00:34:17
yourself some space. You don't have a bunch of stuff
00:34:19
spilling over the outside. It's going to take some practice
00:34:22
and then hang on to any of the leftover brine and put it in the
00:34:26
fridge. I'll tell you why here in a
00:34:27
second. Once you've got your vegetables
00:34:30
covered with your brine, then you're going to place you know
00:34:33
your grape leaf, your cabbage leaf, or you know any other
00:34:36
primary follower that you're going to use on top.
00:34:40
Add your secondary follower and your your weight to hold
00:34:44
everything in place, especially if you're using a croc.
00:34:47
So if you're using a jar, a Mason jar, that's got those sort
00:34:50
of shoulders on them, a lot of the time, you're not going to
00:34:53
have to use as much in the way of followers or weights because
00:34:56
the vegetables are going to be wedged up underneath there.
00:34:58
Again, just make sure that everything is staying below the
00:35:01
brine and then go ahead and put your covering on there.
00:35:04
Set it aside on a baking sheet or on a towel or on a plate
00:35:08
somewhere out of the way. And the towel or the plate of
00:35:10
the baking sheet is there just in case that bubbling really
00:35:13
starts to kind of go crazy and you do end up with some spillage
00:35:16
of the brine over top. And then just go ahead and
00:35:19
ferment for the time that's indicated in your recipe.
00:35:22
Again, you're going to have to monitor the brine level.
00:35:25
And this is where that saving of the brine in the refrigerator
00:35:29
comes in handy, because if you need to top it off, you have the
00:35:34
brine already created. You just want to make sure that
00:35:37
those veggies are always submerged.
00:35:39
And again, if you see scum or anything on top, you can go
00:35:42
ahead and scoop it out. You don't want to have any of
00:35:44
the veggies peeking up out of the brine because they are very
00:35:47
quickly going to get soft and spoiled.
00:35:48
So if you see anything even a teeny tiny bit out of the brine,
00:35:52
make sure that you use a non reactive utensil to either poke
00:35:55
it back under or if it started to get soft or anything then
00:35:58
just pull it out and make sure the rest of them stay
00:35:59
underneath. And again, as these vegetables
00:36:02
ferment they are going to start to lose their really bright
00:36:05
color. The brine is going to start to
00:36:07
get cloudy, and this is when you just start taste testing.
00:36:11
They are ready whenever it is pleasantly tasting to you.
00:36:14
You know, if they're pickly, they they won't have that same
00:36:17
strong acidity as a vinegar pickle, you know.
00:36:22
But but the the taste should be what you are looking for in a
00:36:26
pickle. And again, this very well may
00:36:28
require some, you know, experimentation by you over the
00:36:32
course of several attempts just to find what it is that you like
00:36:36
as far as the flavor and texture of your fermented vegetables.
00:36:40
In reality, fermenting is a simple process.
00:36:43
The main things to worry yourself with is the cleanliness
00:36:47
and keeping the veggies submerged under the brine to
00:36:50
stave off any of the yucky stuff.
00:36:52
I've done sauerkraut. I've done carrots and radishes.
00:36:56
I did a shredded carrot and radish seed pod salad.
00:37:00
But by far my favorite has been fermented garlic.
00:37:04
I did one big batch and they stored half of it in honey,
00:37:08
which has made it delightfully complex.
00:37:12
And then the other half of the batch I transferred into some
00:37:15
leftover brine from my German pickle recipe and stored them in
00:37:19
the refrigerator. And they are a fabulous addition
00:37:21
to anything that calls for Pickles or garlic.
00:37:24
Have fun with it, get the basics down, and then start
00:37:28
experimenting with flavors. There is a world of
00:37:32
possibilities out there with what you can do with fermented
00:37:34
foods. When I started canning, I used
00:37:38
the Ball Blue Book of Preserving, which became my
00:37:41
canning Bible and I still reference it to this day.
00:37:44
When I started fermenting, I used the book Fermented
00:37:48
Vegetables by Kirsten and Christopher Shockey.
00:37:51
It has stepbystep instructions and a ton of recipes for
00:37:55
fermenting just about anything and everything and I swear by
00:37:59
it. I will leave a link to that
00:38:01
book, plus the kit that my sisterinlaw got me, and all the
00:38:04
references and all the resources in today's show notes, so you
00:38:07
can start your fermenting journey too.
00:38:10
Until next time, my gardening friends, Keep on cultivating
00:38:13
that dream garden and we'll talk again soon.
00:38:16
You just finished another episode of The Just.
00:38:18
Grow Something Podcast For more information about today's topic,
00:38:21
go to Just Grow Something. Podcast.com where you can find
00:38:24
all the episodes, show notes, articles, courses, newsletter,
00:38:27
sign up and more. Or spring registration if you're
00:38:32
a gardening friend from down on the I'm so sorry, we're not
00:38:36
going to do that. That was awful.
00:38:37
That goes into the outtakes. Now not all ferments are going
00:38:44
to recorder. Water recorder.
00:38:48
That's recorder is not a word I'd also love for you to head
00:38:52
to. Facebook and join our gardening
00:38:54
community in the Just Grow Something Gardening Friends
00:38:57
Facebook group. Until next time, my gardening
00:38:59
friends keep learning and keep growing.